
What Makes a Seaborne Raid Scene
Navigation Mesh
- Works similarly to village scenes.
- In scenes created using two separate levels, for the
land_raidLevel (check “What Makes a Village Scene” documentation), all NavMesh on land must have ID 0 in thenaval_raidLevel. - Agents can walk in water up to a height of 1.40 meters. Therefore, NavMesh with ID 0 should be baked up to a depth of 1.40m; if the water is deeper, Agents will swim.
Spawn Points
- All Spawn Points must be positioned inside the Soft Borders.
- All Spawn Points must be placed on top of the NavMesh.
- Battle Spawn Points:
- All defender Spawn Points must be located within the Defender Boundaries.
- Prefab:
naval_battle_set - Place the defender parts of the set on land and the attacker parts in the sea/river.
- Attacker Spawn Points should not be too close to the shore.
- Ensure all defender Spawn Points have empty space around them for troops to spawn properly.
- Move defender reinforcement Spawn Points out of sight as much as possible without being too far from the front lines.
- Since a raid can be performed with 3 ships, you can position attacker infantry, archer, and cavalry Spawn Points facing the direction they will travel in the water.
- The distance between attacker Spawn Points should be adjusted according to ship dimensions.
- If a river scene is being prepared, it must be wide enough for large ships to move freely.
- All defender Spawn Points must be located within the Defender Boundaries.
Tactical Positions
- Prefab:
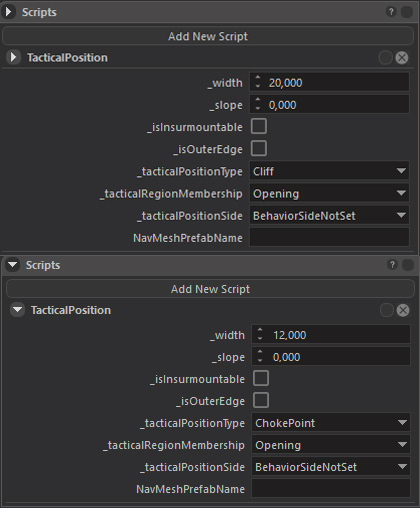
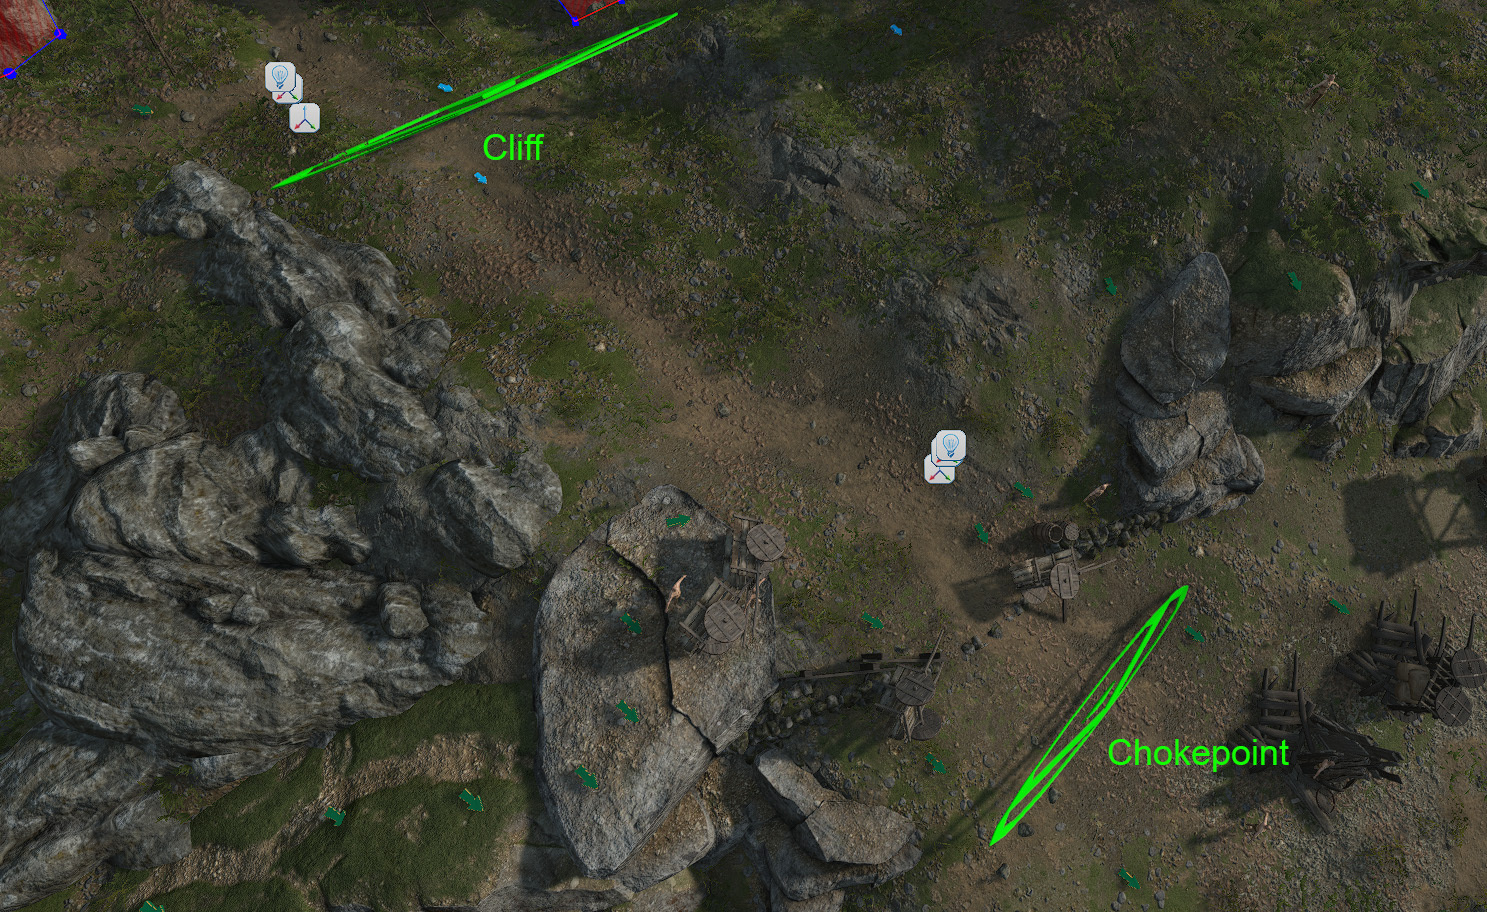
tactical_position - Use the
chokepointTactical Position type within the Script, adjusting its size for where you want infantry to position and defend. - Use the
cliffTactical Position for the general placement of archers. This position determines the general location of archers, from which they distribute tostrategic_archer_pointentities and return to when retreating. - The
cliffTactical Position Prefab should be used as a child of thechokepointTactical Position Prefab. - AI will position themselves according to the rotation of the Prefab and the width defined in the Script.
Tactical & Strategic Archer Positions
- Prefab:
strategic_archer_position - Defines the location where a single archer will go. Many can be added to the scene; all defender archers in battle will distribute among these positions.
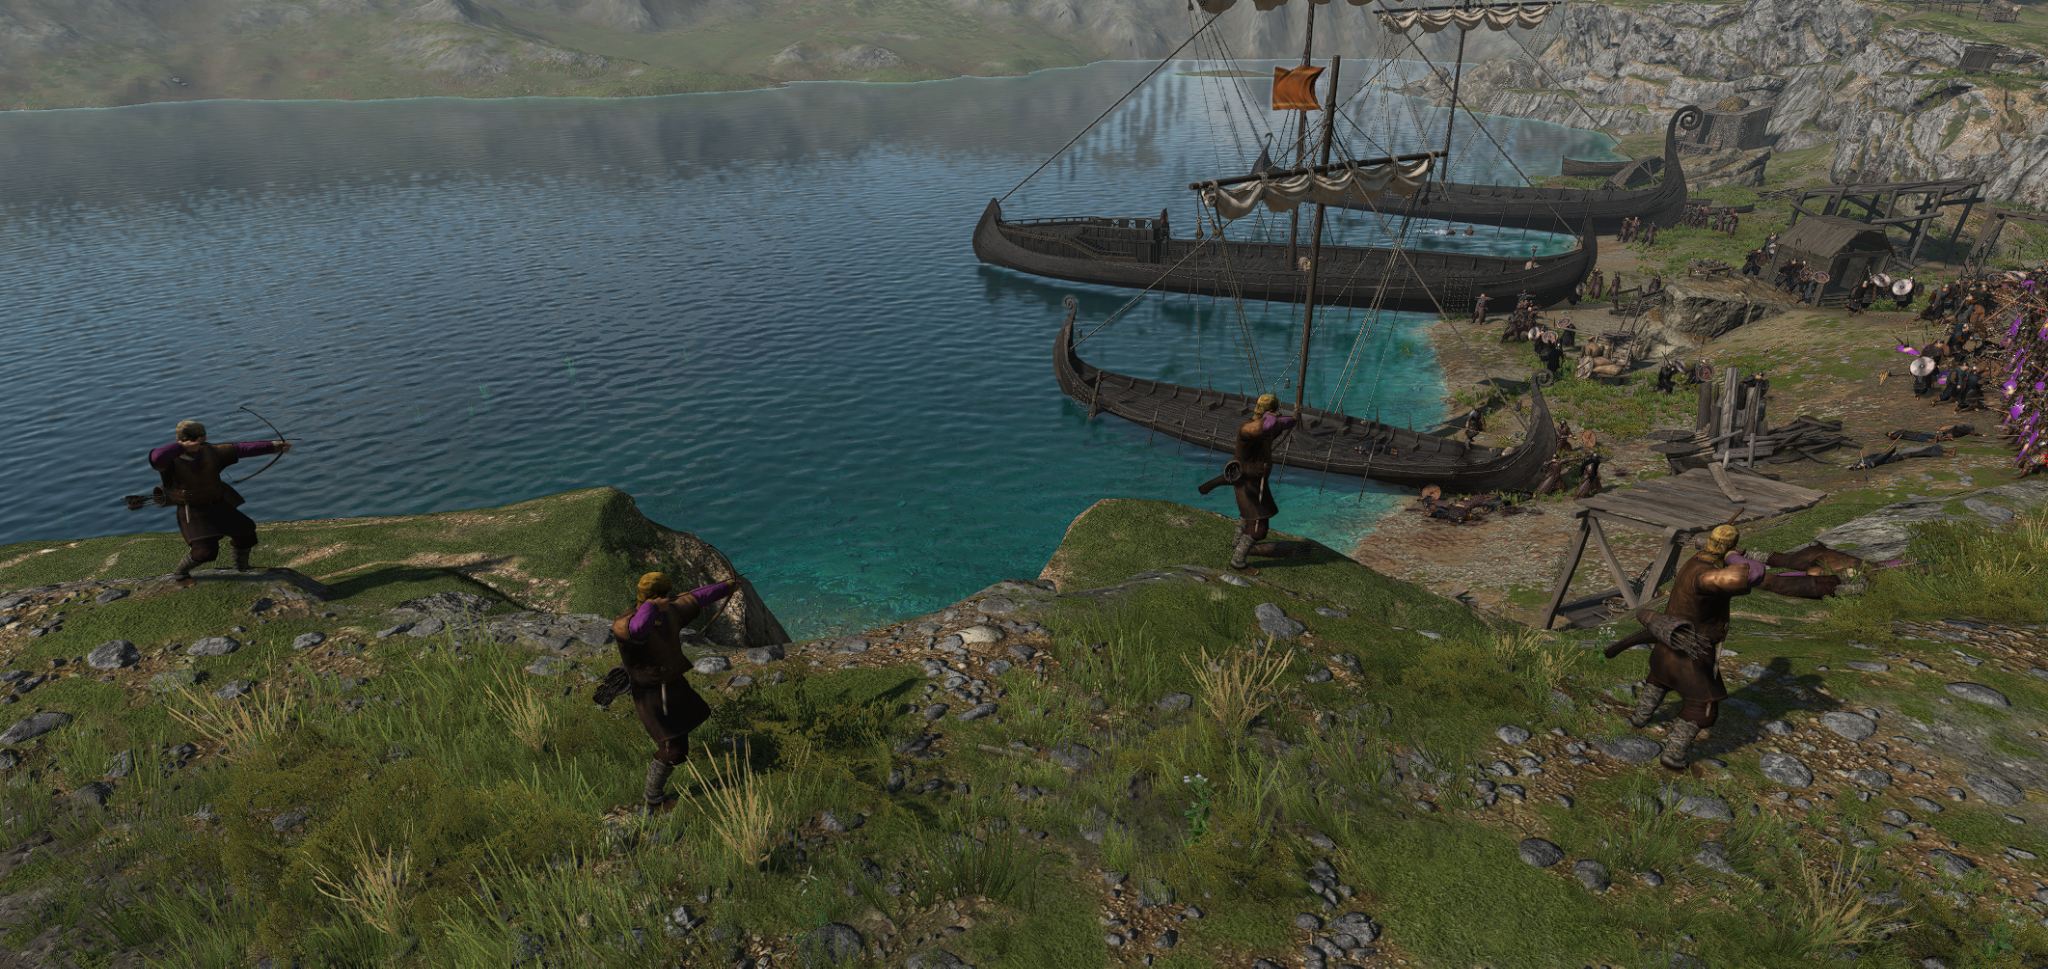
- To reposition archers who are placed far from the main battlefield to harass incoming ships early on, you have two tactical options to bring them back into the main fight:
- Option A (
unsafe_archer_point): If you give these entities theunsafe_archer_pointTag, once the ships complete their landing, these archers will automatically fall back toward the main battlefield (cliffTactical Position) to rejoin the active defense. - Option B (
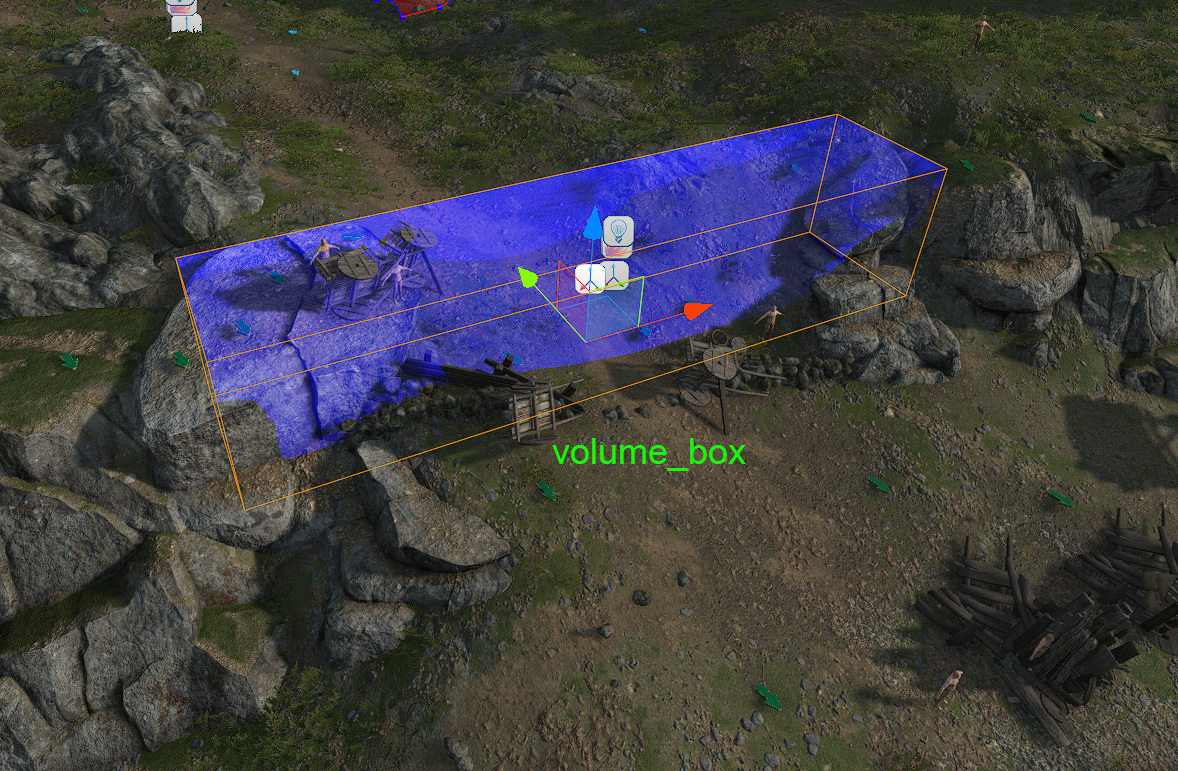
volume_box_archer_point): If you want more precise control, you can use thevolume_box_archer_pointTag (applied to both the archer positions and a correspondingvolume_box). This ensures that the archers will hold their positions and only fall back to thecliffTactical Position when the enemy actually penetrates your designated Volume Box area.
Volume Box Trigger Point:
- Prefab:
volume_box - Tag:
volume_box_archer_point - This setup acts as a spatial trigger for archer maneuvers. Unlike the
unsafe_archer_pointwhich triggers upon landing, this allows for precise control based on attacker progression. - Setup Rule: The
volume_box_archer_pointTag must be assigned to both thevolume_boxentity itself and allstrategic_archer_pointentities that you want to be triggered by this specific box. - Behavior: When any attacker enters the tagged
volume_box, all archers stationed at the matching taggedstrategic_archer_pointentities will immediately begin their retreat toward thecliffTactical Position.
Player View Point (for Defender)
- Use the
arrow_new_iconPrefab and assign theplayer_spawn_frameTag to it. - The player will Spawn facing the direction of the arrow.
- Note: The rotation and direction of the arrow are critical, as they directly determine the player’s initial field of view upon spawning.
Landing Points
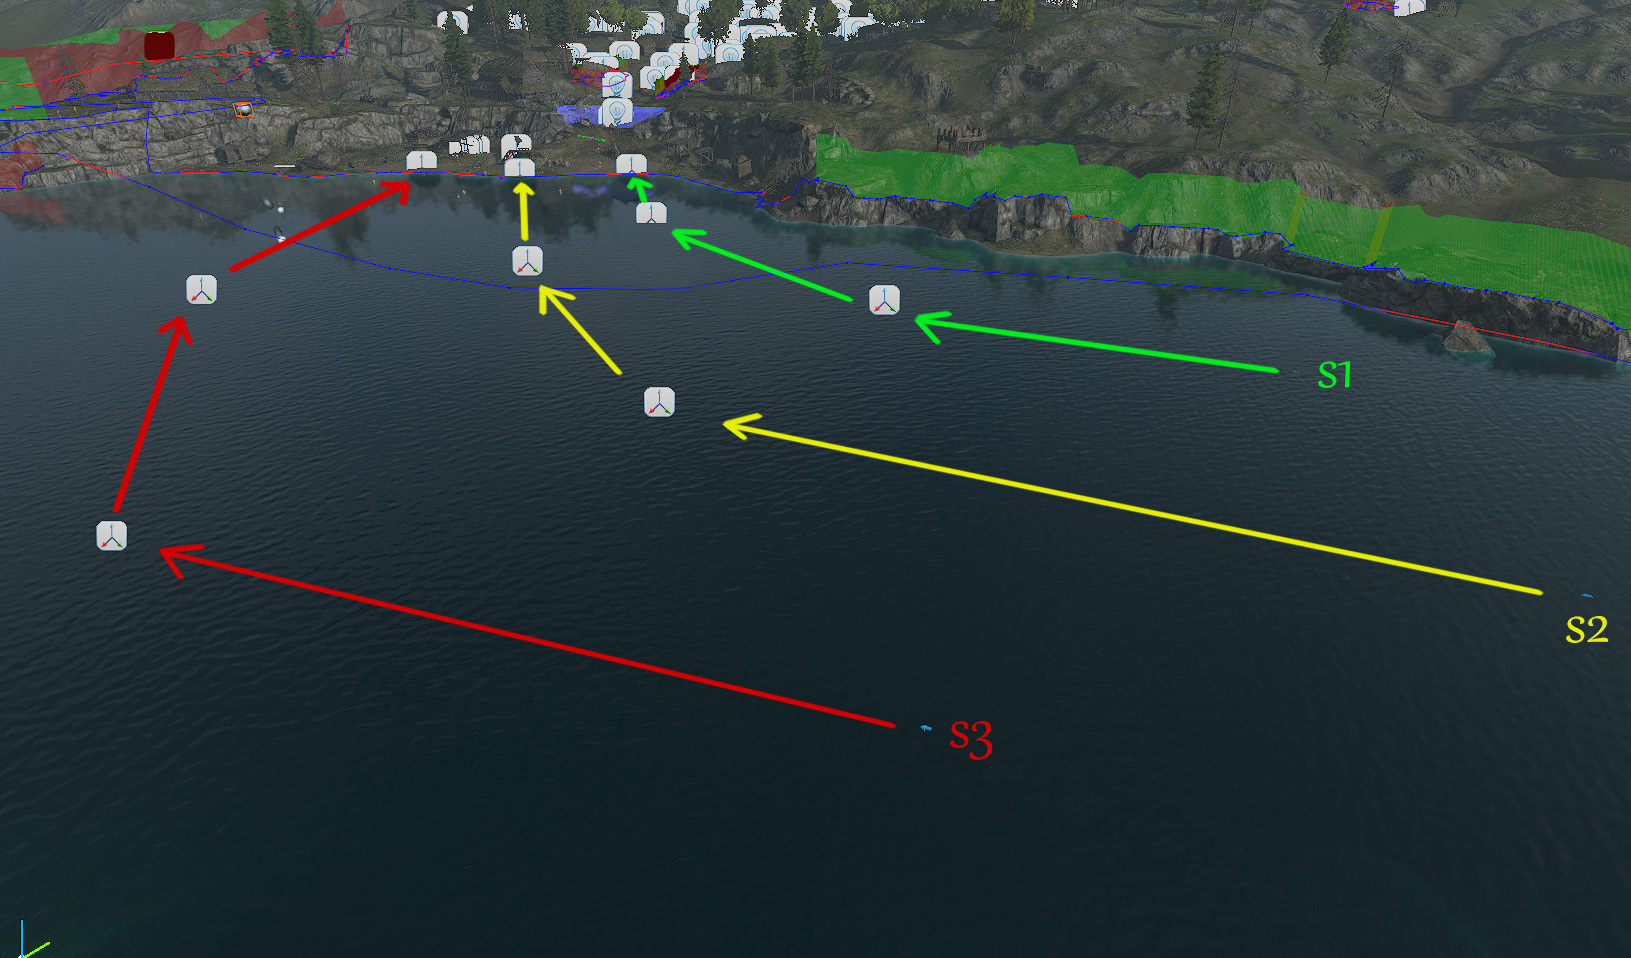
- 3 empty entities must be placed on the shore using the correct Tags for 3 ships to land:
- Attacker infantry ship landing Tag:
landing_001_0 - Attacker archer ship landing Tag:
landing_002_0 - Attacker cavalry ship landing Tag:
landing_003_0
- Attacker infantry ship landing Tag:
- Ensure there is enough distance between the landing points of the ships on the shore.
- For the route you want ships to follow in the water, you can give similar Tags to empty entities placed in the water.
- Example: For the infantry ship, from near to far:
landing_001_1,landing_001_2,landing_001_3. In this case, the attacker infantry Spawn Point inside thenaval_battle_setwill targetlanding_001_3first, then the others in sequence to reachlanding_001_0.
- Example: For the infantry ship, from near to far:
- The rotation of all entities must face the next target landing entity.
- The rotation of the final destination
landing_00x_0must be positioned to ensure the ship docks correctly at the shore.
Jumping Points
- Used to indicate which direction Agents jumping from the ship to the shore should move.
- Use empty entities with Tags
jumping_001,jumping_002,jumping_003for each ship, and they must be a child of their associated final landing point.
- Example: The entity with the
jumping_001Tag must always be a child of thelanding_001_0entity.
- Example: The entity with the
- The rotation should be adjusted to ensure Agents use the most logical Mechanics to leave the ship.
Flee Positions
- Positions to which fleeing troops and horses will run.
- Ensure they are inside the Soft Border and have NavMesh below them.
Soft Border
- Prefab:
border_soft - These entities define the red boundaries of the scene.
- When placed, they form a polygon by connecting the two closest border entities.
- To visualize the current boundaries, navigate to
Visibility Window->Visibility Masksand enableBorders. - Design Note: Ensure the layout of these borders prevents players from abusing the map limits or finding unintended escape routes.
Sounds & Atmosphere
- Works similarly to village scenes.
- Ensure environmental sounds reflect the naval nature of the raid.
- Atmosphere must look consistent across all seasons and times of day.
Gameplay Design Hints
- Having ships under fire before docking increases the epic battle feel. You can place archers further out to shoot at ships early on. To ensure these archers rejoin the frontline defense rather than getting left behind, you can use the
unsafe_archer_pointTag to trigger their fallback to thecliffTactical Position upon ship landing, or utilize thevolume_box_archer_pointsetup to trigger their relocation exactly when the enemy reaches a specific zone in your scene. - Using physical Chokepoints in the scene will increase the difficulty for the attacker.
- Make sure the scene works well at night.
- To maintain the “village raid” atmosphere, ensure the battle does not start or end too far from the village area.