
Horse Reins Simulation Creation
Introduction
This tutorial explains how to add simulation to the reins of a horse armor set.
We previously used only one mesh for horse armor, however the reins would hang in the air and not move according to gravity. We then decided to add simulation to the reins which meant applying some changes to the system. Instead of a single mesh, horse armors now contain 3 meshes. We will divide them into 2 groups.
Group 1:
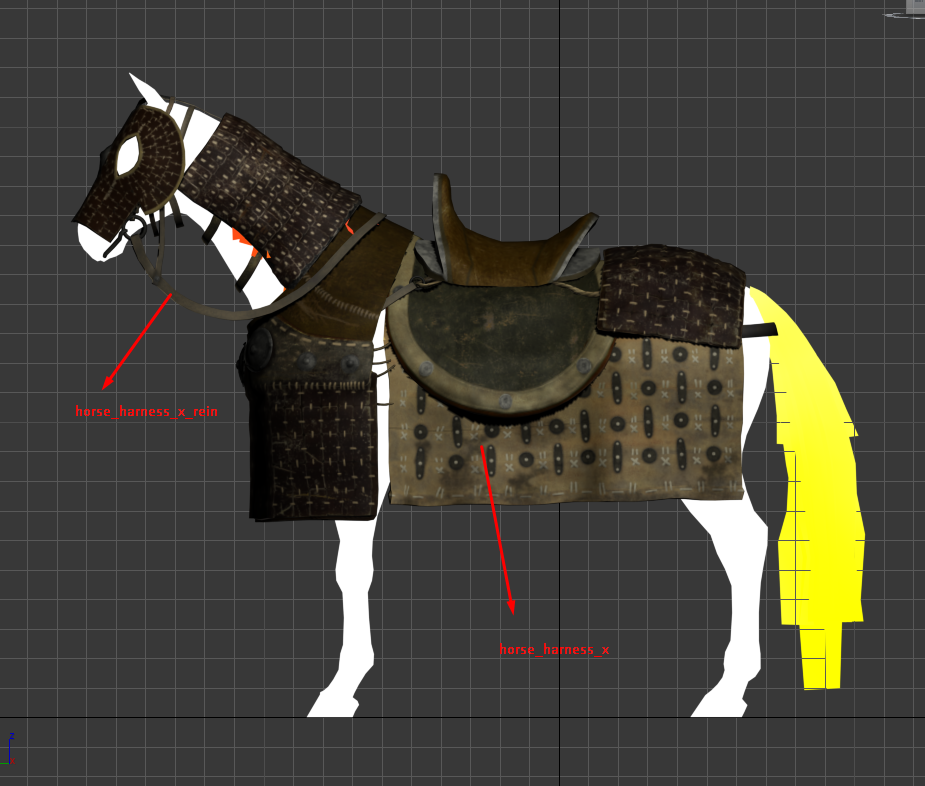
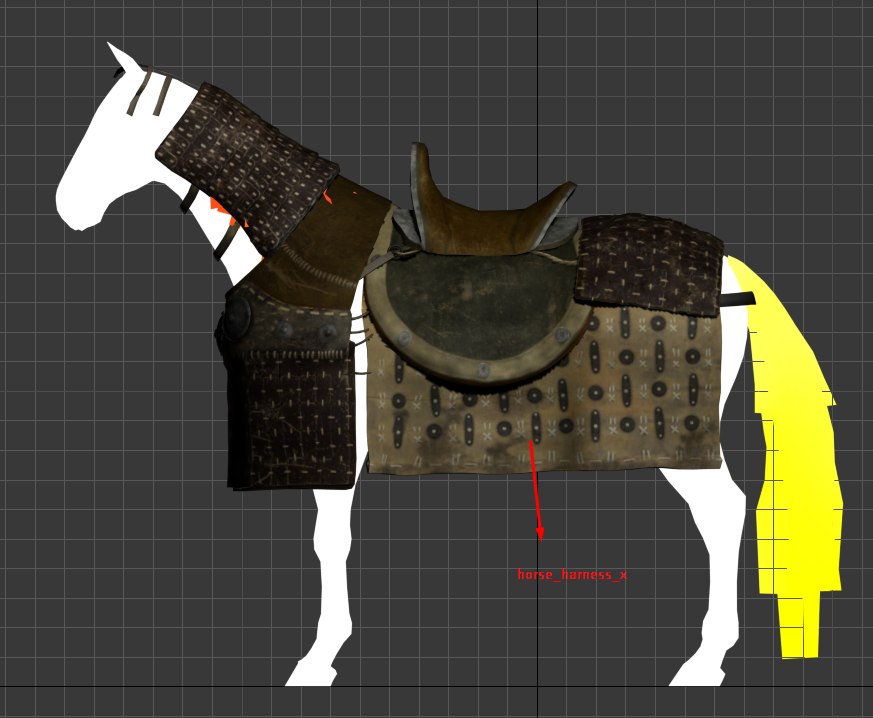
- The horse armor/harness: The armor set that is related to the body of the horse as demonstrated in Image 2b (which has its own simulation but we’ll ignore that for now) Example: horse_harness_x
- The original rein piece: The part that is separated from the initial single mesh that we have mentioned above and it is seen in Image 2c. We kept this unsimulated piece for occasions where the simulated piece is not needed; that is when the camera is distant from the horse and the armor set begins to switch to LOD 1 and to the rest of the LODs. Example: horse_harness_x_rein
Group 2:
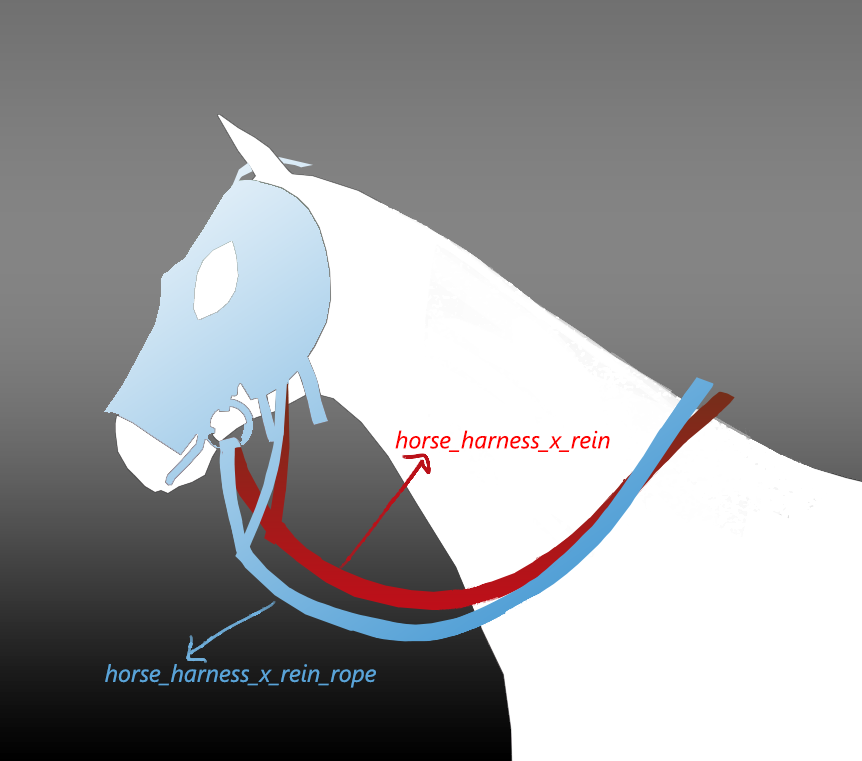
- The simulated rein piece: When the camera is close to the horse, the rider holds the reins and the reins move according to physics. Example: horse_harness_x_rein_rope
This tutorial mainly explains how to create the third mesh which is “the simulated rein piece”. But before diving into the steps, we would like to clarify a few things.
 |
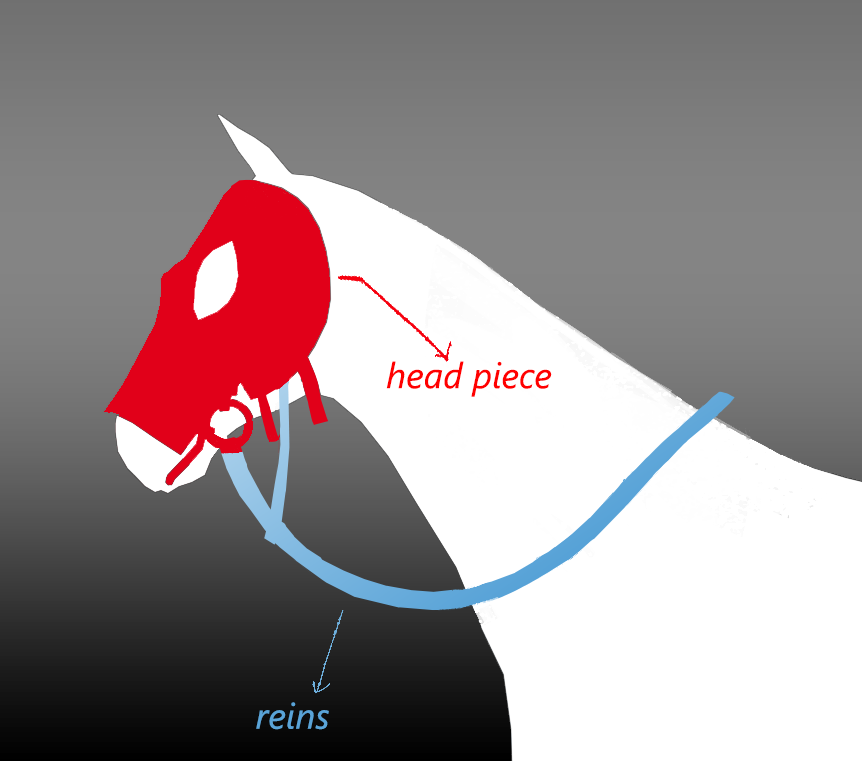 |
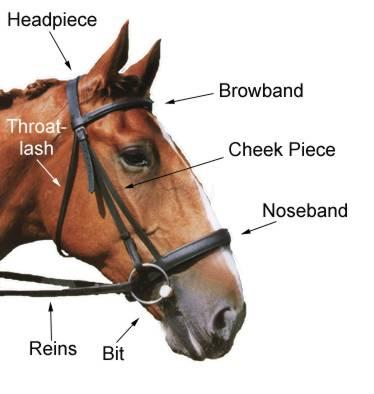
| Image 1a; Normally each component has a different name but we will refer to the parts of our mesh either as headpiece or rein as shown in Image 1b. | Image 1b; For simplicity and due to functionality we will only use “head piece” and “reins”. |
We named the horse harness as “horse_harness_x” to serve as an example below (marked light grey) while explaining the grouping (those names are only chosen as examples, please mind that there are meshes with names “horse_harness_x, horse_harness_x_rein, horse_harness_x_rein_rope” in the game already).
 |
 |
 |
| Image 2a; This is the initial stage where you model the horse harness/armor and rein according to horse anatomy. The rein should be modelled so that it is positioned within the rider’s reach (we have modelled the armor sets in 3ds Max). | Image 2b; horse_harness_x. | Image 2c; horse_harness_x_rein (headpiece is part of this mesh which will later be duplicated to become horse_harness_x_rein_rope). |
In the following chapter, we will talk about how to create the third component; “the simulated rein piece” of the armor set.
Rein Simulated Piece: Horse_harness_x_rein_rope
The simulated piece needs another skeleton for skinning which is part of our Modding Kit, accessible under Mount & Blade II Bannerlord\modding_resources (see image 3).
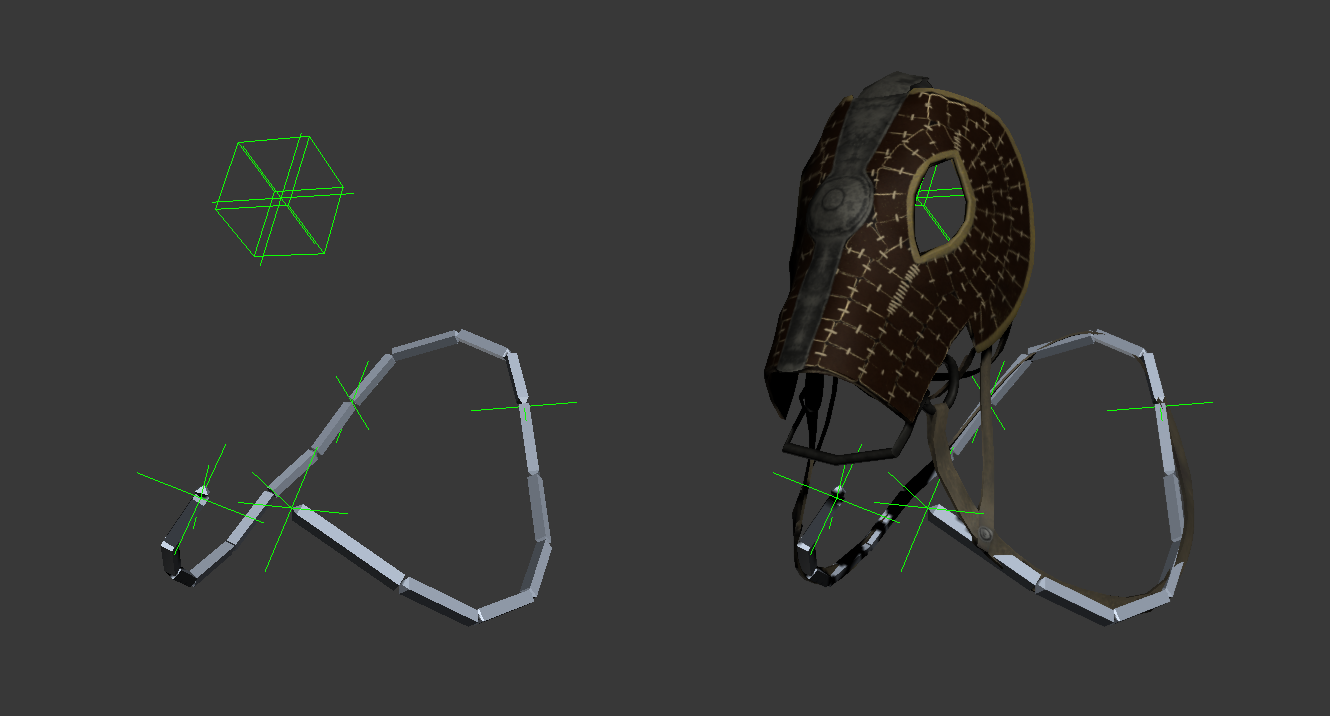
Image 3; horse_harness_rein_skeleton which contains 22 bones is on the left. On the right we have a demonstration of how the horse_harness_x_rein_rope is supposed to fit on the skeleton.
Steps to create the simulation mesh:
- Duplicate the mesh “horse_harness_x_rein”.
- Rename it to “horse_harness_x_rein_rope”.
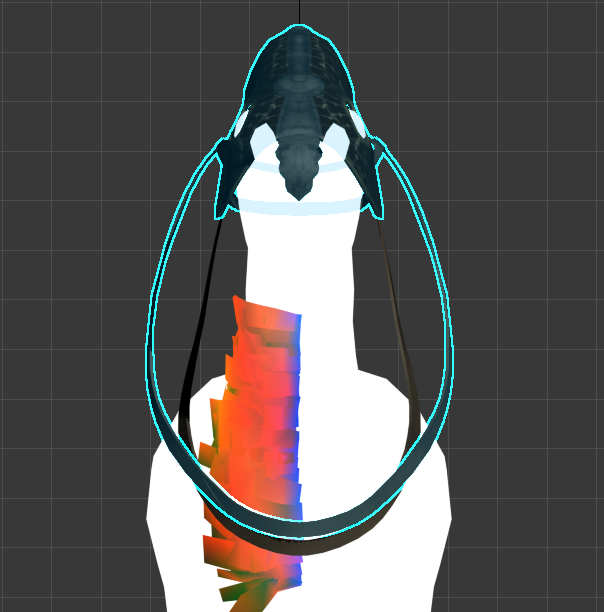
- Tweak the new mesh (“horse_harness_x_rein_rope”) so that it sits perfectly on the “horse_harness_rein_skeleton” (when you are done the mesh should look like it does on Image 5a and 5b).
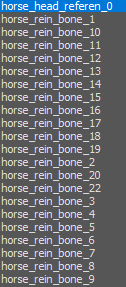
- Skin “horse_harness_x_rein_rope” according to “horse_harness_rein_skeleton”. Image 4 shows the bone list of the skeleton in question.
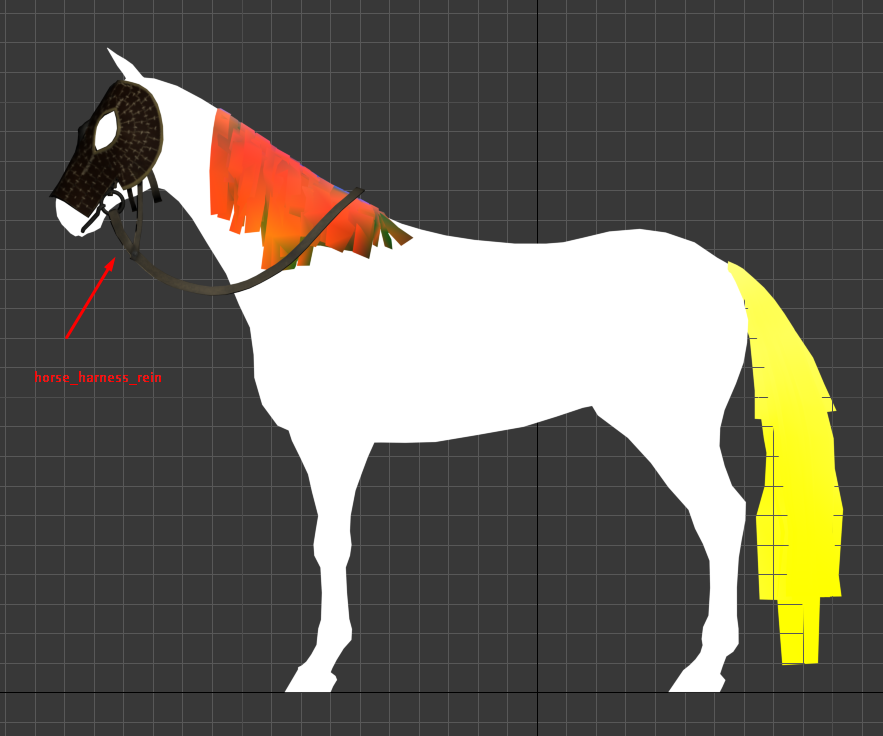
- Set the alpha of vertices of the simulated region to “100”. Set the other non-simulated vertices to “0” (see Image 6).
 |
 |
 |
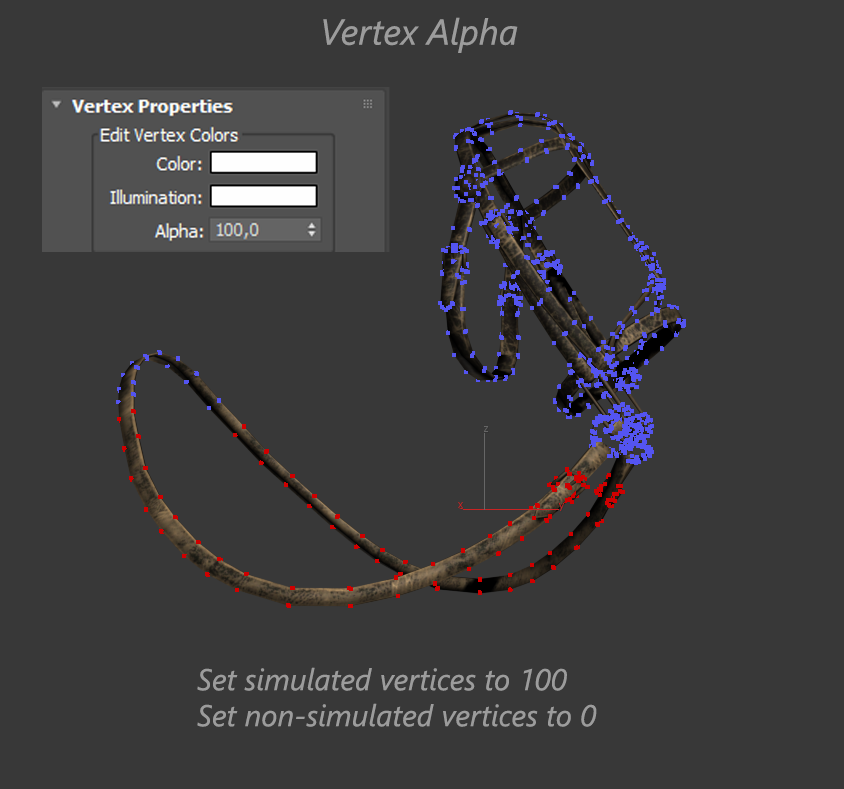 |
| Image 4; bones of horse_harness_rein_skeleton. | Image 5a; side view of horse_harness_x_rein_rope compared to horse_harness_x_rein. | Image 5b; top view of horse_harness_x_rein_rope (selected mesh) compared to horse_harness_x_rein. | Image 6; alphas of the selected vertices (red/lighter) are set to “100” since they belong to the simulated region of the rein. The part where the rider holds and the head piece (see Image 1b) are not simulated, hence they are set to “0”. |
Exporting the meshes to the game
Export the meshes in fbx format to the designated folder:
[Game Folder]\Modules[Mod Folder]\AssetSources