Generating and Loading UI Sprite Sheets
Introduction
Sprites are two-dimensional images that are mostly used in the user interface of a game. Sprite sheets are the collection of such images. In other words, sprites are packed together to form a sprite sheet. This documentation will go through the following steps:
- Adding new sprites.
- Generating sprite sheets from the sprites that you have added.
- Importing the sprite sheets to your module.
- Using sprites in UI XML files.
- Loading and unloading the sprite categories.
Prerequisites
- A submodule created under INSTALLATION_PATH\Mount & Blade II Bannerlord\Modules
- Knowing how to build your project from the Integrated Development Environment (IDE) like Visual Studio.
- Mount & Blade II: Bannerlord - Modding Kit downloaded from Steam.
Adding Sprites
- Create a new folder named GUI under Modules\YOUR_MODULE_NAME
- Create a new folder named SpriteParts under the newly created folder GUI.
- Create a new folder named ui_{YOUR_CATEGORY_NAME} under the newly created folder SpriteParts. In this documentation, it will be named ui_mycategory.
- Note: Content inside of ui_{YOUR_CATEGORY_NAME} will be put in a single category called YOUR_CATEGORY_NAME. All the sprites in a category are loaded and unloaded together. It is suggested to divide your sprites into categories (instead of having only one category) in order to avoid unnecessary sprites being loaded. For example, you may create a new screen in the game that requires certain sprites to be loaded. Those sprites could be packed into a category and once that screen is opened, you can then load the relevant sprites only, and then when the screen is closed you can then unload them (see Loading & Unloading Sprite Categories section).
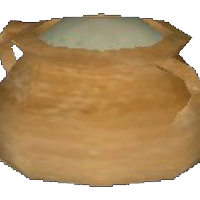
- Put your sprites into the ui_{YOUR_CATEGORY_NAME} folder. For example, this sprite is added and named mysprite.png:
- For launcher, new sprites should be added to a category under MODULE_NAME\LauncherGUI\SpriteParts.
Generating Sprite Sheets
In order to generate sprite sheets, run the TaleWorlds.TwoDimension.SpriteSheetGenerator.exe executable file located at INSTALLATION_PATH\Mount & Blade II Bannerlord\bin\Win64_Shipping_wEditor. If you have followed the steps above, after running SpriteSheetGenerator.exe, you should see the following window:
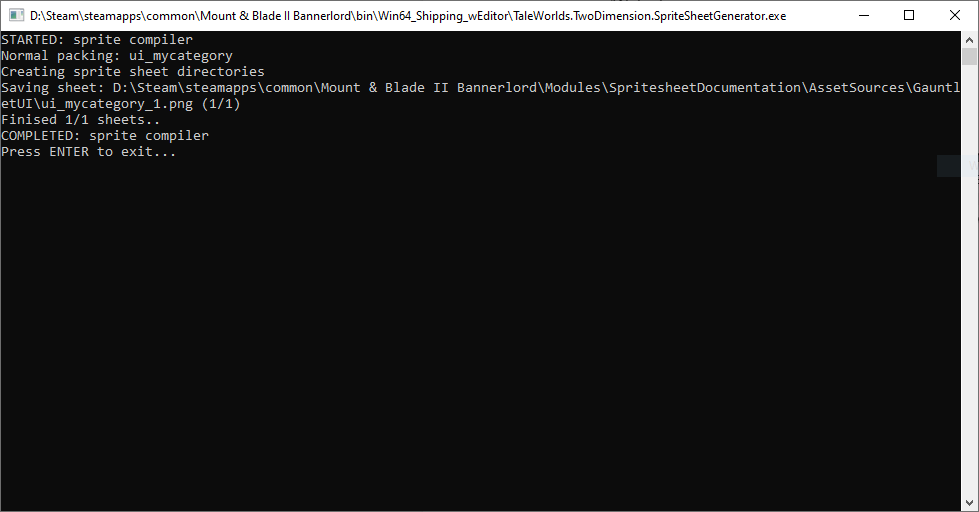
SpriteSheetGenerator.exe will create two folders named Assets and AssetSources under Modules\YOUR_MODULE_NAME. It will also create a SpriteData.xml file (with a prefix of your module name) under Modules\YOUR_MODULE_NAME\GUI.
- If you are generating sprite sheets for the launcher, use Update Launcher SpriteSheets.bat script under LauncherGUI folder.
Importing Created Sprite Sheets
In order to use the sprites in your sprite sheets, you should also import them from the resource browser. Note that this step should be skipped if you are adding sprites just for the Launcher.
Follow these steps to import a sprite sheet:
- Make sure you have built your project into Modules\YOUR_MODULE_NAME\bin\Win64_Shipping_wEditor (in addition to Win64_Shipping_Client). If your project is not built properly, you will get a crash while launching.
- Run Mount & Blade II: Bannerlord - Modding Kit from Steam.
- Make sure your mode is selected in the Mods section of the Launcher, then hit “Play”.
- On the main menu, press Alt + ` to open the console.
- Type resource.show_resource_browser, then hit enter.
This should open the resource browser:
Collapse the folder named Native on the left of the resource browser to see your module easily. Then, select your module.
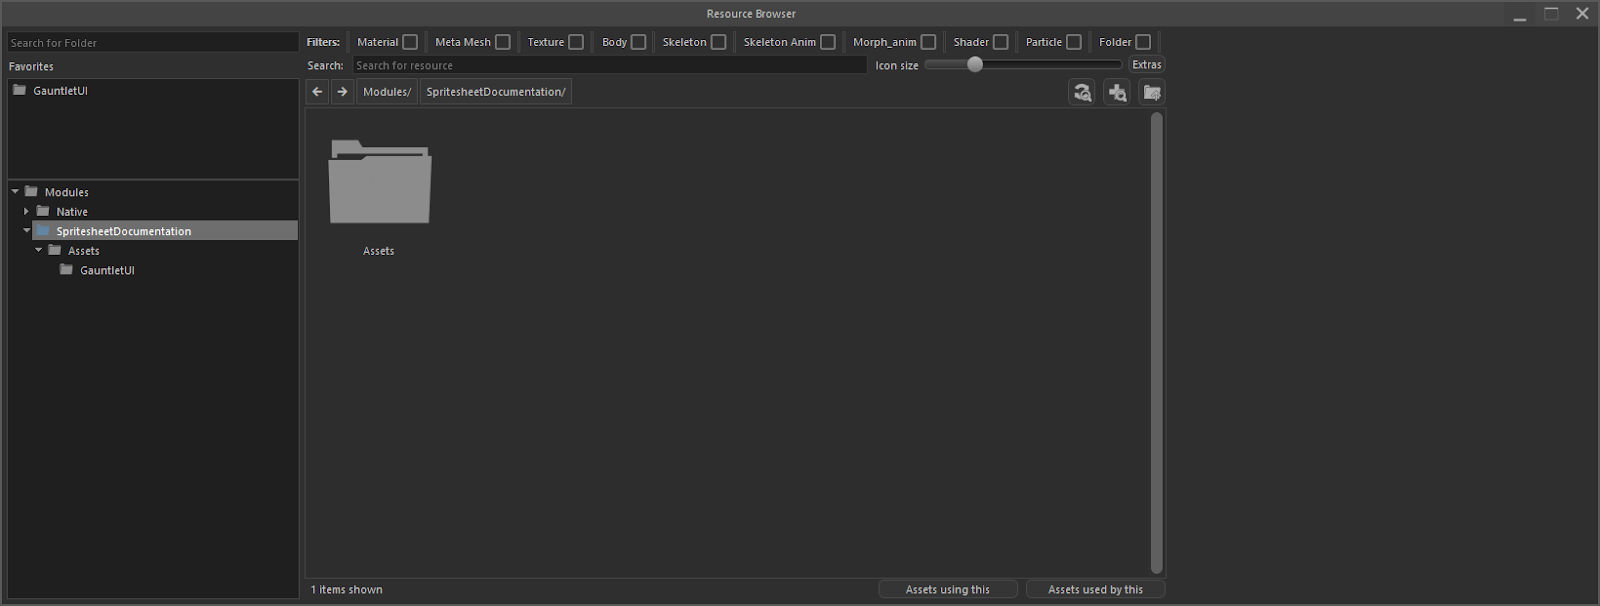
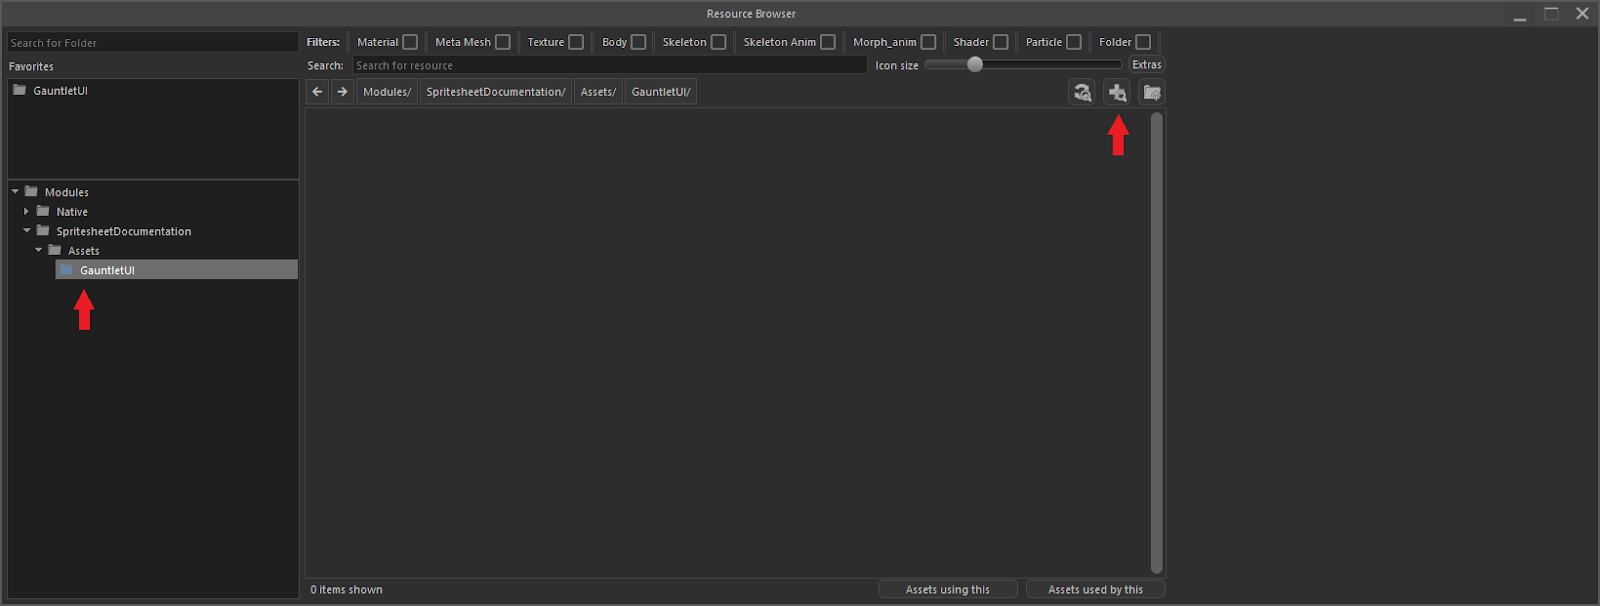
Open the GauntletUI folder in your module. Then, press the “Scan new asset files” button which is pointed with a red arrow below (arrow on the right).
This should open a new window:
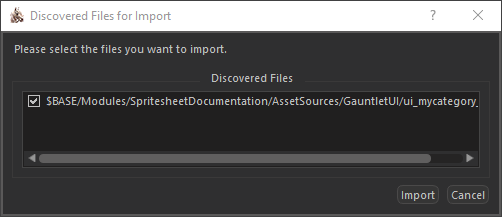
Make sure your category is selected (in the example, it is ui_mycategory) then press the Import button. Then, you should see something similar to this:
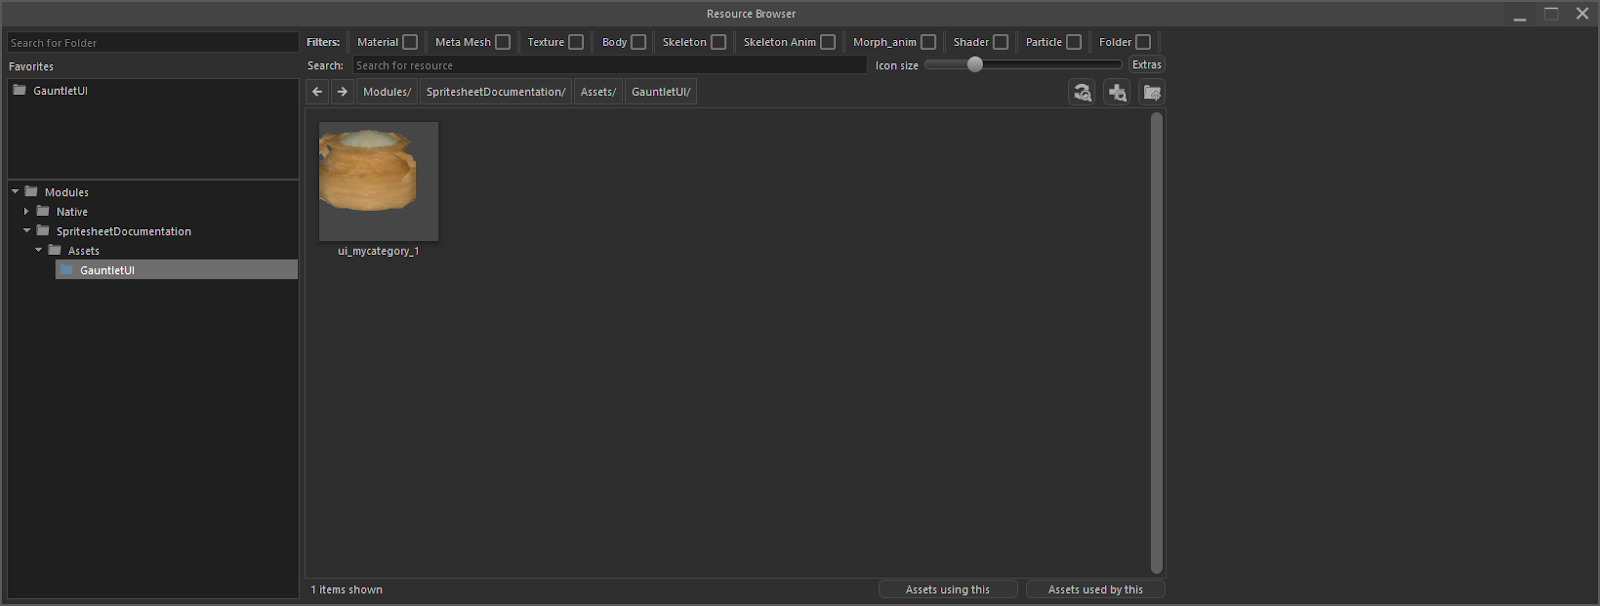
Close the resource browser and the game. You should now see a new file named ui_{YOUR_CATEGORY_NAME}_1_tex.tpac under Modules\YOUR_MODULE_NAME\Assets\GauntletUI.
Using Sprites In UI XML Files
You may now use the sprites in the sprite sheets that you have created (you also need to load the corresponding category which is explained below, in the Loading & Unloading Sprite Categories section). Sprites are used in UI XML files. You may refer to your sprites with their names. You can find the names of your sprites in the SpriteData.xml file (with a prefix of your module name) which is located at Modules\YOUR_MODULE_NAME\GUI. To give an example, we will create a new UI XML file. To do that, go back to the folder named GUI under Modules\YOUR_MODULE_NAME\ and create a new folder named Prefabs. Create a new file named MyXml.xml under the Prefabs folder. You may now refer to your sprites in this file as Sprite=“mysprite”. For example, the content of the MyXml.xml file could be:
<Prefab>
    <Window>
        <Widget DoNotAcceptEvents="true" DoNotPassEventsToChildren="true" WidthSizePolicy="StretchToParent" HeightSizePolicy="StretchToParent">
            <Children>
                <ImageWidget WidthSizePolicy="Fixed" HeightSizePolicy="Fixed" SuggestedWidth="128" SuggestedHeight="128" HorizontalAlignment="Center" VerticalAlignment="Center" Sprite="mysprite"/>
            </Children>
        </Widget>
    </Window>
</Prefab>
Loading & Unloading Sprite Categories
In order to use the sprites that you have added, you need to load them. You have two options in this regard:¸
Loading & Unloading Manually
- The developer has more control. They can choose when the sprite categories are loaded and unloaded. Thus, they can manage memory usage and performance.
- Requires writing code. Thus, more complex than The AlwaysLoad Option.
Using The AlwaysLoad Option
- Sprite categories are loaded on startup automatically.
- Categories are kept in the memory until the game is closed. Thus, no need to manually load them every time they are used.
- Decreased UI loading time at the cost of increased memory usage.
- Easy to use.
1. Loading & Unloading Manually
Here we show how to load & unload sprite categories manually. In the example below, we override the OnGameStart and OnGameEnd methods of MBSubModuleBase class to add and remove the MyScreen global layer respectively. Notice that the constructor of MyScreen loads the sprite category and the UI XML that we have created in previous sections. We also unload the sprite category inside the OnFinalize method.
If you are going to copy the below code, do not forget to change the namespace and name of the Main function. They should match with the fields in your SubModule.xml. In other words, you should change SpritesheetDocumentation (namespace) to YOUR_MODULE_NAME and Main (name of the Main function) to YOUR_MAIN_FUNCTION_NAME in this field of the SubModule.xml:
<SubModuleClassType value="YOUR_MODULE_NAME.YOUR_MAIN_FUNCTION_NAME"/>
Otherwise, they won’t be recognized and the game will crash while launching.
using TaleWorlds.Core;
using TaleWorlds.MountAndBlade;
using TaleWorlds.Engine.Screens;
using TaleWorlds.Engine.GauntletUI;
using TaleWorlds.GauntletUI.Data;
using TaleWorlds.TwoDimension;

namespace SpritesheetDocumentation
{
    public class Main : MBSubModuleBase
    {
        private MyScreen _myScreen;

        protected override void OnSubModuleLoad()
        {

        }

        protected override void OnGameStart(Game game, IGameStarter gameStarterObject)
        {
            base.OnGameStart(game, gameStarterObject);
            _myScreen = new MyScreen();
            ScreenManager.AddGlobalLayer(_myScreen, true); // add MyScreen on game start
        }

        public override void OnGameEnd(Game game)
        {
            base.OnGameEnd(game);
            _myScreen.OnFinalize();
            ScreenManager.RemoveGlobalLayer(_myScreen); // remove MyScreen on game end
        }
    }

    public class MyScreen : GlobalLayer
    {
        private GauntletLayer _gauntletLayer;
        private IGauntletMovie _gauntletMovie;
        private SpriteCategory _category;

        public MyScreen()
        {
            var spriteData = UIResourceManager.SpriteData;
            var resourceContext = UIResourceManager.ResourceContext;
            var resourceDepot = UIResourceManager.UIResourceDepot;

            _category = spriteData.SpriteCategories["ui_mycategory"]; // select which category to load, put your category name here
            _category.Load(resourceContext, resourceDepot); // load the selected category

            _gauntletLayer = new GauntletLayer(2);
            Layer = (ScreenLayer)_gauntletLayer;

            _gauntletMovie = _gauntletLayer.LoadMovie("MyXml", null); // load the ui xml in Prefabs folder
        }

        public void OnFinalize()
        {
            // unload ui xml, sprite category, layer, etc.
            _gauntletMovie = null;
            _category.Unload();
            _gauntletLayer = null;
        }
    }
}
2. Using The AlwaysLoad Option
Instead of manually loading sprite categories like in the Loading & Unloading Manually section, you can choose which sprite categories should be loaded automatically on startup by enabling the AlwaysLoad option for those categories. Unless they are manually unloaded by the developer, categories that have the AlwaysLoad option enabled will be kept in the memory until the game is closed so that you don’t have to load them manually every time they are used. Enabling the AlwaysLoad option decreases the load time of UI (since these categories are loaded only once on startup) but increases memory usage (since these categories will be kept in the memory even when they are not used). This option is very useful for the categories that are frequently loaded & unloaded (f.e. A category that is used in a screen that is opened and closed frequently).
Note: This feature has been released with e1.6.2. If you are on an earlier version and still want to use the AlwaysLoad option, please switch both the game and the modding kit to e1.6.2 or a newer version.
To enable the AlwaysLoad option for a category, follow the steps below:
Create a new XML file named Config.xml under the folder Modules\YOUR_MODULE_NAME\GUI\SpriteParts. Copy and paste the following into Config.xml:
<Config>
    <SpriteCategory Name="ui_{YOUR_CATEGORY_NAME}">
        <AlwaysLoad/>
    </SpriteCategory>
</Config>
Replace ui_{YOUR_CATEGORY_NAME} with your category. Then, generate sprite sheets by following the steps in the Generating Sprite Sheets section above. To check if everything is okay, open the file named {YOUR_MODULE_NAME}SpriteData.xml which is located at Modules\YOUR_MODULE_NAME\GUI. There you should see that the AlwaysLoad option is enabled for the categories that you have selected in the Config.xml:
<SpriteData>
    <SpriteCategories>
        <SpriteCategory>
            <Name>ui_{YOUR_CATEGORY_NAME}</Name>
            <AlwaysLoad />
            <SpriteSheetCount>1</SpriteSheetCount>
            <SpriteSheetSize ID="1" Width="512" Height="512" />
        </SpriteCategory>
    </SpriteCategories>
    ...
</SpriteData>
You don’t need to change/add any code to load the new sprite sheet category.
Conclusion
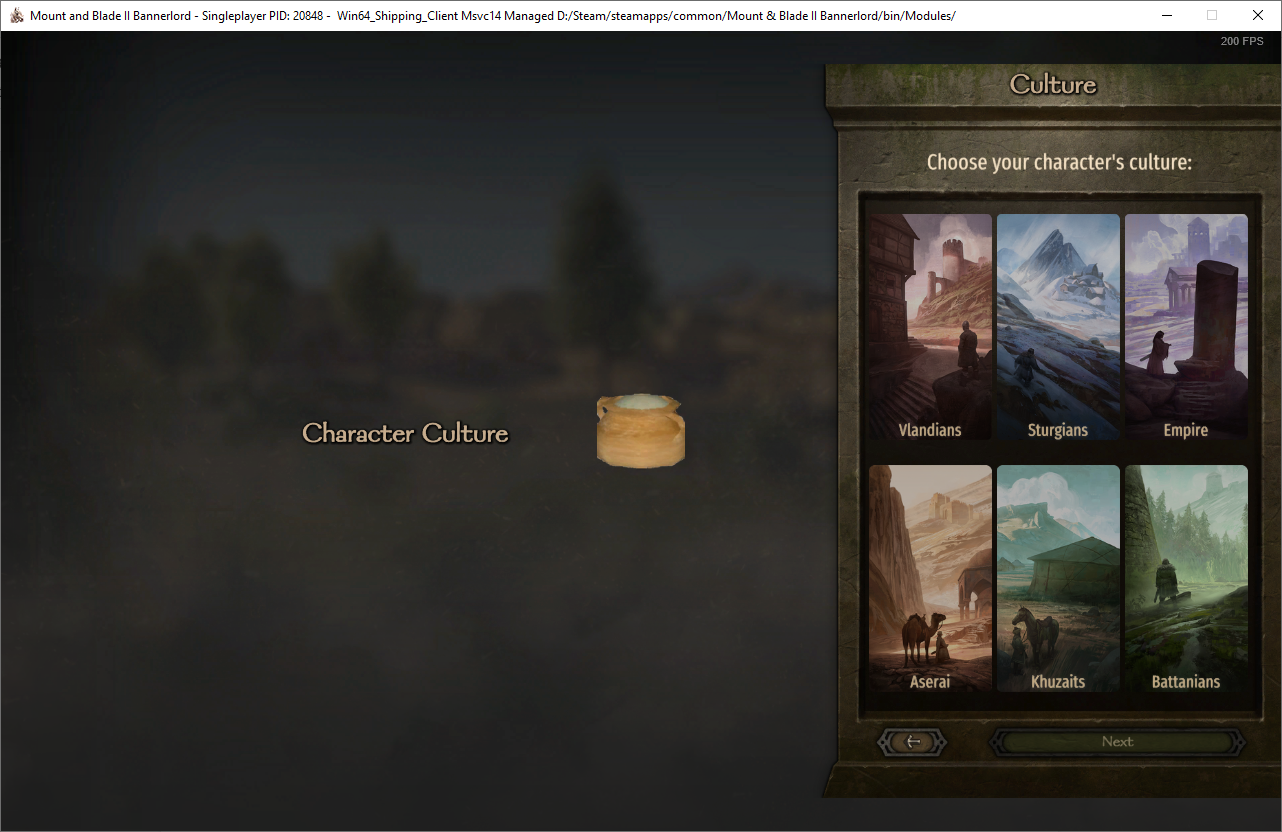
Make sure you have created a screen and loaded the UI XML file that you have created in Using Sprites In UI XML Files section in order to see the result below.
Note: If you have added your sprite category with the AlwaysLoad option and didn’t use the code shared in the Loading & Unloading Manually section, you can write your own code to create a screen and load the UI XML. If you don’t know how to do it, you can copy the code from the Loading & Unloading Manually section (please also read the details in that section) and delete the following lines since you have used the AlwaysLoad option and don’t need to load the category manually:
var spriteData = UIResourceManager.SpriteData;
var resourceContext = UIResourceManager.ResourceContext;
var resourceDepot = UIResourceManager.UIResourceDepot;

_category = spriteData.SpriteCategories["ui_mycategory"]; // select which category to load, put your category name here
_category.Load(resourceContext, resourceDepot); // load the selected category
You can also delete the _category field and remove its references.
- Make sure you have built your project into Modules\YOUR_MODULE_NAME\bin\Win64_Shipping_Client.
- Launch the game (not the Modding Kit) from Steam and make sure your module is selected in the Mods section of the Launcher, then hit “Play”.
- Create a new campaign or load a compatible save file to open the campaign map. Both of them will start a game. Notice that the code we have written adds the screen once the game starts (check the OnGameStart method).
- After you start the game by creating a new campaign, you should see this screen: