
Hosting a Custom Server
Installing
Enable Tools within your Steam Library. Mount & Blade II: Dedicated Server should appear on your list. Download and install it.
Hosting
By default, dedicated servers use UDP port 7210. You must have a visible (public) IP address on the internet as well as the aforementioned port being accessible.
Anonymous hosting is not supported. You will have to create a server token by going in-game first.
Generating a Token
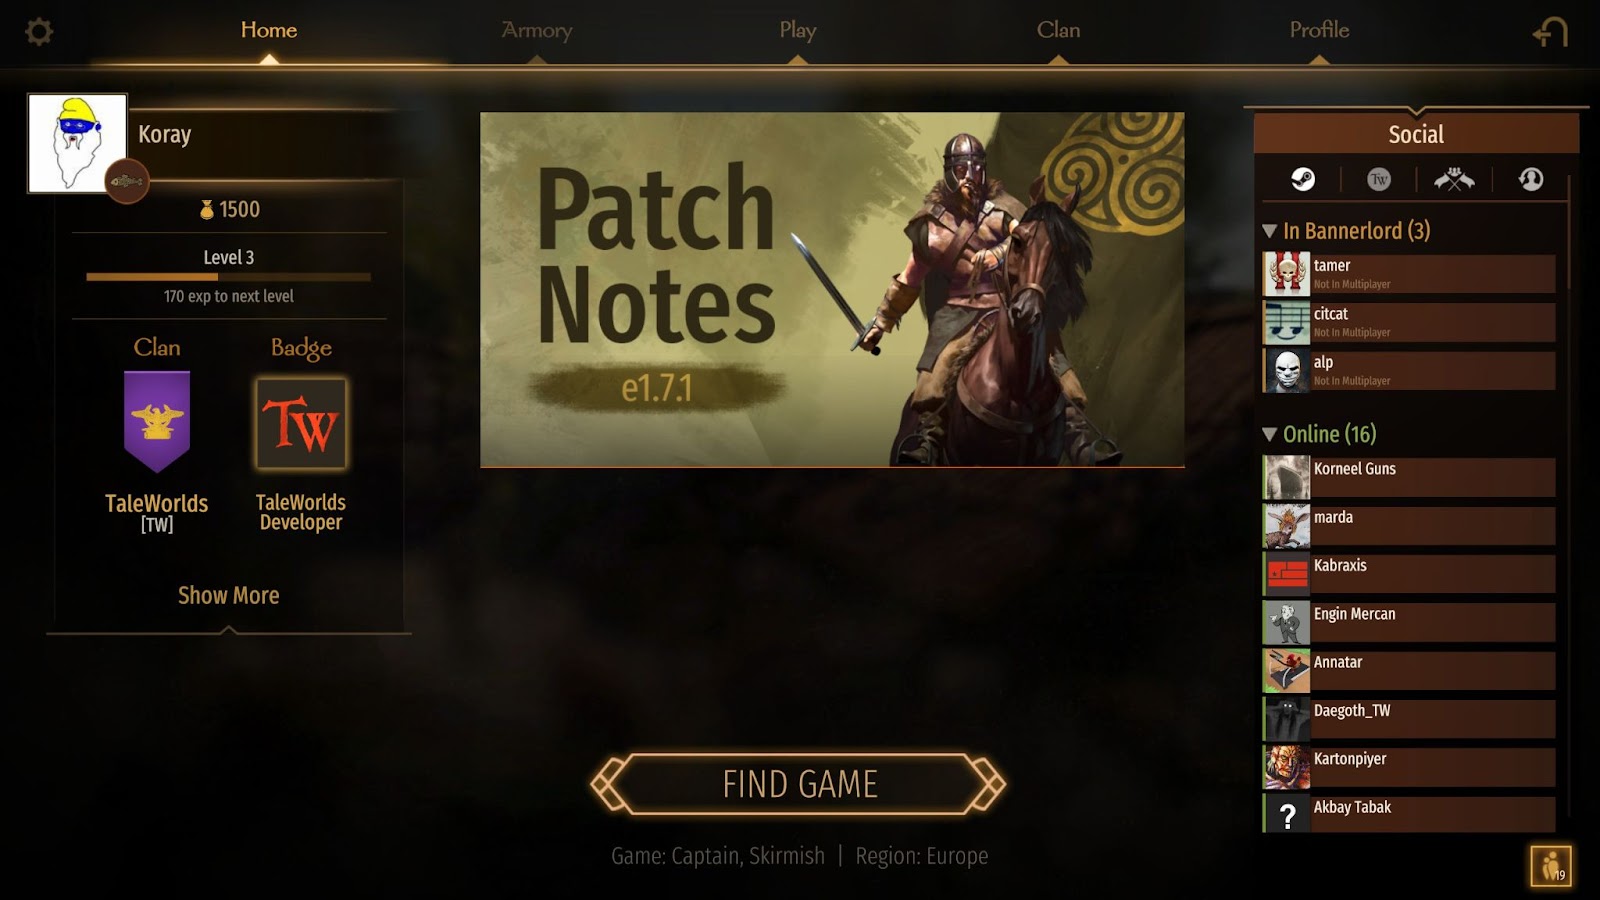
Launch Mount & Blade II: Bannerlord multiplayer and log into the game lobby:
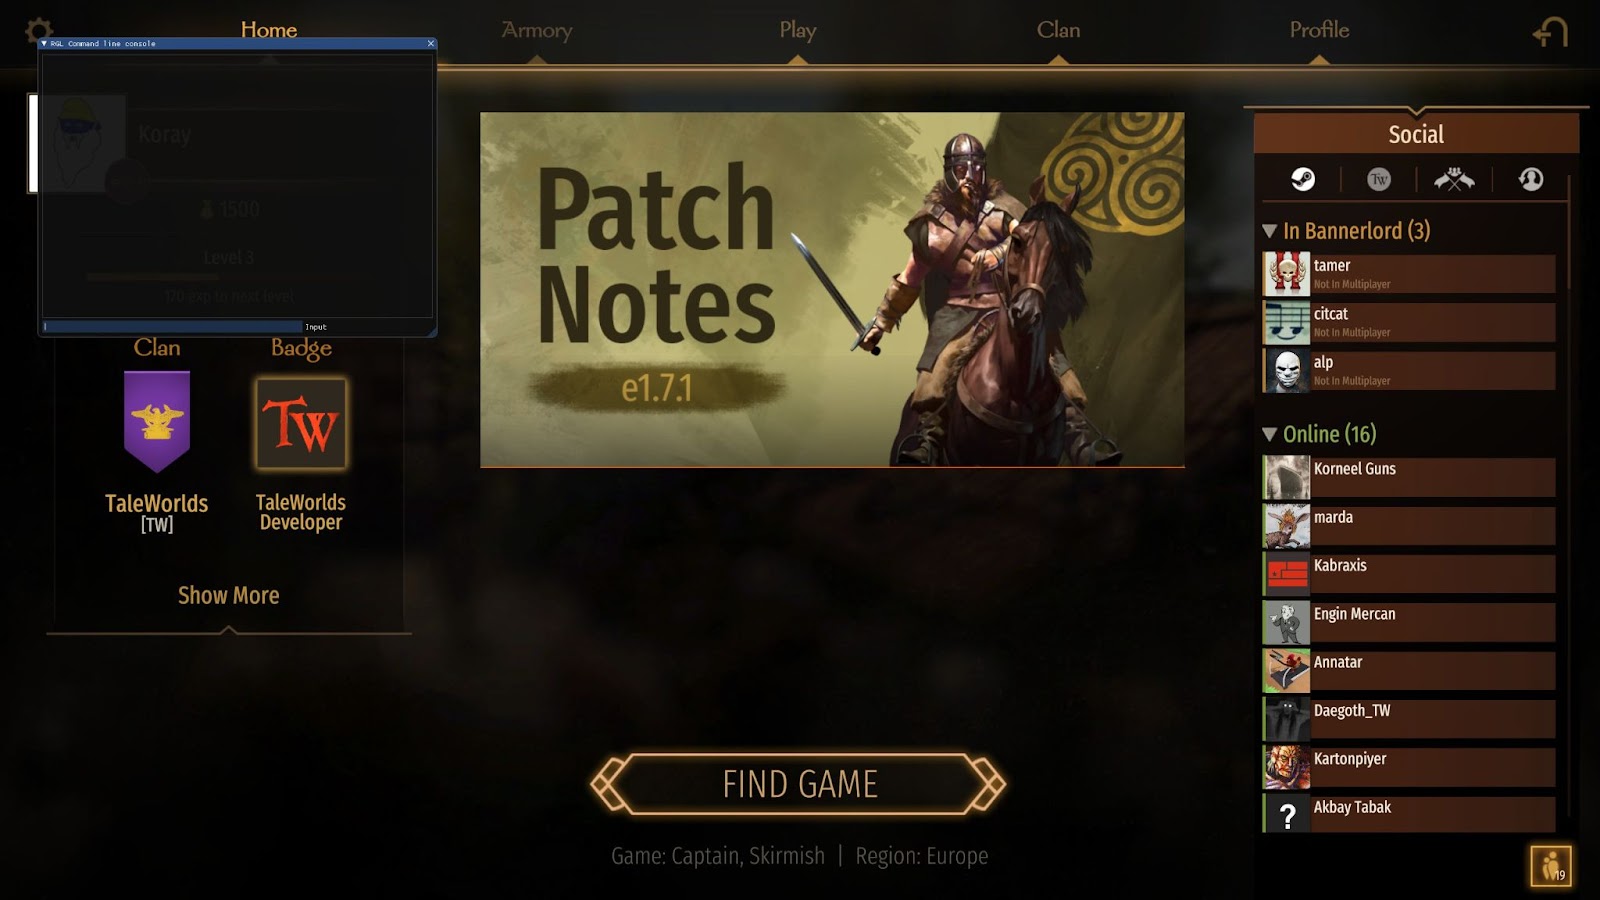
Open the game console by pressing ALT + tilde key (~):
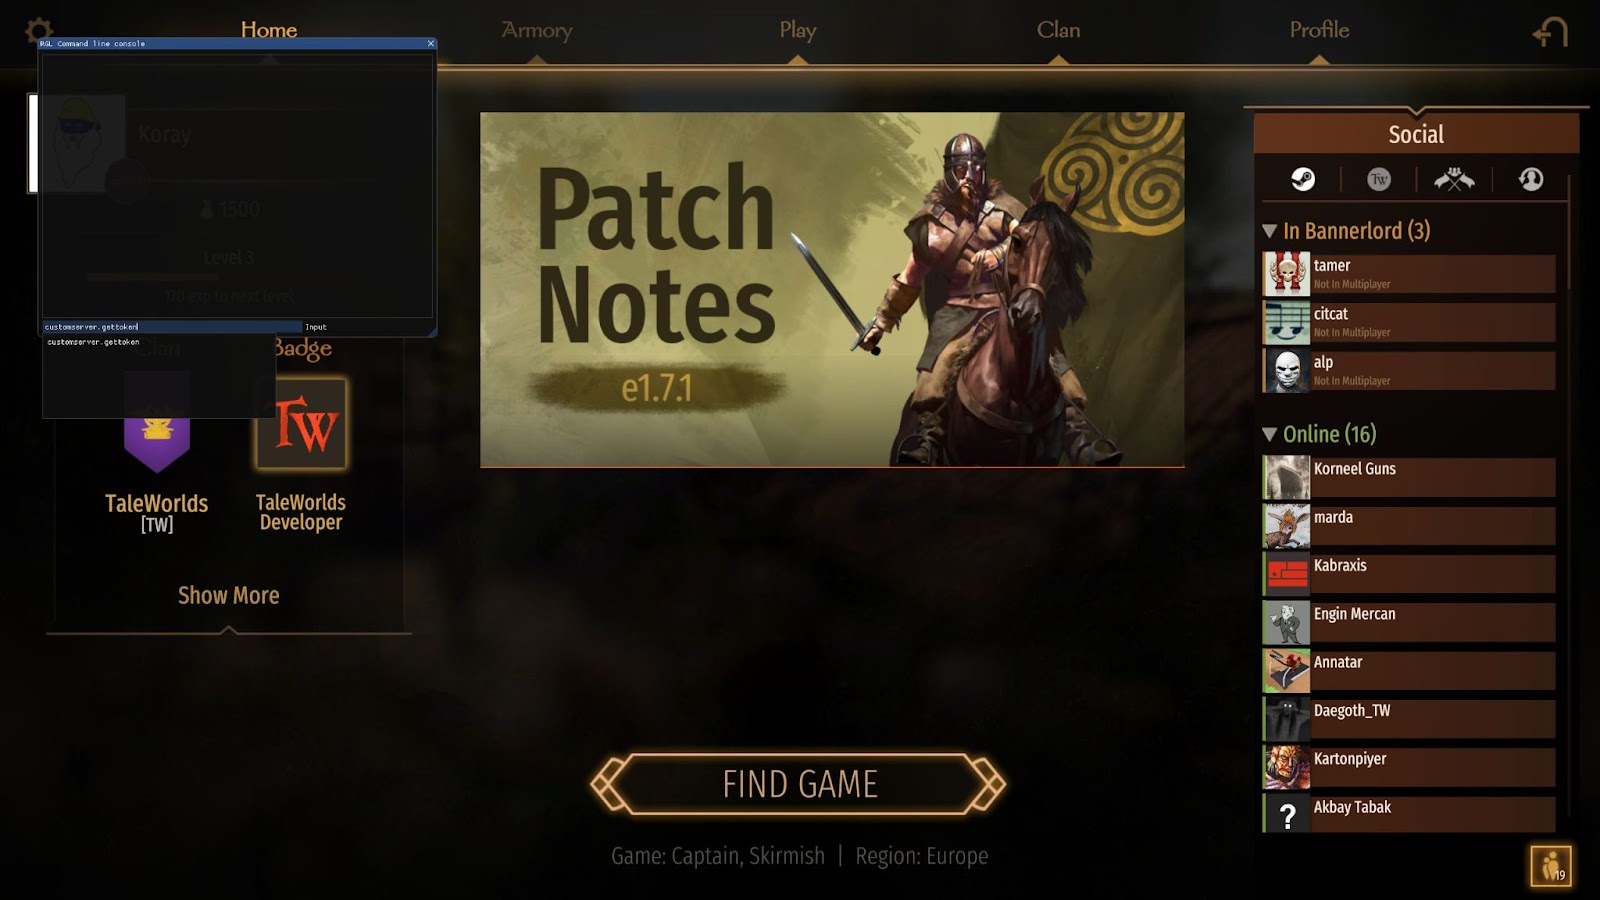
Type customserver.gettoken in the textbox and press enter:
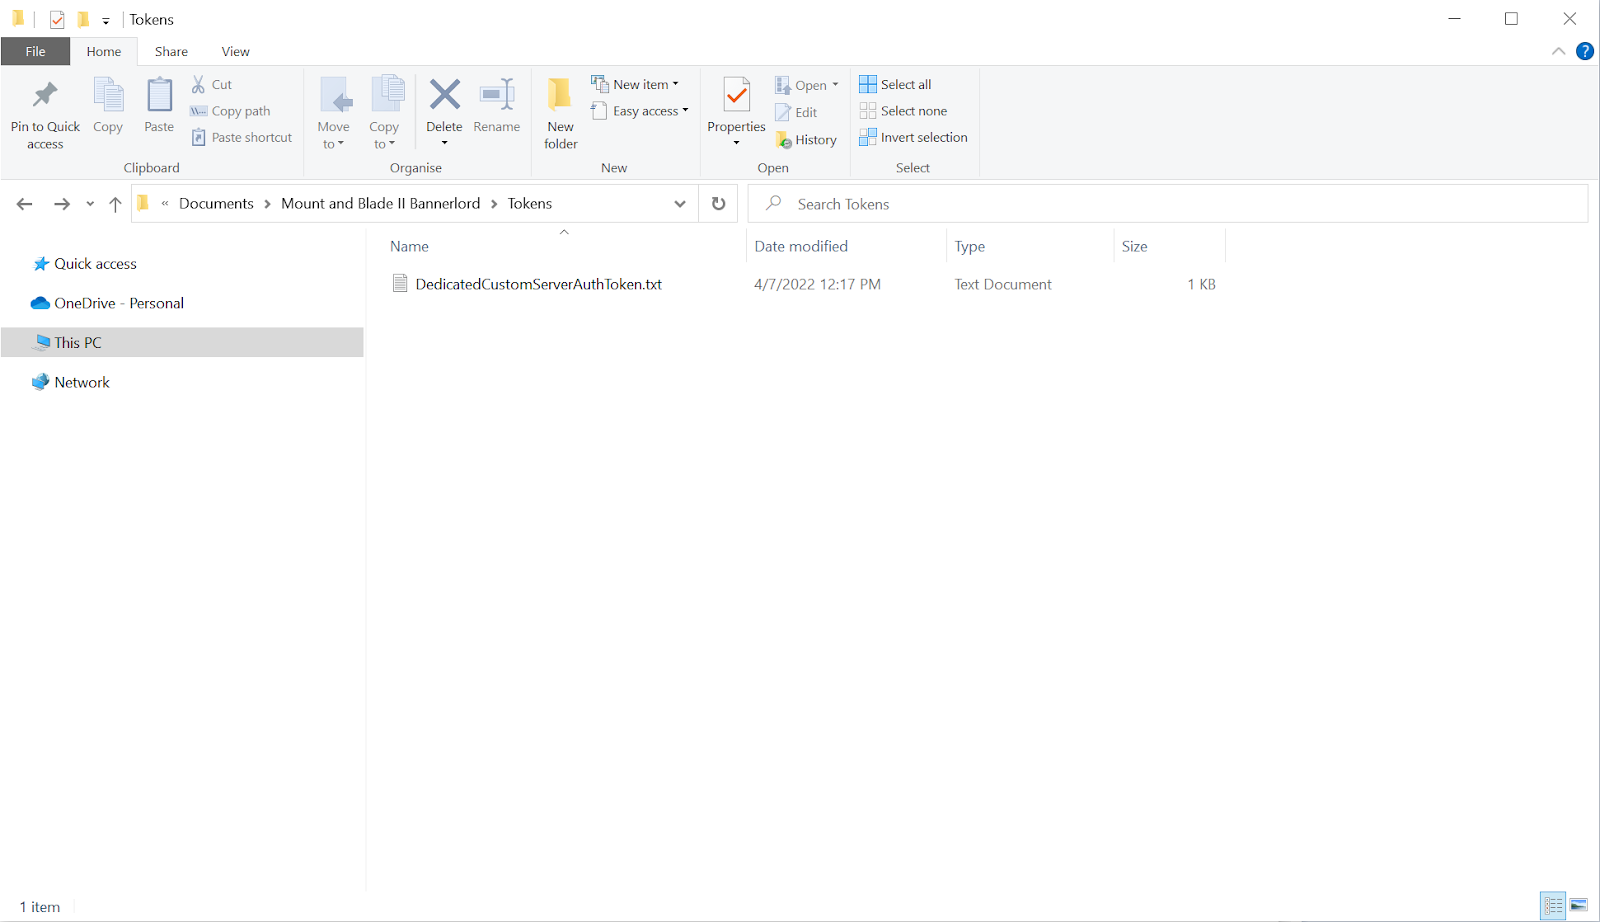
Your token has been generated and saved under your Documents\Mount & Blade II Bannerlord\Tokens folder:
If you are planning to host the dedicated server on the same computer where you installed Bannerlord, this is all you have to do. But if you are planning to host using a different computer, please copy this token file to the target computer’s Documents\Mount & Blade II Bannerlord\Tokens folder. There is also one other alternative method shown in the Launch Arguments section below.
Beware that the generated token is tied to your Bannerlord account. Any abuse would be traced back to the user who originally generated the token. We recommend keeping it private, and not sharing it with other people.
Also remember that your token expires after 3 months due to security reasons at which point you can replace it by generating a new one.
Server Administration
You can administrate your server by typing commands in your server’s console (that opens up when launching the server).
By typing list and pressing enter, you will get all the available commands in the dedicated server:
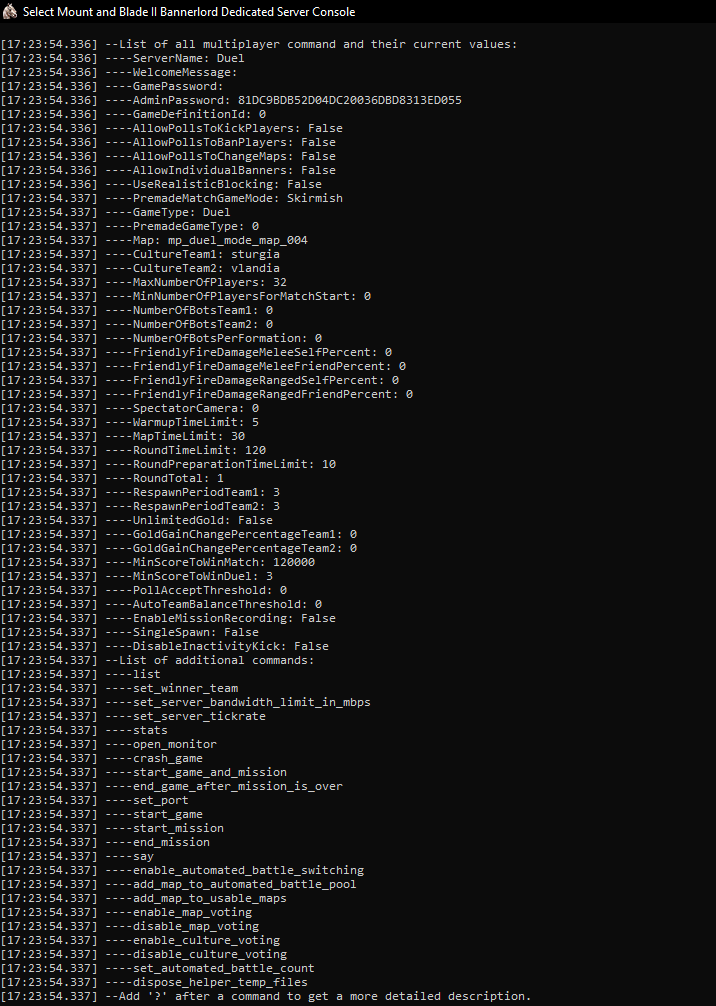
For example, to get a simple server running, you can type the following commands into your console:
ServerName Custom Dedicated Beta TestGameType TeamDeathmatchstart_gamestart_mission
By executing these commands, you will make your custom server visible and accessible to all players.
With the ServerName and GameType commands, you are simply setting the name of your server and setting your game mode.
With the start_game command, you are starting to host your server. Your server becomes visible to all players. Any player who enters your server will wait in the intermission state.
With the start_mission command, your server will switch into mission mode and players will be able to play the game.
You can also use the shorthand start_game_and_mission instead of the two commands.
Tips & Tricks
Configuration Files
Instead of executing commands one at a time with the server console, you can specify a configuration file to run on initialization, which will have its contents executed line by line.
You can find sample configuration files within the Native module directory (Modules\Native\ds_config_*.txt). Note that currently, your own configuration files must also reside within this same directory to be found by the server. See the launch arguments section below for how you can specify a configuration file to be run.
Launch Arguments
There are a few particularly useful launch arguments at the moment:
/dedicatedcustomserverconfigfile [configuration_file_name]
Specify a configuration file to be run as seen in the Configuration Files section above.
/dedicatedcustomserverauthtoken [authentication_token_contents]
When the token is passed through the launch argument, a local file containing the token is not required.
/DisableErrorReporting
Disables the Crash Uploader popup and automatic error reporting.
/LogOutputPath [output_path]
Sets the log output directory of the server. Path should be in double quotes.
/port [number] Optionally specify a port number to run the server from, useful for using ports other than the default.
Log Files
By default, log files for the custom server can be found in your ProgramData directory on Windows (%programdata%\Mount and Blade II Bannerlord\logs).
Automated Battle Count
By using the command set_automated_battle_count before enable_automated_battle_switching, you can set the number of missions to be played before the server shuts down.
For example, set_automated_battle_count 10 will have the server play 10 missions and shut down. If you would like to have an unlimited number of missions, set it to -1.
Additional Features
With patch v1.2.x the below striken through text is no longer relevant. The DedicatedCustomServerHelper module and its functionality has been merged into the base game.
We supply the optional For the server side modules to be usable from the outside, you will need to make TCP port 7210 accessible as well.DedicatedCustomServerHelper module to help server hosts. There are several submodules within for distinct purposes.
Note that although the module is optional for server hosts, if you as the host do load the module, the players will also need to have it loaded. Otherwise, a mismatch in modules will prevent players from joining.
Administration Web Panel
This module launches a web panel to interact with your custom server, through a general management page and a terminal page:
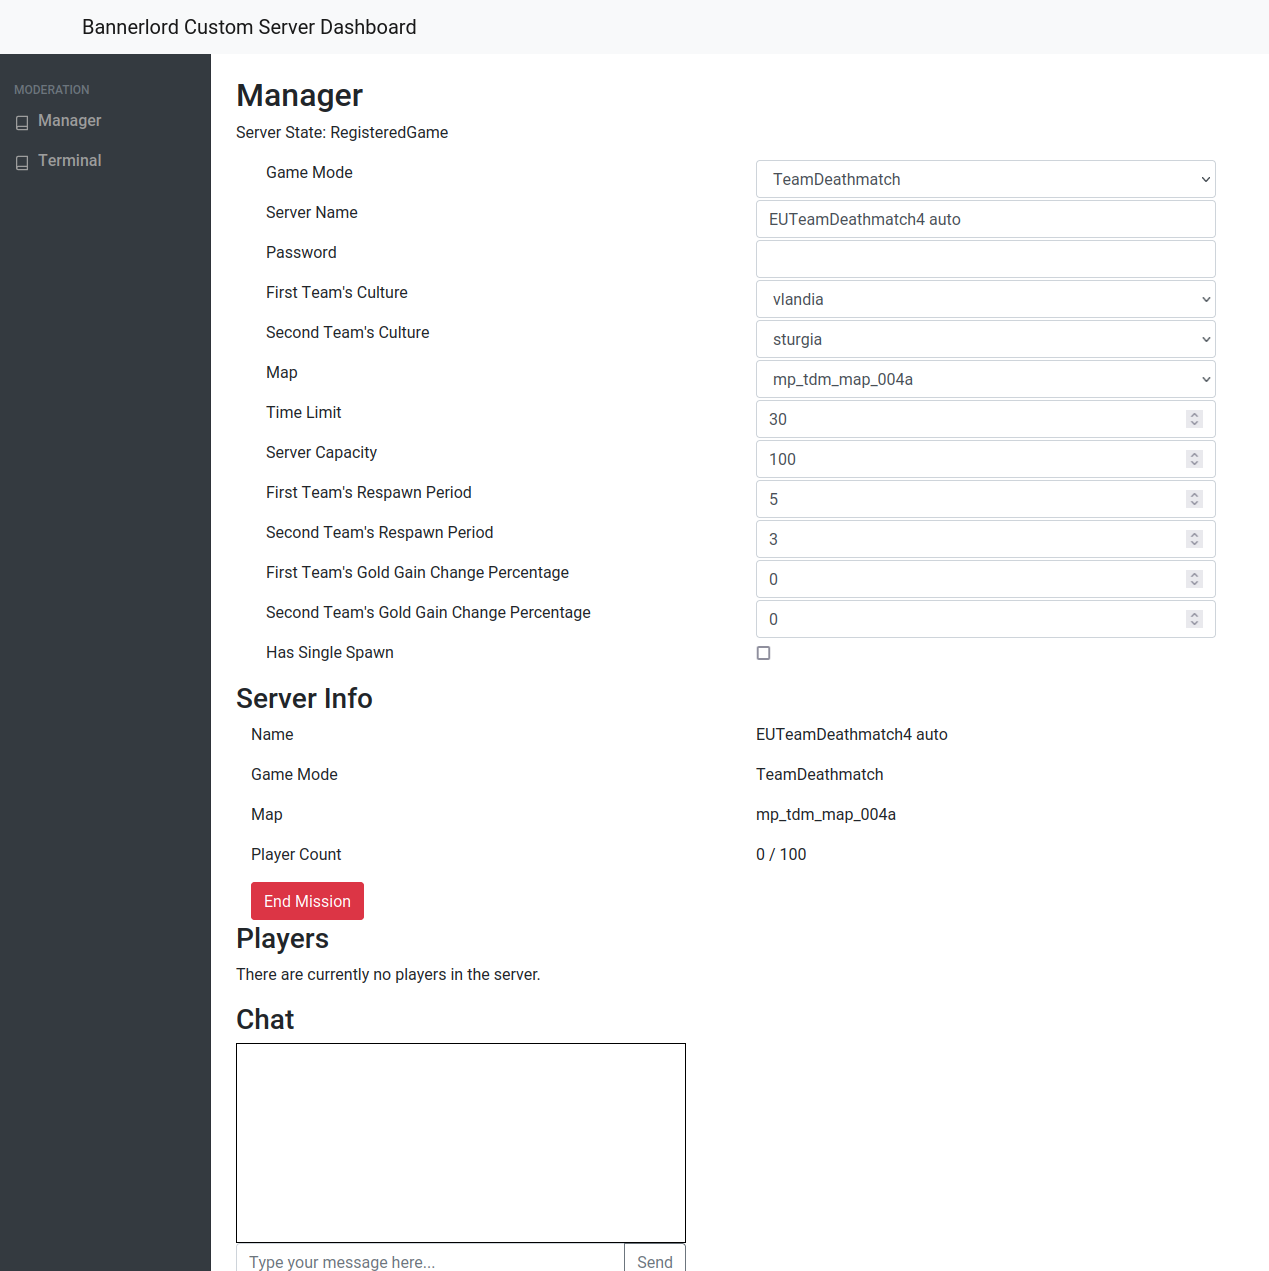
You can access the web panel with your server’s IP address and port once it has been initialized.
The web panel is password protected by the server’s configured AdminPassword option. By default, this option is left blank, so be sure to change it to a secure password.
If you do not want the web panel to be accessible from outside the local network or machine, and also do not need the map download feature below, you are free to block TCP port 7210 from external access.
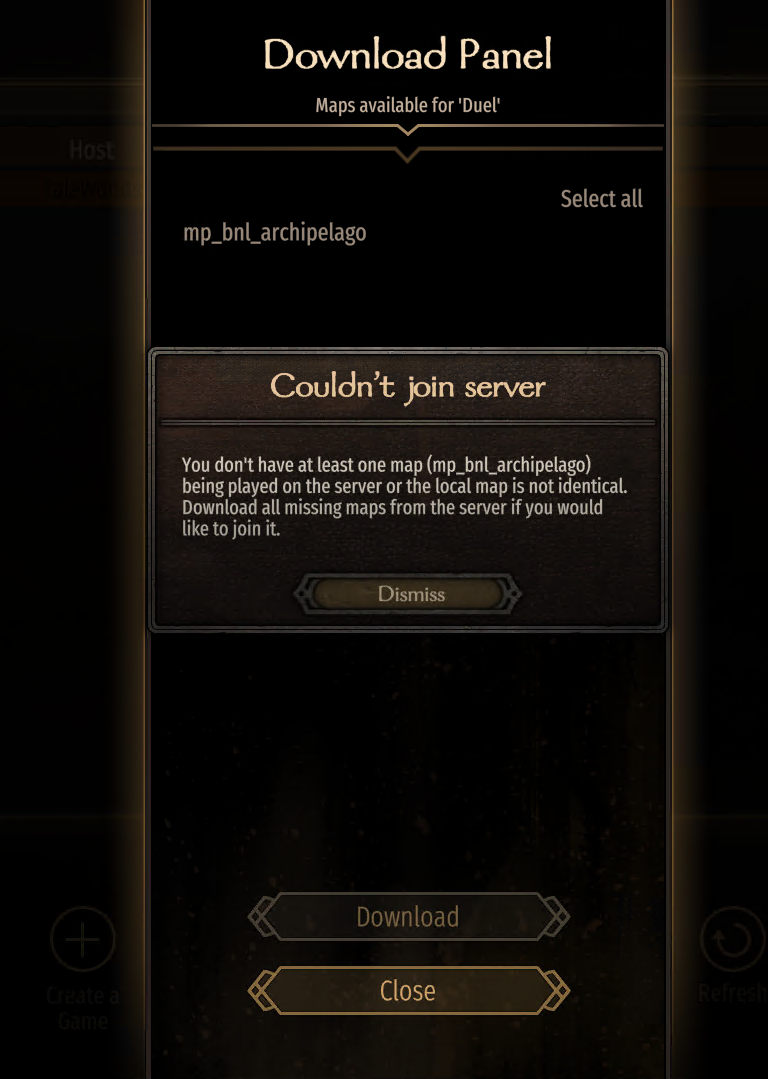
In-Game Map Downloads [Map Downloader]
We also present a way to allow players to download your server’s map files through an in-game panel. As the server host, there are some conditions you must ensure to get this functioning:
- The maps to be served must be located within ONLY the Multiplayer module’s
SceneObjdirectory, in the same way a typical module contains scenes. You can create the directory by hand if it is missing. - The maps to be served must be “registered” through either the
Mapconfiguration option, theadd_map_to_automated_battle_pooloradd_map_to_usable_mapscommands. In other words, only maps playable on the server are served.
Note that having the scene loaded in multiple modules will cause issues such as the scene not being shown on the download panel.
Players will then get prompted to download all of the missing maps as they try to join the server or they can right click on the custom server list entry, which will open a context menu with the option to open the download panel for the server. Once all missing maps are successfully downloaded, there is no need to restart the game, they should be able to join your server as is.
Note that this feature is intended to support simple use cases. This is not a module manager feature, and will not be able to support maps that require other assets (ModuleData, Prefabs, etc.) spread throughout a given module. Only the SceneObj directory contents are transferred between the server and the client.
If the lack of prefab support is a concern, you may be able to make the scene usable through the Map Downloader by breaking the prefabs. Open the scene in the editor, select all entity objects, right click and select Break Prefab.
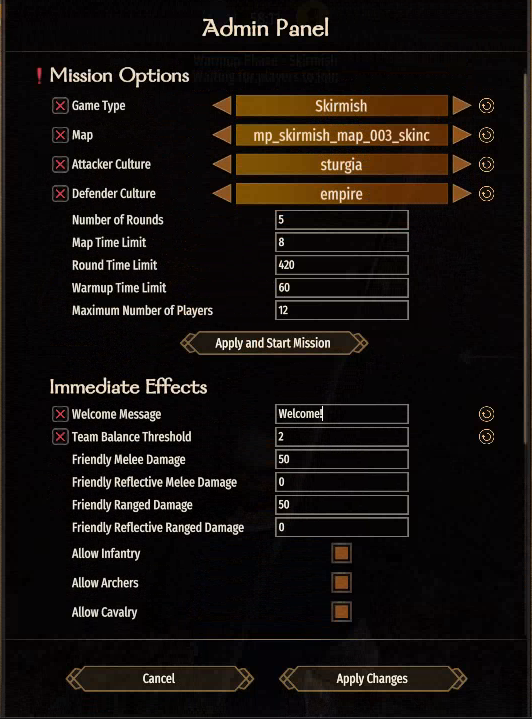
In-game admin panel & admin features
The in-game admin panel provides an easy way to organize and moderate events.
The admin features are only available to those that enter the server as an admin by providing the admin password (right-click on the server and then Join as Admin). You can then access the admin panel via the Escape menu. The AdminPassword can be set from the server config.
 |
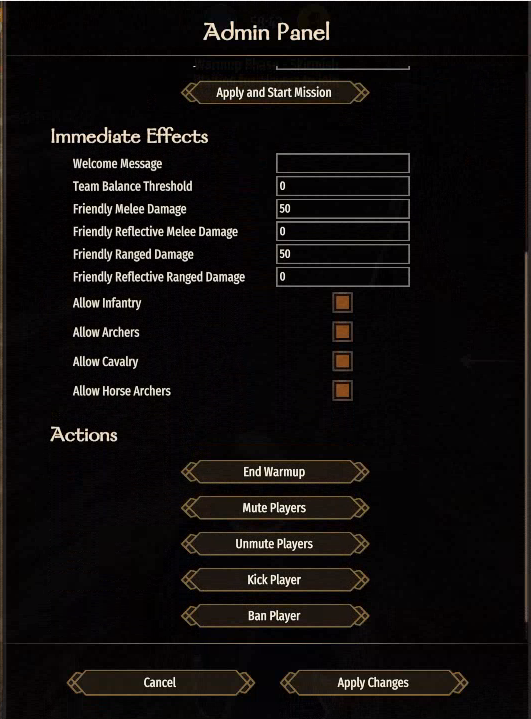 |
The in-game panel has two main operational buttons:
Apply and Start Mission-> This will apply all of the changes made and start a new mission immediately.Apply Changes-> This will apply all of the changes made. The ones that are listed under Immediate Effects will go into effect right away. Those that are listed under Mission Options will be applied on the next mission.
The in-game admin panel comes with the following options:
Mission Options (require mission restart)
Please note that if you wish to change “Mission Options” that require a mission restart using the in-game Admin Panel - you must use the map intermission system. This means you must use the start_game_and_mission (or start_game) and enable_automated_battle_switching commands in your server config. Not using these will automatically disable all Mission Options on the Admin Panel.
Additionally, options open up based on the selected Game Type. For example, the Warmup Time Limit option is not available when selecting TeamDeathMatch - as there’s no warmup in TDM.
- Game Type
- Lists all available game types (Siege, TeamDeathmatch, Captain, Skirmish, Duel, Battle)
- Map
- Lists all the maps that have been passed to the server inside the config with the
add_map_to_usable_maps [MapName] [GameType],[GameType]command- For example:
add_map_to_usable_maps mymap Siege,Skirmish(please note that the GameType must be correctly capitalized)
- For example:
- Lists all the maps that have been passed to the server inside the config with the
- Attacker & Defender Cultures
- Minimum Score to Win Duel
- Number of Rounds
- Map Time Limit
- Round Time Limit
- Warmup Time Limit
- Maximum Number of Players
Immediate Effects
- Welcome Message
- Team Balance Threshold
- Friendly Damages
- Class Limits (Allow, Disallow)
Others
- End Warmup
- Overrides the warmup timer and ends the warmup in 30 seconds.
- Mute/Unmute Player
- Mutes a player, preventing them from using chat.
- Kick Player
- Kicks a player from the server. Kicked players are able to immediately rejoin the server.
- Ban Player
- Bans a player from the server. Banned players are not able to rejoin the server until it restarts.
Here are some behaviours you should expect while changing Game Types, Maps and Cultures:
- If you leave Game Type, Map and Cultures UNSELECTED -> The game will run the current Game Type being played and give the players the option to vote on the available maps (those passed with
add_map_to_automated_battle_pool) and cultures. - If you leave Game Type, Map and Cultures UNSELECTED AND the Game Type isn’t the one that the server initially launched with -> The game will run the current Game Type being played and use a random map from the available maps (those passed with
add_map_to_usable_maps) and give the players the option to vote on cultures. - If you select a Game Type but leave Map and Cultures UNSELECTED AND the selected Game Type isn’t the one that the server initially launched with -> The game will run the current Game Type being played and use a random map from the available maps (those passed with
add_map_to_usable_maps) and give the players the option to vote on cultures. - If you select a Game Type and Map but leave Cultures UNSELECTED -> The game will run the selected Game Type with the selected Map and give the players the option to vote on cultures.
- If you select a Game Type, Map and Cultures -> The game will run the selected Game Type, Map and Cultures with no voting screen.
- If you provide no maps for a specific Game Type using the
add_map_to_usable_mapsparameter, that specific Game Type will be disabled in the admin panel. - Official maps will only work with the intended Game Types. Trying to use them with another Game Type with
add_map_to_usable_mapswill not display them in the admin panel.
Admin Announcements
You can also make use of the admin announcements system which pushes out text to everyone on the server by typing the following into chat:
/ab [text]- Admin Broadcast - Displays the announcement in the middle of the screen as well as in chat alongside a sound notification./ac [text]- Admin Chat - Displays the announcement in chat.
FAQ
Does Steam need to stay open for hosting?
No. You only need Steam for keeping your server files up to date. You are free to copy your server files to some other computer to host it. But we strongly recommend you to use it with Steam in order to keep it up to date. Unlike Warband, currently, any older versions of the server files will be incompatible with our system.
Are you planning to add support for other game platforms?
Yes.
What if I don’t want to use any game platform to retrieve the server files, will there be any other option?
Right now, Steam is the only way to download it. We are planning to add it to other game platforms and are also discussing using a Docker host for distributing the server files in the future.
Will you provide Linux support?
Linux server files are already available!
Will my server be accessible by everyone?
Yes, your server will be accessible by everyone unless you make it password protected.
How many servers can I host?
There is a limit to the number of servers you can host simultaneously. Currently, you can host up to 50 servers.
What are the hardware requirements?
It depends on the game mode and the player count. With the default configurations, we are hosting our games:
- For smaller battles (Skirmish and Duel): 2 core CPUs (2GHz to 3GHz) with 4GB Memory
- For bigger battles (Siege, Team Deathmatch and Captain): 4 core CPUs (2GHz to 3GHz) with 8GB Memory
But, for instance, you can always host a siege mode with less players on a 2 core machine as well.
You can also try to host a very small game with a single core machine as well but you might get some spikes during the game.
What are the bandwidth requirements?
It depends on the player count. By default, we are sending 60 packets to each player and each packet is less than 1.5 kilobytes. For most configurations, any dedicated server provider should be able to provide a sufficient network connection.
Is there any modification support?
Yes! Go to https://moddocs.bannerlord.com/multiplayer/custom_game_mode/ to learn more.