
Weapon Smithing & Crafting Pieces
Introduction
The Smithing screen allows for the creation of all melee and throwing weapons in the game (swords, daggers, throwing knives, throwing axes, maces, polearms, pikes, javelins).
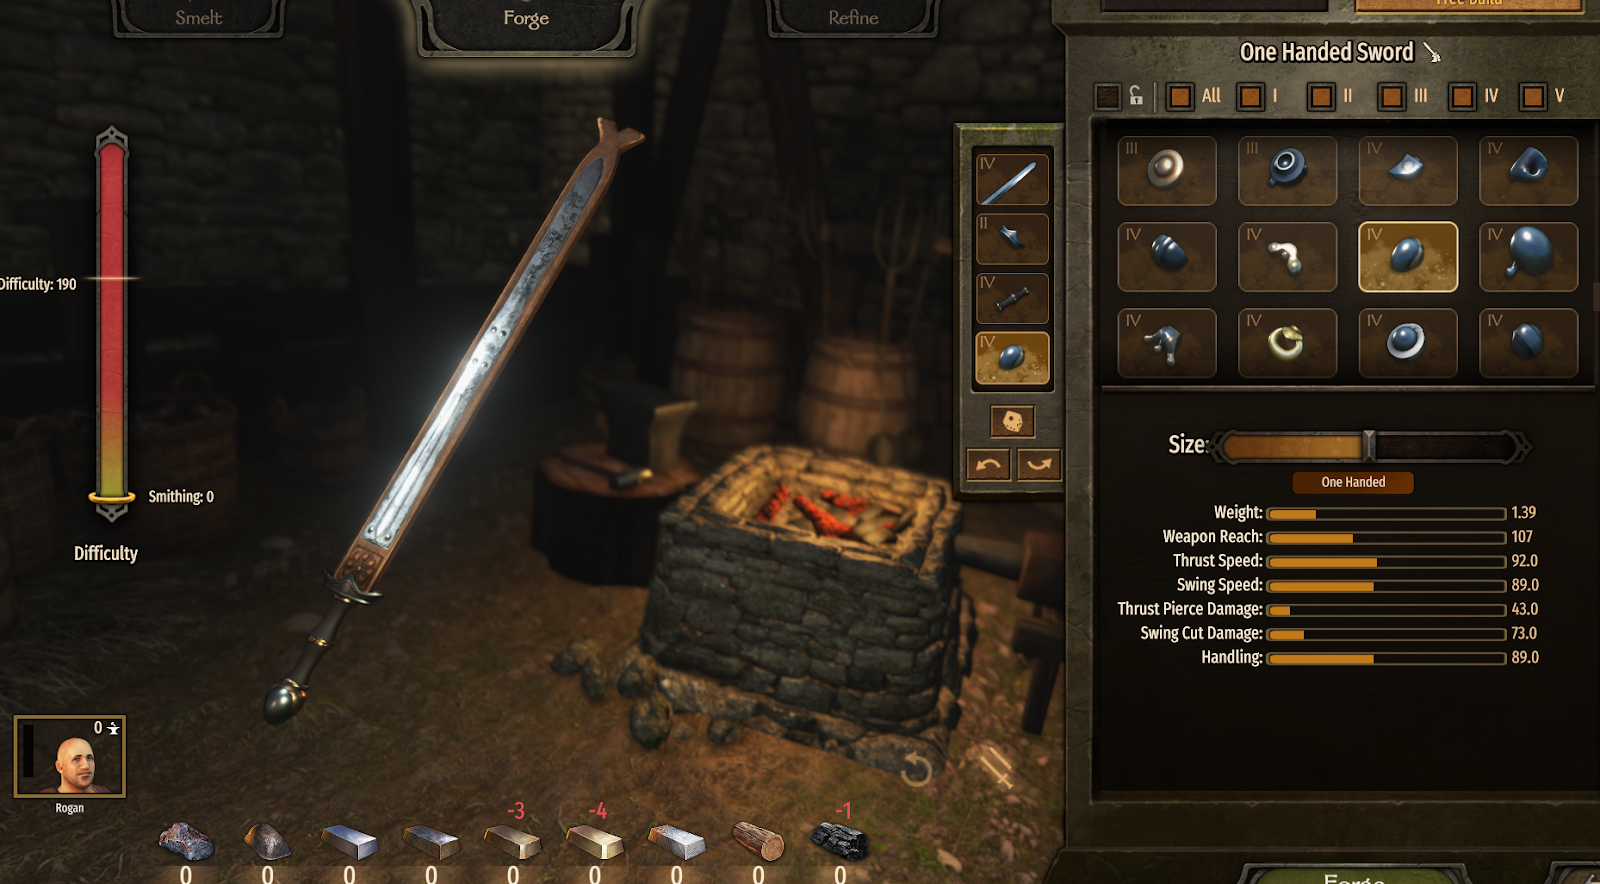
Picture 1: Fine Steel Cavalry Broadsword being created on Smithing screen.
Adding Weapons to the Smithing System
To be able to create a weapon on the Smithing screen, all the individual weapon parts need to be exported to the game separately. You can find out how to export assets to the editor on Asset Management. After the meshes are added to the editor, the mesh name and measurements specific to the added weapon part need to be put into the relevant XML document. Adding weapon parts is explained below by giving sword and dagger parts as examples (other weapon parts can be added to the editor using the same process).
Swords And Daggers
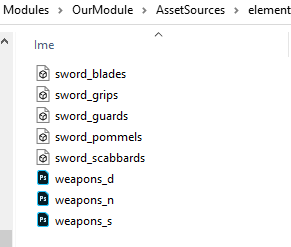
Five parts are needed to create a sword (similar to daggers). Those are the blade, guard, grip, pommel and optionally scabbard. All meshes’ pivot points need to be at the numeric centre of the object and the position of the object needs to be at the world origin (Picture 2, Picture 3). This way we can export all the parts in a single FBX file or export each part individually using separate FBX files. For example, we export all of the sword blades in a single FBX file. Other parts are also exported together to their respective FBX files (guards, grips, pommels, scabbards). (Picture 4)
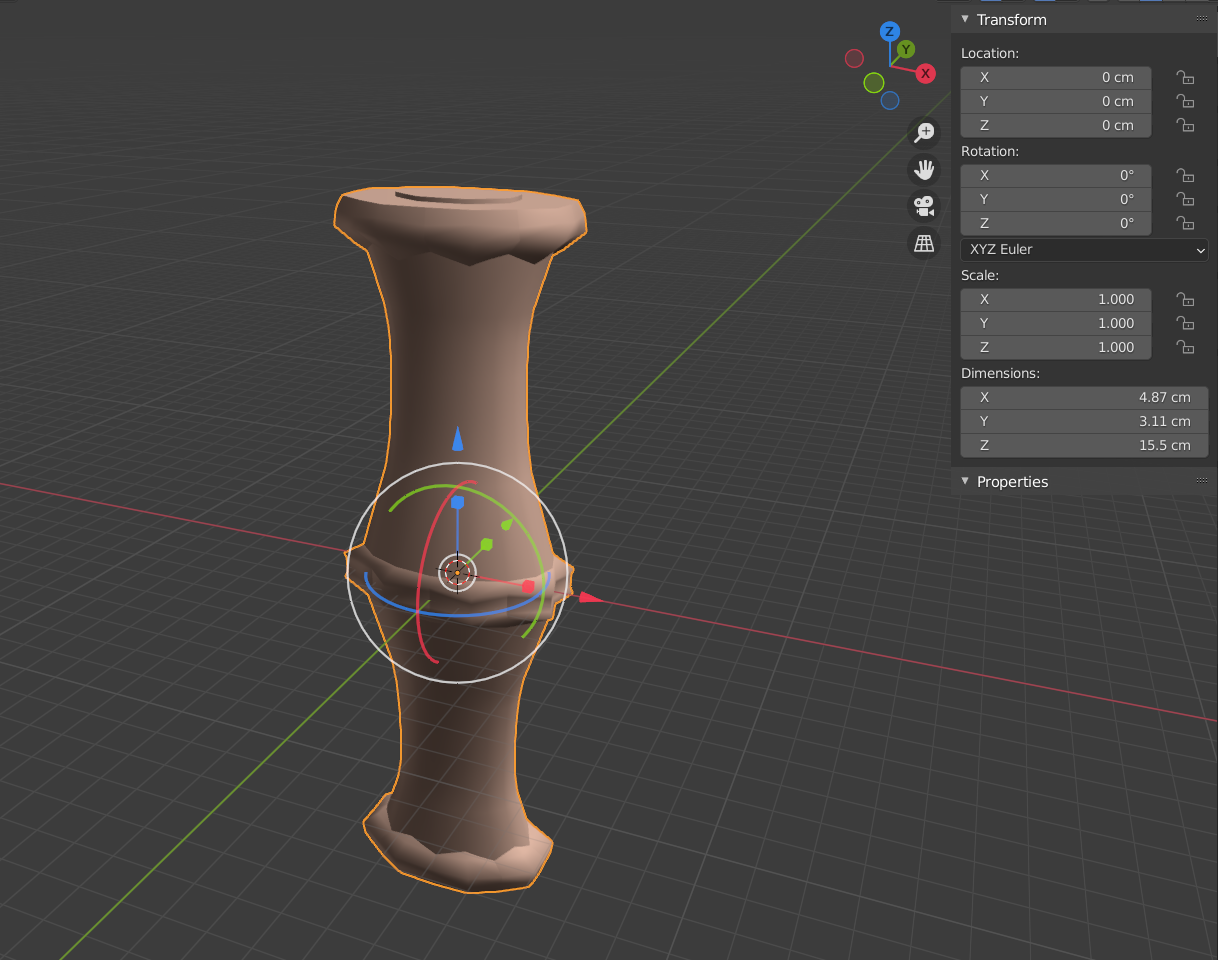
Picture 2: Example, battania_grip_1 mesh in Blender viewport before exporting.

Picture 3: All weapon parts positioned neatly at the world origin.
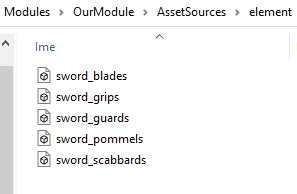
Picture 4: Sword parts directory hierarchy.
CraftingPieces XmlNode Example
<CraftingPieces>
  <CraftingPiece id="empire_blade_3"
                 name="{=kuROzU1J}Simple Warsword Blade"
                 tier="1"
                 piece_type="Blade"
                 mesh="empire_blade_3"
                 culture="Culture.empire"
                 length="91.3"
                 weight="0.93"
                 is_default="true">
    <BuildData previous_piece_offset="-0.4" />
    <BladeData stack_amount="3"
               physics_material="metal_weapon"
               body_name="bo_sword_one_handed"
               holster_mesh="empire_blade_3_scabbard_3">
      <Thrust damage_type="Pierce"
              damage_factor="2.4" />
      <Swing damage_type="Cut"
             damage_factor="2.8" />
    </BladeData>
    <Flags>
      <Flag name="Civilian"
            type="ItemFlags" />
    </Flags>
    <Materials>
      <Material id="Iron2"
                count="3" />
    </Materials>
  </CraftingPiece>
</CraftingPieces>
CraftingPieces/CraftingPiece Node
When a crafting piece is created the following pieces of information should be defined.
- id: Unique string id of the piece. Each piece must have a unique id to differ from other pieces.
- name: Name of the piece that will be shown to the players in the game.
- piece_type: References to the “CraftingPiece.PieceTypes”. PieceTypes are definitions that are used to label which part the piece belongs to. Each crafting piece is composed of different pieces.
- mesh: A unique mesh id is required to define the visual shape of the crafting piece.
- weight: Weight of the crafting piece in kilograms.
- length: Measured length of the piece in centimeters (Pivot point is always centered).
- culture (optional): Defined culture of the current item. If an item is set for a culture, the item will only be sold on the markets of the same culture.
- full_scale (optional): Defines scaling factors of the piece in dimensions. When set as “true” the piece should scale in all three dimensions. Setting it “false” scales in a single dimension which is the build axis.
- appearance (optional): A value (price) calculation factor.
- center_of_mass (optional): Center of mass percentage of the piece, normally 0.5 (in the middle).
- tier (optional): Defaults as “1”. Tier defines the quality of the crafting piece. Tier helps setting the weapon tier and the crafting difficulty.
- is_default (optional): When set as “true” the piece comes out unlocked for the crafting feature, if the piece is set as “false” the piece must be unlocked through crafting different weapons.
- is_hidden (optional): When set as “true” the piece won’t show up on the crafting feature. Therefore it won’t be usable. When this variable is not set or set as “false” the crafting piece is available for the crafting feature.
- item_holster_pos_shift (optional): Value given to this parameter sets position offset for the holster.
- excluded_item_usage_features (optional): “:” separated values of item usage features which the piece cannot use. For example, when “thrust” is defined as an exclusion on a weapon piece. A weapon with that piece can not make thrust attacks.
CraftingPieces/CraftingPiece/BuildData Node
- piece_offset: Given value sets distance adjustment for the piece from the origin of the weapon in centimeters.
- next_piece_offset: Given value sets the distance of the next piece in terms of centimeters. When a positive number is set, the distance to the next piece is closer. Negative values can be given to separate the pieces further apart.
- previous_piece_offset: Given value sets the distance of the previous piece in terms of centimeters. While the positive values bring pieces together, negative pieces set them further apart.
CraftingPieces/CraftingPiece/Materials/Material Node
Material sets the required number of materials needed to craft the piece. Materials are also used in the smelting formula. Results of the smelting can not be more than material count and can not result in materials that are not listed in the material list. (Current formula in Bannerlord generates 1 lesser quality material of the highest material defined) Multiple materials can be set for specific items. A sword guard might require 3 counts of Iron2 and 1 count of Iron4.
- id: References to the “CraftingMaterials”. CraftingMaterials are definitions used for pieces that generate a crafting piece when combined.
- count: Amount of material required to craft the piece.
CraftingPieces/CraftingPiece/Flags/Flag Node
Flags are used for defining different properties that allow crafted items to have different features. There are two different variables when a flag needs to be set;
name: References to the “ItemFlags” or “WeaponFlags”.
- ItemFlags
- ForceAttachOffHandPrimaryItemBone
- ForceAttachOffHandSecondaryItemBone
- AttachmentMask
- NotUsableByFemale
- NotUsableByMale
- DropOnWeaponChange
- DropOnAnyAction
- CannotBePickedUp
- CanBePickedUpFromCorpse
- QuickFadeOut
- WoodenAttack
- WoodenParry
- HeldInOffHand
- HasToBeHeldUp
- UseTeamColor
- Civilian
- DoNotScaleBodyAccordingToWeaponLength
- DoesNotHideChest
- NotStackable
- WeaponFlags
- MeleeWeapon
- RangedWeapon
- WeaponMask
- FirearmAmmo
- NotUsableWithOneHand
- NotUsableWithTwoHand
- HandUsageMask
- WideGrip
- AttachAmmoToVisual
- Consumable
- HasHitPoints
- DataValueMask
- HasString
- StringHeldByHand
- UnloadWhenSheathed
- AffectsArea
- AffectsAreaBig
- Burning
- BonusAgainstShield
- CanPenetrateShield
- CantReloadOnHorseback
- AutoReload
- TwoHandIdleOnMount
- NoBlood
- PenaltyWithShield
- CanDismount
- MissileWithPhysics
- MultiplePenetration
- CanKnockDown
- CanBlockRanged
- LeavesTrail
- CanCrushThrough
- UseHandAsThrowBase
- AmmoBreaksOnBounceBack
- AmmoCanBreakOnBounceBack
- AmmoBreakOnBounceBackMask
- AmmoSticksWhenShot
type: “ItemFlags” or “WeaponFlags”. WeaponFlags is the default if omitted.
CraftingTemplates XmlNode Example
<CraftingTemplates>

  <CraftingTemplate id="OneHandedSword"
                    item_modifier_group="sword"
                    item_holsters="sword_left_hip_3:sword_left_hip:sword_left_hip_2:sword_back"
                    piece_type_to_scale_holster_with="Blade"
                    hidden_piece_types_on_holster="Blade"
                    default_item_holster_position_offset="0,0,-0.1">
    <PieceDatas>
      <PieceData piece_type="Handle"
                 build_order="0" />
      <PieceData piece_type="Guard"
                 build_order="1" />
      <PieceData piece_type="Blade"
                 build_order="2" />
      <PieceData piece_type="Pommel"
                 build_order="-1" />
    </PieceDatas>
    <WeaponDescriptions>
      <WeaponDescription id="OneHandedSword" />
    </WeaponDescriptions>
    <StatsData>
      <StatData stat_type="Weight"
                max_value="7.0" />
      <StatData stat_type="WeaponReach"
                max_value="300" />
      <StatData stat_type="ThrustSpeed"
                max_value="200" />
      <StatData stat_type="SwingSpeed"
                max_value="200" />
      <StatData stat_type="ThrustDamage"
                max_value="500" />
      <StatData stat_type="SwingDamage"
                max_value="500" />
      <StatData stat_type="Handling"
                max_value="200" />
      <!--<StatData stat_type="FollowUp" max_value="200" />-->
    </StatsData>
    <UsablePieces>
      <UsablePiece piece_id="empire_blade_1" />
      <UsablePiece piece_id="empire_noble_blade_1" />
      <UsablePiece piece_id="empire_noble_blade_2" />
      <UsablePiece piece_id="mp_vlandian_arming_sword_blade"
                   mp_piece="true" />
      <UsablePiece piece_id="mp_vlandian_arming_sword_guard"
                   mp_piece="true" />
    </UsablePieces>
  </CraftingTemplate>
</CraftingTemplates>
CraftingTemplates/CraftingTemplate Node
When generating a crafting template the following values must be defined.
- id: Unique string id of the template. Each template must have a unique id to differ from other templates.
- item_modifier_group: A reference to an item modifier group from item_modifier_groups.xml.
For example both two handed maces and maces fall under the mace category here.
item_modifier_group="mace"
- item_holsters: Defines where the item can be holstered. For items of multiple pieces common holsters will be used within the game. Piece types should be separated by ”:”. Separated references can be found from item_holsters.xml.
- piece_type_to_scale_holster_with: This defines the piece type to scale the holster mesh (if exists) with. As an example if the “Blade” is set for this parameter, the blade piece will be scaling the holster of the weapon. Other pieces will be disregarded.
- hidden_piece_types_on_holster: “:” separated values of “CraftingPiece.PieceTypes” to be hidden in the holster mesh.
- default_item_holster_position_offset: Default position offset for the holster. This is set in the format of “x,y,z”. Applies to all weapons that are using the template. Further adjustment per piece can be applied from item_holster_pos_shift variable under a crafting piece.
- use_weapon_as_holster_mesh: When set as “true”, all weapons using the template will have itself as the holster mesh. The weapon itself will appear in place of the holster.
- rotate_weapon_in_holster: When set as “true”, all weapons using the template will be put in the opposite direction in the holster mesh. Useful for javelins to have their blades sticking out.
- always_show_holster_with_weapon: When set as “true”, the weapon mesh inside the holster mesh will not be hidden when the weapon is drawn. This feature is most useful for weapons with multiple stacks inside the holster such as quivers.
CraftingTemplates/CraftingTemplate/PieceDatas/PieceData Node
Defines which type of pieces can be used with the template and in which order they will be assembled.
- piece_type: References to the “CraftingPiece.PieceTypes”.
- build_order: In which order the piece is going to be built. All weapons are built around the handle pieces. Since all weapons must have handles, the order of a handle should be set to 0. Any piece which is on top of a handle should have incremental positive values and any piece which is on the other side of the handle should have incremental negative values.
CraftingTemplates/CraftingTemplate/WeaponDescriptions/WeaponDescription Node
A WeaponDescription is simply the primary usage or one of the alternative usages of a weapon. They are defined in weapon_descriptions.xml and referenced in the template.
- id: Unique string id of the description. Each description must have a unique id to differ from other descriptions.
CraftingTemplates/CraftingTemplate/StatsData Node
This is used for defining which basic stats for the weapon will be shown on the inventory or the crafting screen.
- weapon_description (optional): If specified, given data will be used only for the defined description instead of the template. When at least one StatsData node has this optional attribute defined, either all weapon descriptions referenced in the template must have their own StatsData entries or a default one must be provided before the specific one.
An example is given below;
<StatsData usage_data="Javelin">
    <StatData stat_type="Weight"
        max_value="7.0" />
    <StatData stat_type="WeaponReach"
        max_value="300" />
    <StatData stat_type="MissileDamage"
        max_value="500" />
    <StatData stat_type="MissileSpeed"
        max_value="200" />
    <StatData stat_type="Accuracy"
        max_value="100" />
    <StatData stat_type="StackAmount"
        max_value="5" />
</StatsData>
CraftingTemplates/CraftingTemplate/StatsData/StatData Node
- stat_type: References to the “CraftingTemplate.CraftingStatTypes”. Defines different characteristics of a weapon.
- max_value: Maximum value defines the upper limit a stat can have.
CraftingTemplates/CraftingTemplate/UsablePieces/UsablePiece Node
- piece_id: References to the “CraftingPiece.PieceTypes”.
Example: In order to enable spear_blade_7 as a javelin part, it must be listed under the “javelin” id. The same piece must also be listed on the weapon_descriptions.xml under the related part.
<UsablePiece piece_id="spear_blade_7" />
WeaponDescriptions XmlNode Example
<WeaponDescriptions>
  <WeaponDescription id="OneHandedSword"
                     weapon_class="OneHandedSword"
                     item_usage_features="onehanded:block:shield:swing:thrust">
    <WeaponFlags>
      <WeaponFlag value="MeleeWeapon"/>
    </WeaponFlags>
    <AvailablePieces>
      <AvailablePiece id="empire_blade_1"/>
      <AvailablePiece id="empire_noble_blade_1"/>
      <AvailablePiece id="empire_noble_blade_2"/>
      ...
    </AvailablePieces>
  </WeaponDescription>
</WeaponDescriptions>
WeaponDescriptions/WeaponDescription Node
A Weapon description is used for defining different usages and features. Defined parts listed under the crafting templates nodes must also be listed under the weapon_descriptions.xml to be used.
- id: Unique string id of the WeaponDescription.
- weapon_class: References to the “WeaponClass”. This defines which weapon type will be used by the weapon descriptions.
- item_usage_features: “:” separated values of item usage features which are available for the description. This is used for defining possible features (“_” separated pieces) of an item_usage_set (from item_usage_sets.xml).
An example is listed below;
item_usage_features="onehanded:block:shield:swing:thrust">
- rotated_in_hand: When set as “true”, all weapons using the description will be held 180 degrees rotated in hand. A common use case for this is throwable polearms.
- use_center_of_mass_as_hand_base: When set as “true”, instead of the usual handle pivot, the weapon will be held from the calculated center of mass position. This is also used in throwable polearms.
WeaponDescriptions/WeaponDescription/WeaponFlags/WeaponFlag Node
Default WeaponFlags used for all weapons for the description.
- value: References to the “WeaponFlags”.
WeaponDescriptions/WeaponDescription/AvailablePieces/AvailablePiece Node
List of available pieces.
- id: A reference to a crafting piece.
Example: Adding crafting pieces to existing weapon templates via XML & XSLT
Example case: We have created 8 crafting pieces suitable for one handed swords with the following mesh names in the .fbx files:
- yourforumusername_blade_1
- yourforumusername_blade_2
- yourforumusername_guard_1
- yourforumusername_guard_2
- yourforumusername_grip_1
- yourforumusername_grip_2
- yourforumusername_pommel_1
- yourforumusername_pommel_2
We have also created 4 crafting pieces suitable for two handed swords:
- yourforumusername_blade_3
- yourforumusername_guard_3
- yourforumusername_grip_3
- yourforumusername_pommel_3
We haven’t yet created our new module which is why we launched the Mount & Blade II: Bannerlord Modding Kit, opened the Editor, clicked on File->Create New Module, gave our module a name “OurModule” and clicked “Create”.
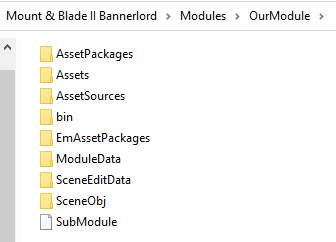
We have then added all of the meshes and materials to our module with the help of the editor. This requires more than just adding the source files to the AssetSources\element folder. The files then need to be exported to the game via the Resource browser and the module published.
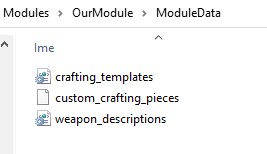
Now, we want to do the necessary steps for these crafting pieces to appear in-game. We need to create a new XML file within our module:
- Modules\OurModule\ModuleData\Custom_crafting_pieces.xml
We also need to modify the native Crafting_templates.xml and Weapon_descriptions.xml via XSLT. That’s why we need to create these 2 files within our module:
- Modules\OurModule\ModuleData\Crafting_templates.xsl
- Modules\OurModule\ModuleData\Weapon_descriptions.xsl
SubModule.xml
We also need to add the new XML & XSL files to our SubModule.xml:
<Xmls>
    <XmlNode>
        <XmlName id="CraftingPieces" path="custom_crafting_pieces"/>
        <IncludedGameTypes>
            <GameType value="Campaign"/>
            <GameType value="CampaignStoryMode"/>
        </IncludedGameTypes>
    </XmlNode>
    <XmlNode>
        <XmlName id="CraftingTemplates" path="crafting_templates"/>
        <IncludedGameTypes>
            <GameType value="Campaign"/>
            <GameType value="CampaignStoryMode"/>
        </IncludedGameTypes>
    </XmlNode>
    <XmlNode>
        <XmlName id="WeaponDescriptions" path="weapon_descriptions"/>
        <IncludedGameTypes>
            <GameType value="Campaign"/>
            <GameType value="CampaignStoryMode"/>
        </IncludedGameTypes>
    </XmlNode>
</Xmls>
Custom_crafting_pieces.xml
Within the Custom_crafting_pieces.xml, we’ll add the 12 crafting pieces. We’ll also define all of the required properties of these pieces as explained in this document above.
<?xml version="1.0" encoding="utf-8"?>
<CraftingPieces>
  <!-- #Blades -->
  <CraftingPiece id="yourforumusername_blade_1"
                 name="{=}Cool Blade 1"
                 tier="1"
                 piece_type="Blade"
                 mesh="yourforumusername_blade_1"
                 culture="Culture.battania"
                 length="80.8"
                 weight="0.81">
    <BladeData physics_material="metal_weapon"
               body_name="bo_sword_one_handed"
               holster_mesh="yourforumusername_blade_scabbard_1">
      <Thrust damage_type="Pierce"
              damage_factor="3.1" />
      <Swing damage_type="Cut"
             damage_factor="4.1" />
    </BladeData>
    <Flags>
      <Flag name="Civilian"
            type="ItemFlags" />
    </Flags>
    <Materials>
      <Material id="Iron6"
                count="2" />
    </Materials>
  </CraftingPiece>
  <CraftingPiece id="yourforumusername_blade_2"
                 name="{=}Cool Blade 2"
                 tier="1"
                 piece_type="Blade"
                 mesh="yourforumusername_blade_2"
                 culture="Culture.battania"
                 length="80.8"
                 weight="1.5">
    <BladeData physics_material="metal_weapon"
               body_name="bo_sword_one_handed"
               holster_mesh="yourforumusername_blade_scabbard_2">
      <Thrust damage_type="Pierce"
              damage_factor="2.2" />
      <Swing damage_type="Cut"
             damage_factor="3.1" />
    </BladeData>
    <Flags>
      <Flag name="Civilian"
            type="ItemFlags" />
    </Flags>
    <Materials>
      <Material id="Iron3"
                count="3" />
    </Materials>
  </CraftingPiece>
  <CraftingPiece id="yourforumusername_blade_3"
                 name="{=}Cool Blade 3"
                 tier="2"
                 piece_type="Blade"
                 mesh="yourforumusername_blade_3"
                 culture="Culture.battania"
                 length="80.8"
                 weight="1.5">
    <BladeData physics_material="metal_weapon"
               body_name="bo_sword_one_handed"
               holster_mesh="yourforumusername_blade_scabbard_3">
      <Thrust damage_type="Pierce"
              damage_factor="2.2" />
      <Swing damage_type="Cut"
             damage_factor="3.1" />
    </BladeData>
    <Flags>
      <Flag name="Civilian"
            type="ItemFlags" />
    </Flags>
    <Materials>
      <Material id="Iron3"
                count="3" />
    </Materials>
  </CraftingPiece>
  <!-- #Guards -->
  <CraftingPiece id="yourforumusername_guard_1"
                 name="{=}Cool Guard 1"
                 tier="1"
                 piece_type="Guard"
                 mesh="yourforumusername_guard_1"
                 culture="Culture.battania"
                 length="5.3"
                 weight="0.097">
    <BuildData next_piece_offset="1.8" />
    <StatContributions armor_bonus="3" />
    <Materials>
      <Material id="Iron5"
                count="1" />
    </Materials>
  </CraftingPiece>
  <CraftingPiece id="yourforumusername_guard_2"
                 name="{=}Cool Guard 2"
                 tier="1"
                 piece_type="Guard"
                 mesh="yourforumusername_guard_2"
                 culture="Culture.battania"
                 length="5.7"
                 weight="0.300">
    <BuildData next_piece_offset="1.8" />
    <StatContributions armor_bonus="3" />
    <Materials>
      <Material id="Iron1"
                count="1" />
    </Materials>
  </CraftingPiece>
  <CraftingPiece id="yourforumusername_guard_3"
                 name="{=}Cool Guard 3"
                 tier="1"
                 piece_type="Guard"
                 mesh="yourforumusername_guard_3"
                 culture="Culture.battania"
                 length="2.6"
                 weight="0.086">
    <BuildData next_piece_offset="0.3" />
    <StatContributions armor_bonus="1" />
    <Materials>
      <Material id="Iron1"
                count="1" />
    </Materials>
  </CraftingPiece>
  <!-- #Grips -->
  <CraftingPiece id="yourforumusername_grip_1"
                 name="{=}Cool Grip 1"
                 tier="1"
                 piece_type="Handle"
                 mesh="yourforumusername_grip_1"
                 culture="Culture.battania"
                 length="19.17"
                 weight="0.225"
                 item_holster_pos_shift="0,0,-0.03">
    <BuildData piece_offset="-1.88"
               previous_piece_offset="0.1"
               next_piece_offset="0.1" />
    <Materials>
      <Material id="Iron5"
                count="2" />
    </Materials>
  </CraftingPiece>
  <CraftingPiece id="yourforumusername_grip_2"
                 name="{=}Cool Grip 2"
                 tier="1"
                 piece_type="Handle"
                 mesh="yourforumusername_grip_2"
                 culture="Culture.aserai"
                 length="19.855"
                 weight="0.165">
    <BuildData piece_offset="-2.18"
               previous_piece_offset="0.2"
               next_piece_offset="0.2" />
    <Materials>
      <Material id="Iron2"
                count="3" />
    </Materials>
  </CraftingPiece>
  <CraftingPiece id="yourforumusername_grip_3"
                 name="{=}Cool Grip 3"
                 tier="2"
                 piece_type="Handle"
                 mesh="yourforumusername_grip_3"
                 culture="Culture.sturgia"
                 length="29.4"
                 weight="0.1">
    <BuildData piece_offset="-9.9"
               next_piece_offset="0.1"
               previous_piece_offset="0.3" />
    <Materials>
      <Material id="Iron2"
                count="2" />
    </Materials>
  </CraftingPiece>
  <!-- #Pommels -->
  <CraftingPiece id="yourforumusername_pommel_1"
                 name="{=}Cool Pommel 1"
                 tier="1"
                 piece_type="Pommel"
                 mesh="yourforumusername_pommel_1"
                 culture="Culture.battania"
                 length="2.5"
                 weight="0.14">
    <Materials>
      <Material id="Iron5"
                count="1" />
    </Materials>
  </CraftingPiece>
  <CraftingPiece id="yourforumusername_pommel_2"
                 name="{=}Cool Pommel 2"
                 tier="1"
                 piece_type="Pommel"
                 mesh="yourforumusername_pommel_2"
                 culture="Culture.battania"
                 length="4.027"
                 weight="0.12">
    <Materials>
      <Material id="Iron2"
                count="1" />
    </Materials>
  </CraftingPiece>
  <CraftingPiece id="yourforumusername_pommel_3"
                 name="{=}Cool Pommel 3"
                 tier="2"
                 piece_type="Pommel"
                 mesh="yourforumusername_pommel_3"
                 culture="Culture.sturgia"
                 length="3.76"
                 weight="0.15">
    <Materials>
      <Material id="Iron2"
                count="1" />
    </Materials>
  </CraftingPiece>
</CraftingPieces>
Crafting_templates.xsl
Now, we need to add the crafting pieces to the Crafting_templates.xsl:
<xsl:stylesheet version="1.0" xmlns:xsl="http://www.w3.org/1999/XSL/Transform">

    <xsl:output omit-xml-declaration="yes"/>

    <xsl:template match="@*|node()">
        <xsl:copy>
            <xsl:apply-templates select="@*|node()"/>
        </xsl:copy>
    </xsl:template>

    <xsl:template match="CraftingTemplate[@id='OneHandedSword']/UsablePieces/UsablePiece[1]">
        <UsablePiece piece_id="yourforumusername_blade_1"/>
        <UsablePiece piece_id="yourforumusername_blade_2"/>
        <UsablePiece piece_id="yourforumusername_guard_1"/>
        <UsablePiece piece_id="yourforumusername_guard_2"/>
        <UsablePiece piece_id="yourforumusername_grip_1"/>
        <UsablePiece piece_id="yourforumusername_grip_2"/>
        <UsablePiece piece_id="yourforumusername_pommel_1"/>
        <UsablePiece piece_id="yourforumusername_pommel_2"/>
        <xsl:copy>
            <xsl:apply-templates select="@*|node()"/>
        </xsl:copy>
    </xsl:template>

<xsl:template match="CraftingTemplate[@id='TwoHandedSword']/UsablePieces/UsablePiece[1]">
        <UsablePiece piece_id="yourforumusername_blade_3"/>
        <UsablePiece piece_id="yourforumusername_guard_3"/>
        <UsablePiece piece_id="yourforumusername_grip_3"/>
        <UsablePiece piece_id="yourforumusername_pommel_3"/>
        <xsl:copy>
            <xsl:apply-templates select="@*|node()"/>
        </xsl:copy>
    </xsl:template>

</xsl:stylesheet>
The above XSLT code modifies the two native crafting templates “OneHandedSword” and “TwoHandedSword”. The use of XSLT is required in order to modify the existing templates. If we were to add a new template, for example “Firearms”, the use of XSLT wouldn’t be required. Instead, we could simply create a new custom_crafting_templates.xml and add the new template there.
Weapon_descriptions.xsl
We also need to modify the Weapon_descriptions.xsl with the following:
<xsl:stylesheet version="1.0" xmlns:xsl="http://www.w3.org/1999/XSL/Transform">

    <xsl:output omit-xml-declaration="yes"/>

    <xsl:template match="@*|node()">
        <xsl:copy>
            <xsl:apply-templates select="@*|node()"/>
        </xsl:copy>
    </xsl:template>

    <xsl:template match="WeaponDescription[@id='OneHandedSword']/AvailablePieces/AvailablePiece[1]">
        <AvailablePiece id="yourforumusername_blade_1"/>
        <AvailablePiece id="yourforumusername_blade_2"/>
        <AvailablePiece id="yourforumusername_guard_1"/>
        <AvailablePiece id="yourforumusername_guard_2"/>
        <AvailablePiece id="yourforumusername_grip_1"/>
        <AvailablePiece id="yourforumusername_grip_2"/>
        <AvailablePiece id="yourforumusername_pommel_1"/>
        <AvailablePiece id="yourforumusername_pommel_2"/>
        <xsl:copy>
            <xsl:apply-templates select="@*|node()"/>
        </xsl:copy>
    </xsl:template>

<xsl:template match="WeaponDescription[@id='TwoHandedSword']/AvailablePieces/AvailablePiece[1]">
        <AvailablePiece id="yourforumusername_blade_3"/>
        <AvailablePiece id="yourforumusername_guard_3"/>
        <AvailablePiece id="yourforumusername_grip_3"/>
        <AvailablePiece id="yourforumusername_pommel_3"/>
        <xsl:copy>
            <xsl:apply-templates select="@*|node()"/>
        </xsl:copy>
    </xsl:template>

</xsl:stylesheet>
That’s it. Our crafting pieces will now show up on the crafting screen in-game.
Example Mod Download
If you would like to download the example module presented above click here.