Implementing Flora
Flora is one of the most important rendering aspects in game engines. It takes up a large portion of the overall rendering task when it comes to performance. While creating a new flora mesh one should make sure that the mesh has a low amount of polygon overdraw.
There is also a tradeoff between empty pixels in texture (which increases overdraw) and the triangle count of the mesh (which increases the polygon count cost). The optimum triangle count and the UV layout may change depending on the specific case.
Flora meshes are optimized render objects designed to be drawn in large scale view distances with large amounts of instances.
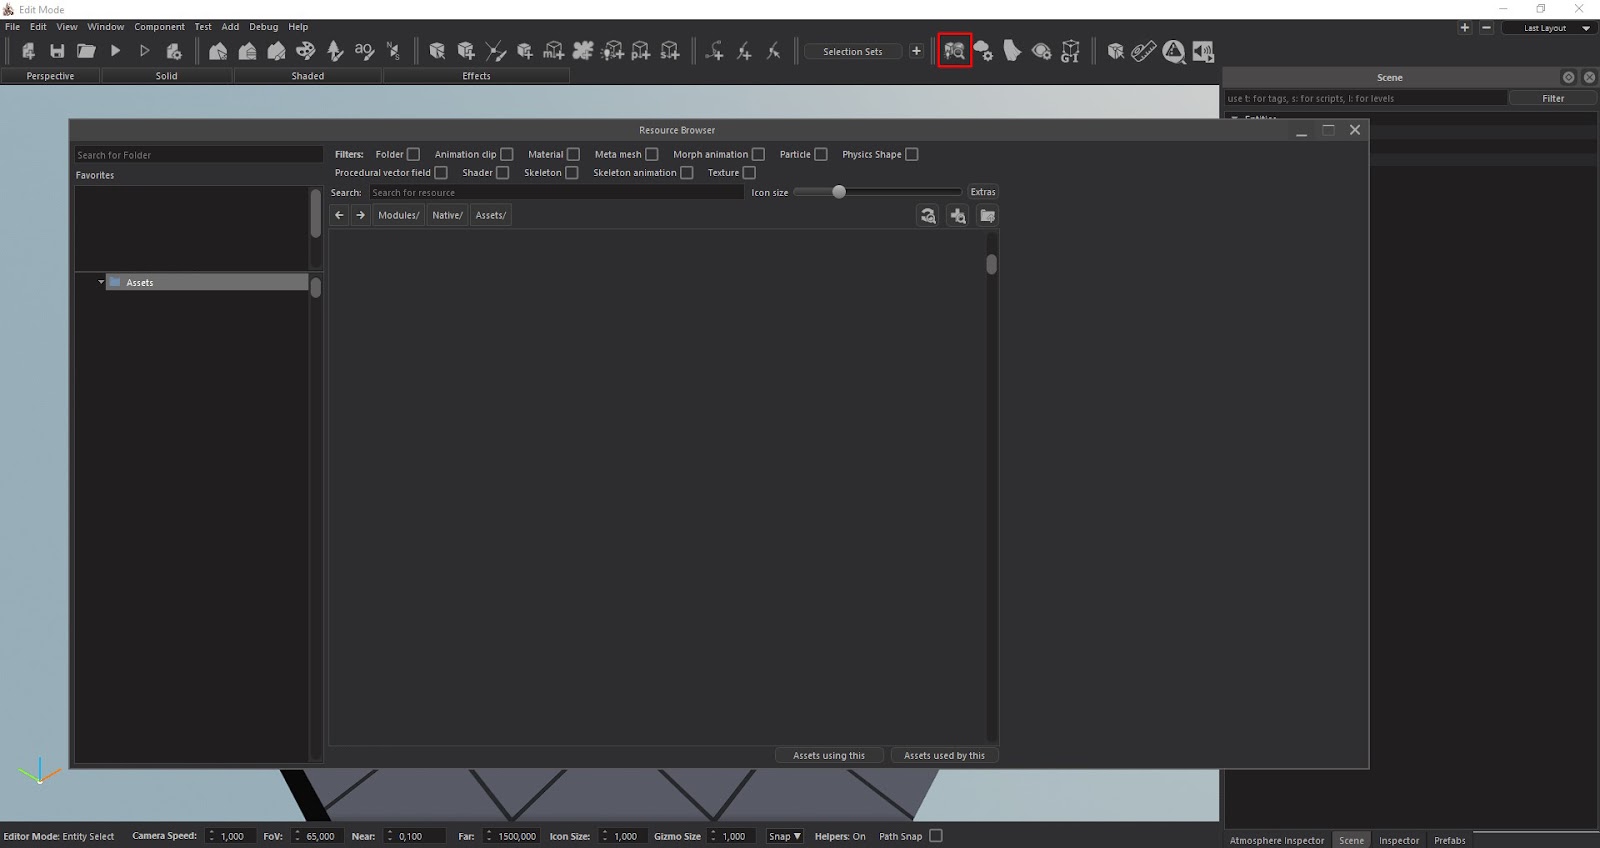
To be able to add, remove or fix flora assets, first you need to open the “Resource Browser”.
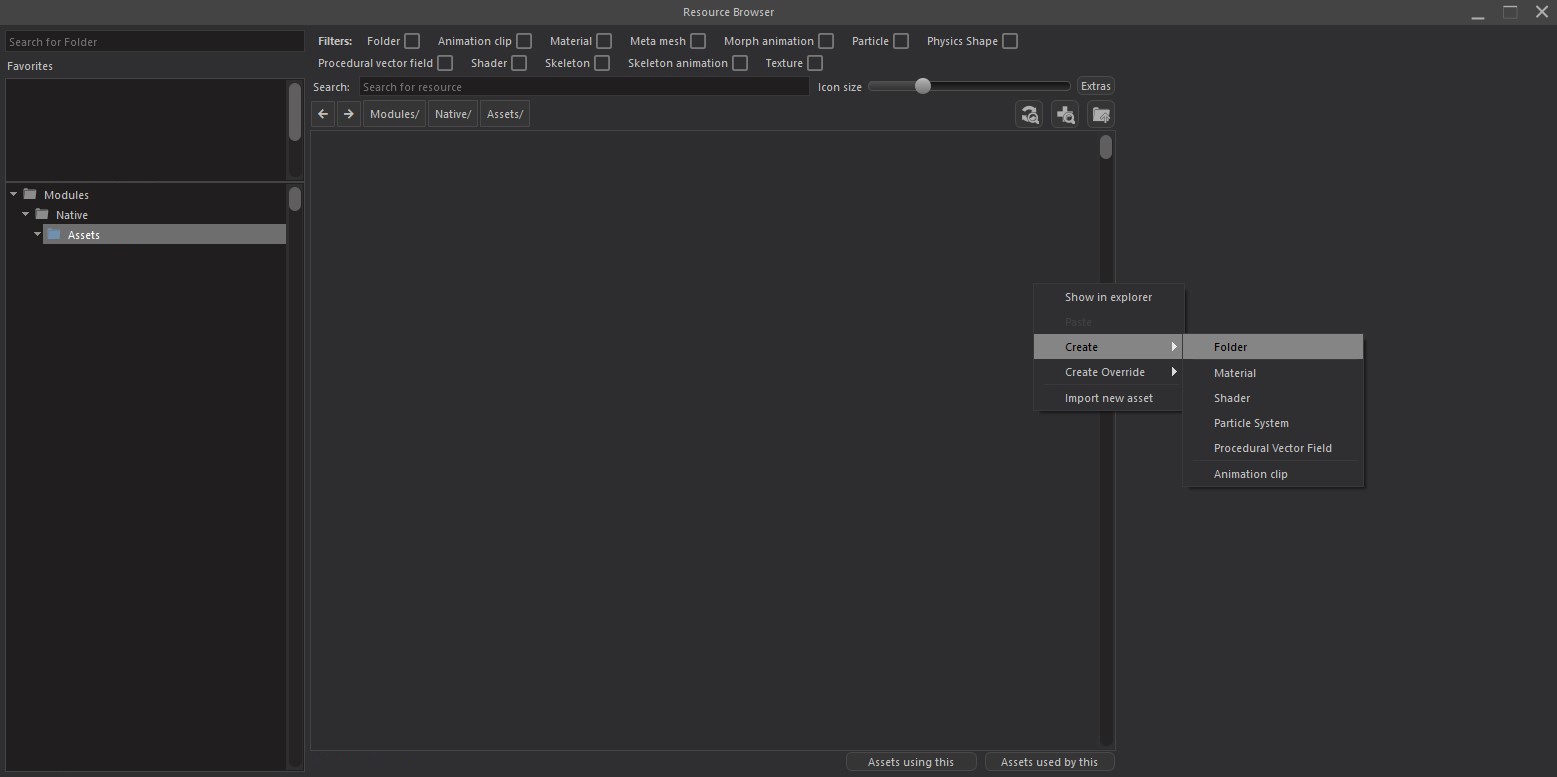
In the Assets folder, right-click on an empty space and create a new folder within the resource browser.
Open your newly created folder and Import all of your meshes and textures one at a time.

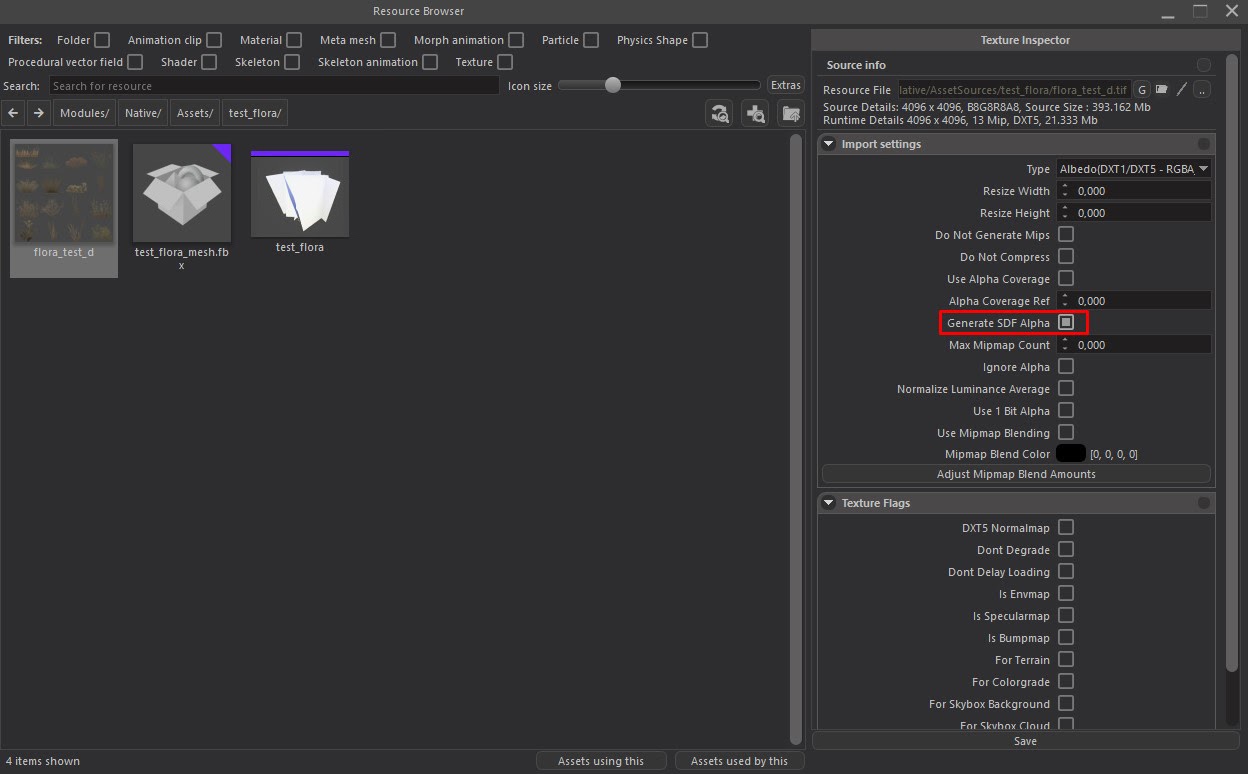
Once imported, to be able to create SDF Alpha from the diffuse texture, you will need to check “Generate SDF Alpha” on the “Texture inspector” panel that opens up on the right side of the screen when a texture file is selected, and click save on the same panel.
SDF Alpha is a technique that we use to improve vegetation alpha performance in our engine. If not applied, the embedded alpha channel of the texture will not be processed.
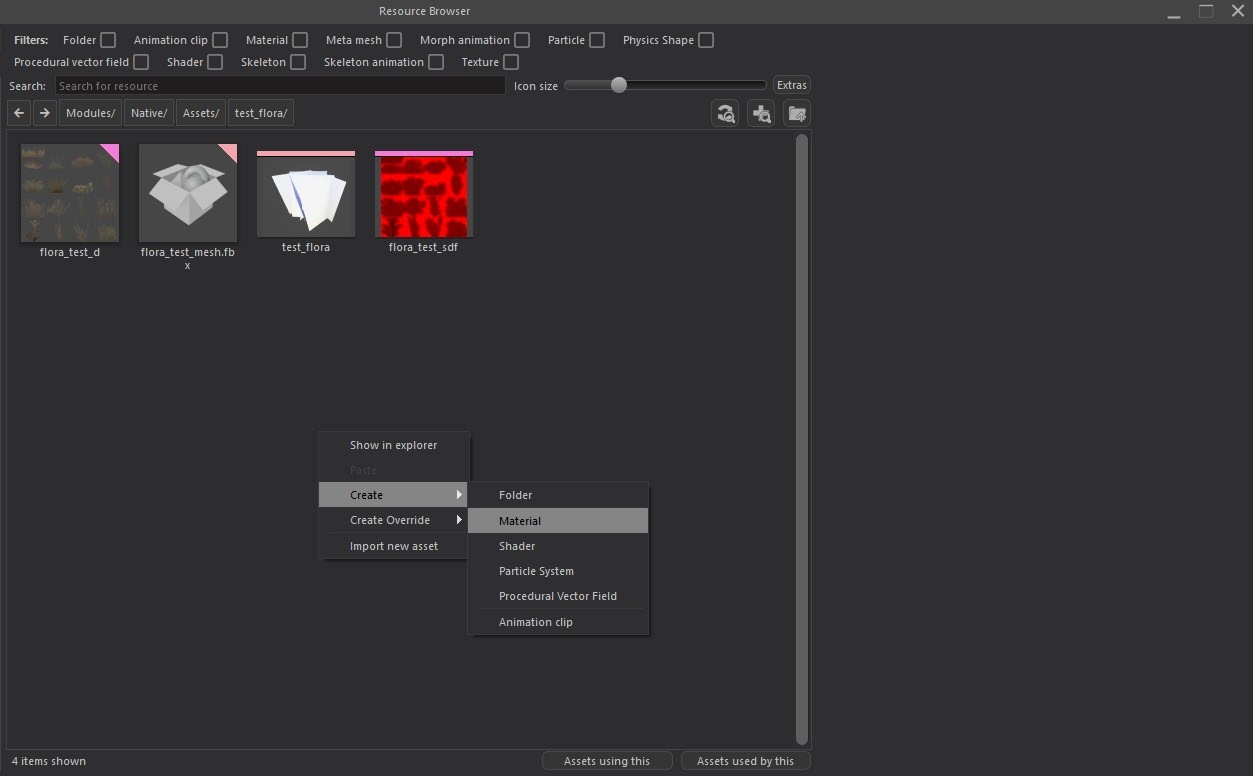
To create a Flora Material, right click on an empty area in the Resource Browser, then click Create>Material and after that you can give a name to your material.
If you want to use materials that already exist or were created by you in the editor for your newly imported meshes, you can rename the materials of your meshes in the 3d modelling program after the existing materials that you want to use in the editor. After the import, the editor assigns those materials to your meshes automatically.
Before diving into “material settings”, please check Material Editor for more information.
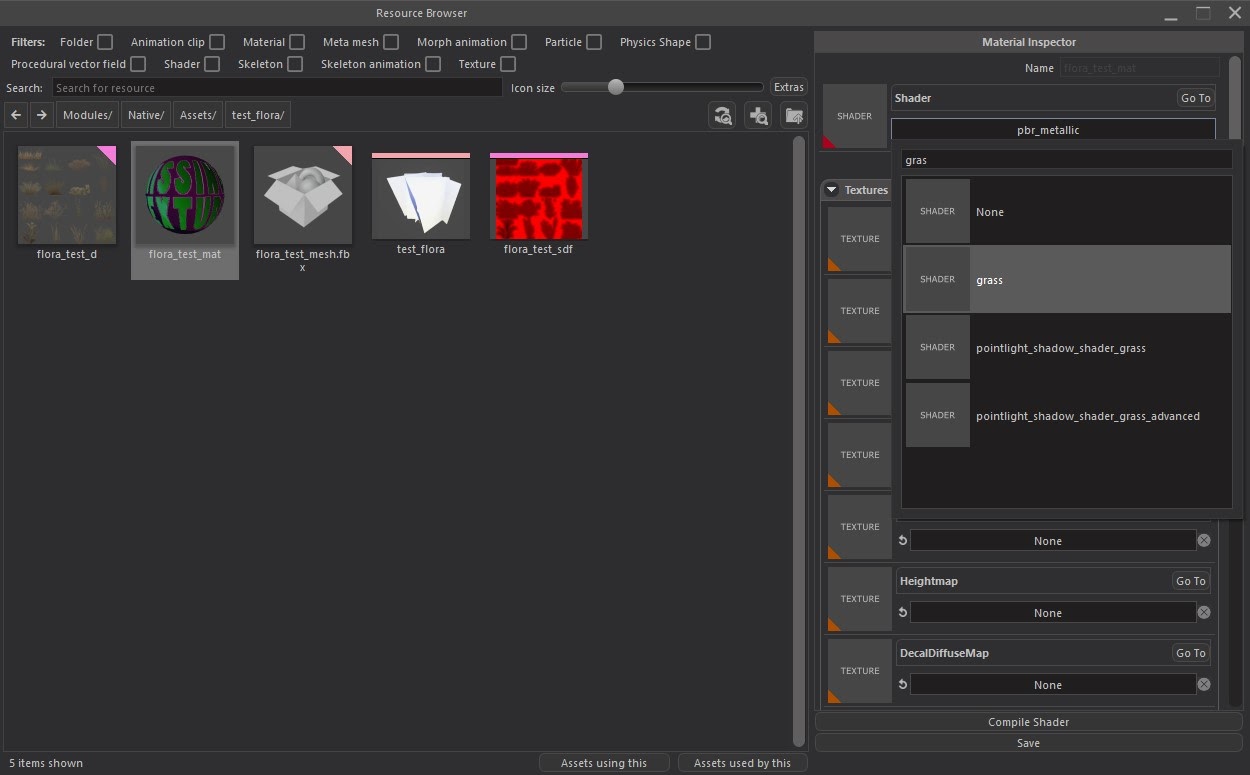
Click on the newly created material and select the shader that you want to use on the shader panel on the right. It is important to discern the type of shader you want to use, e.g. if our flora is grass, we need to select the grass shader, for trees and shrubs we select the flora_leaf shader. For the purpose of this documentation we have created grass as a flora and selected the grass_shader.
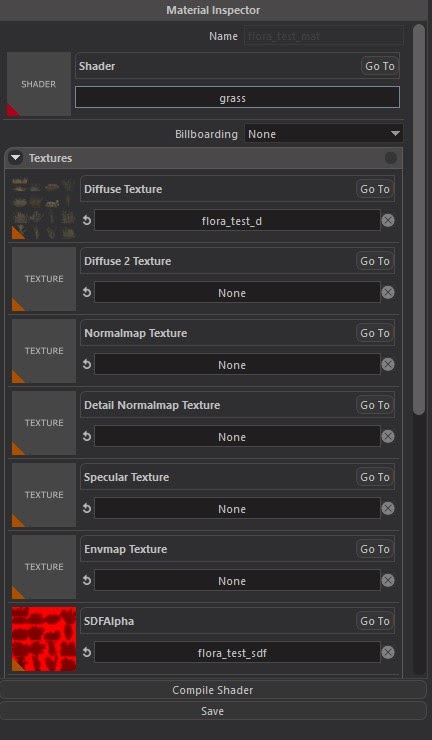
After selecting the shader for flora we need to connect (define) our textures to the flora materials. To achieve this, you can search for the texture in the Textures Panel or just drag and drop it to the texture slots from the Resource Browser. The same procedure should be followed for SDF Alphas.
Make sure to save your changes by pressing “save” at the bottom of the Material Inspector, otherwise materials return to their default settings.
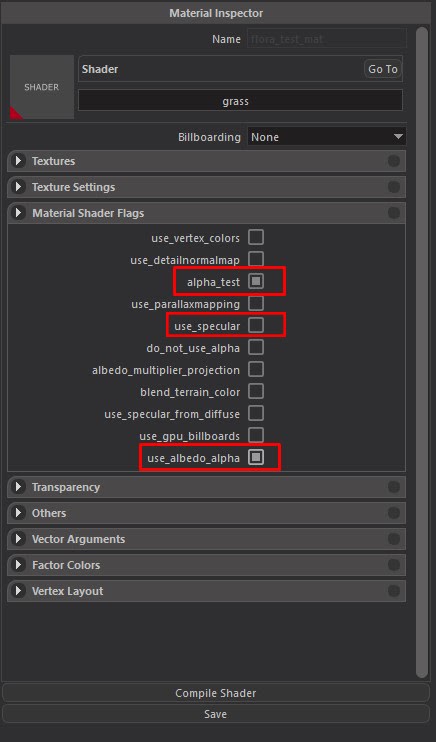
Next we are going to check alpha_test and use_albedo_alpha flags. Do NOT check the use_specular flag for Grass shader in order not to adversely affect performance.
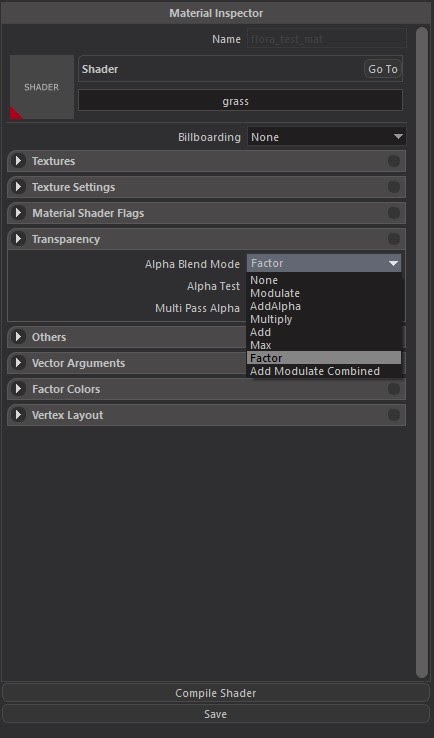
Then we move on to the “Transparency” tab and choose “Factor” from the Alpha Blend Mode drop down list and give a value to be used as a cutoff value for the “Alpha Test”. For most cases, a value of 45 would be suitable.
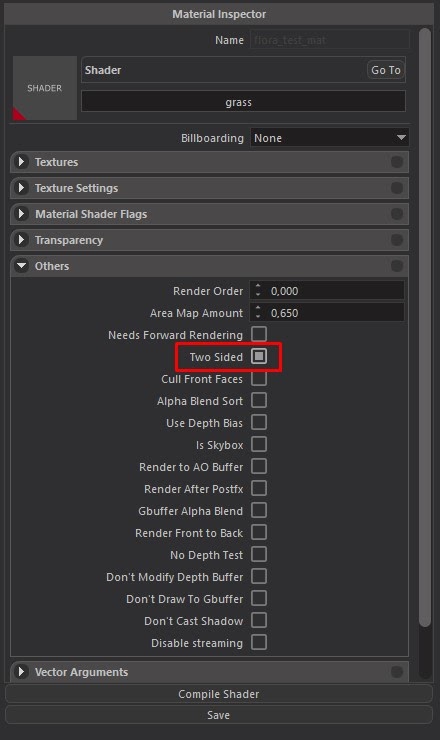
For the last step of our material settings we check the “Two Sided” box under the “Others” segment and then save.
 ,
,
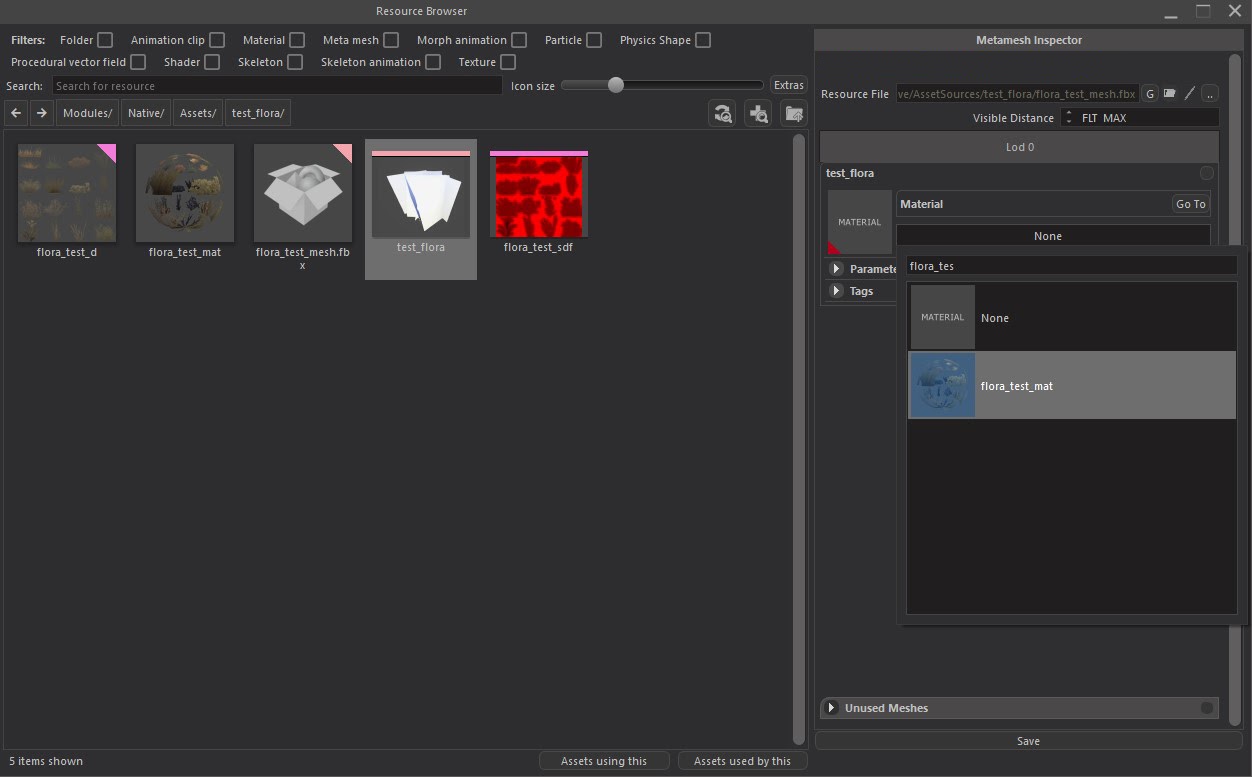
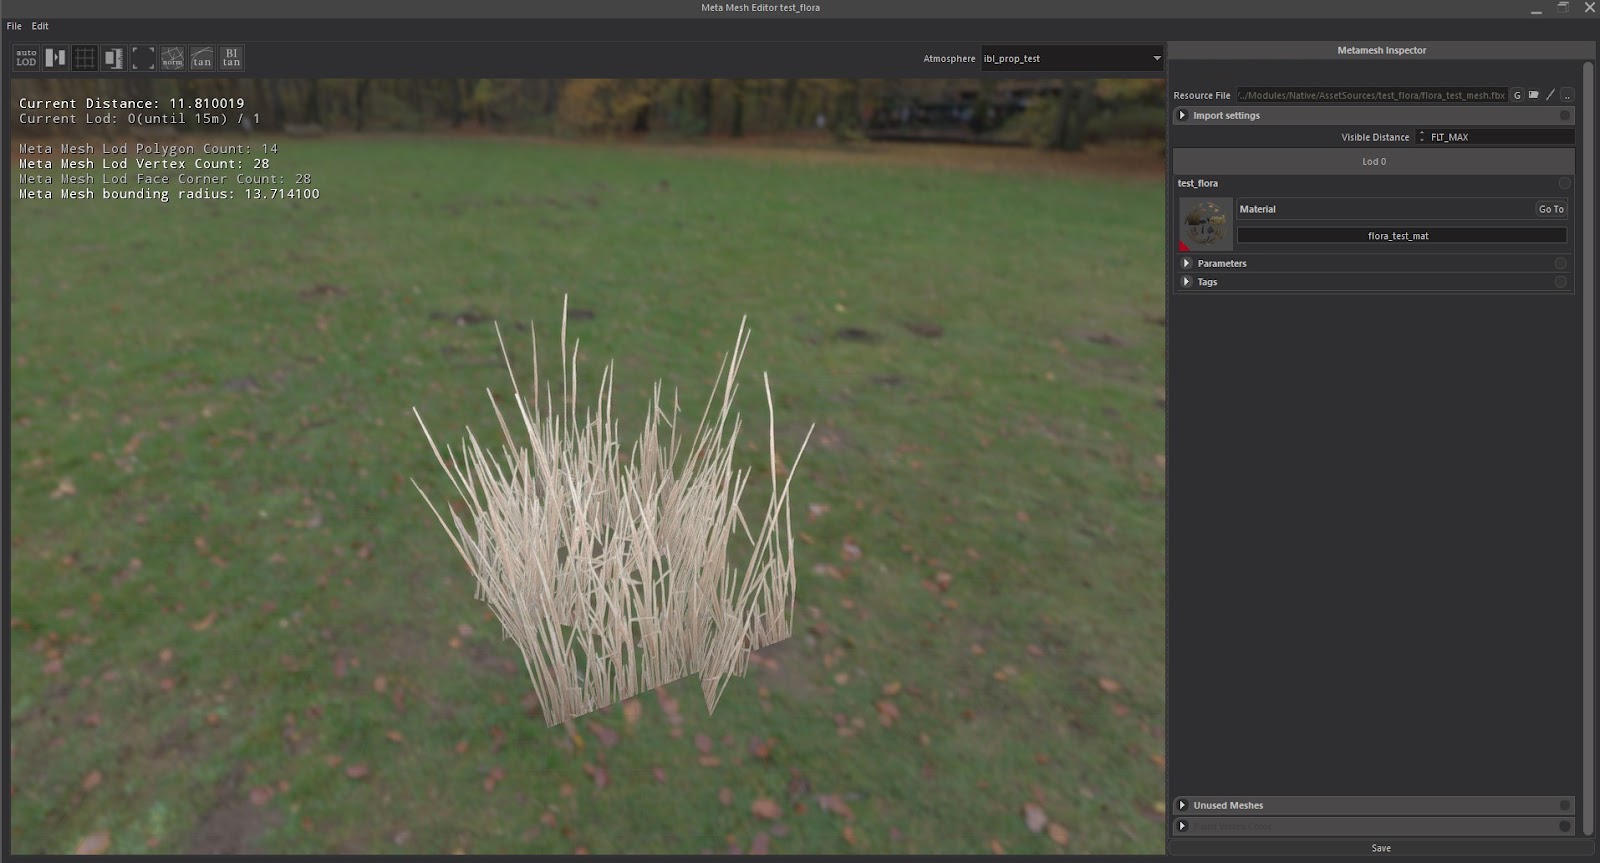
Now that the material settings are done, after selecting the related mesh, we can search for the name of the material on the right side of the screen and apply it to the selected mesh and save. Or we can also select/drag/drop. We can then doubleclick on the mesh in the mesh editor and see if the material has been applied or not.
Flora Kind Editor
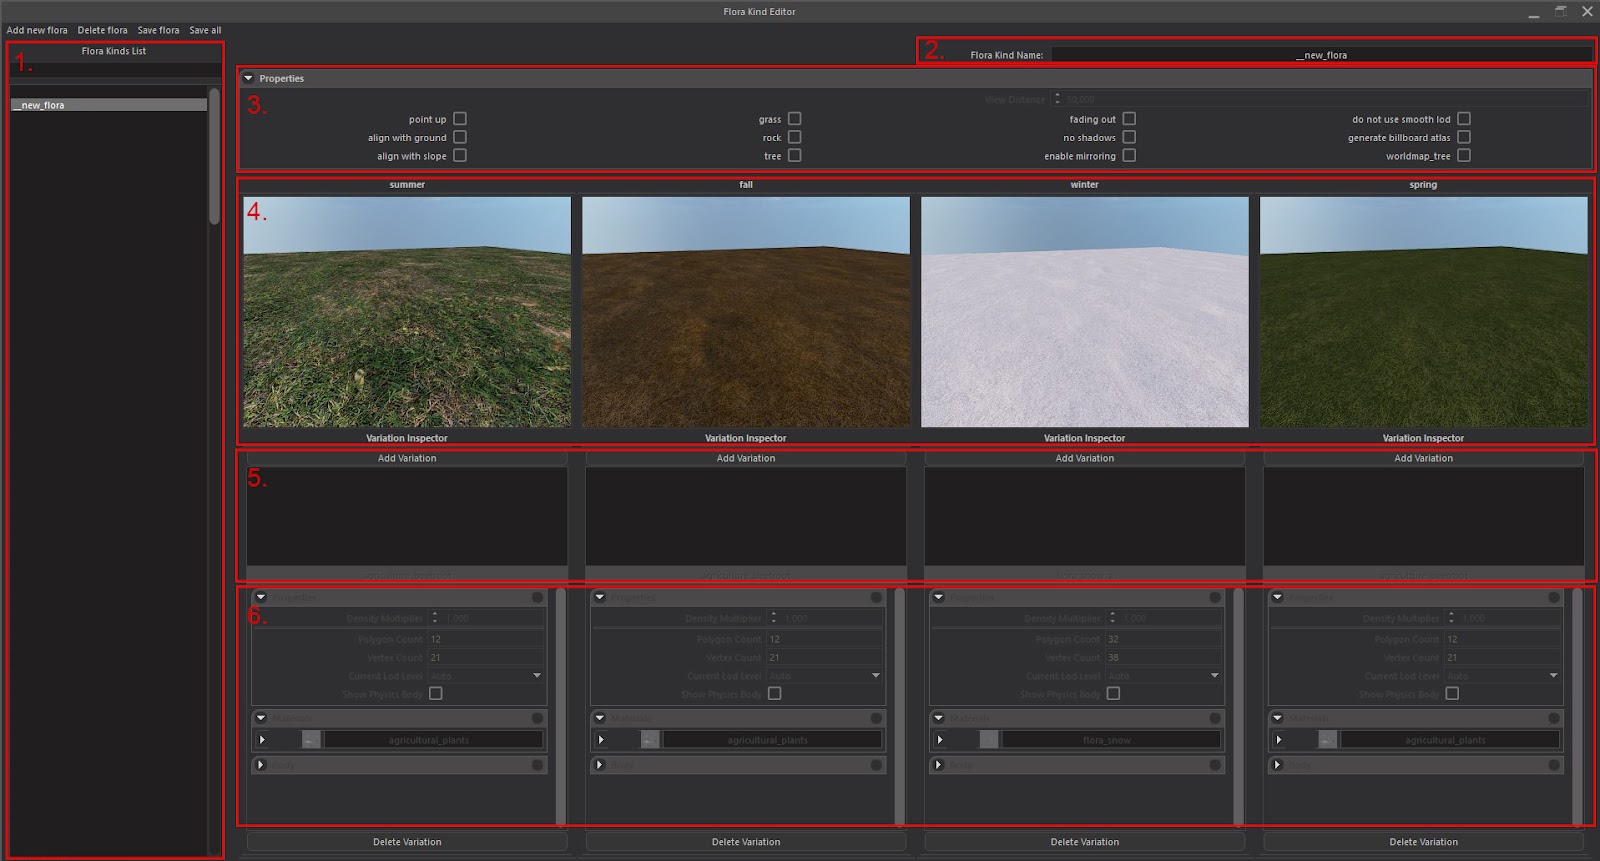
The Flora Kind Editor is where we define and manage imported floras.
Adding Resources to the Flora Kind Editor
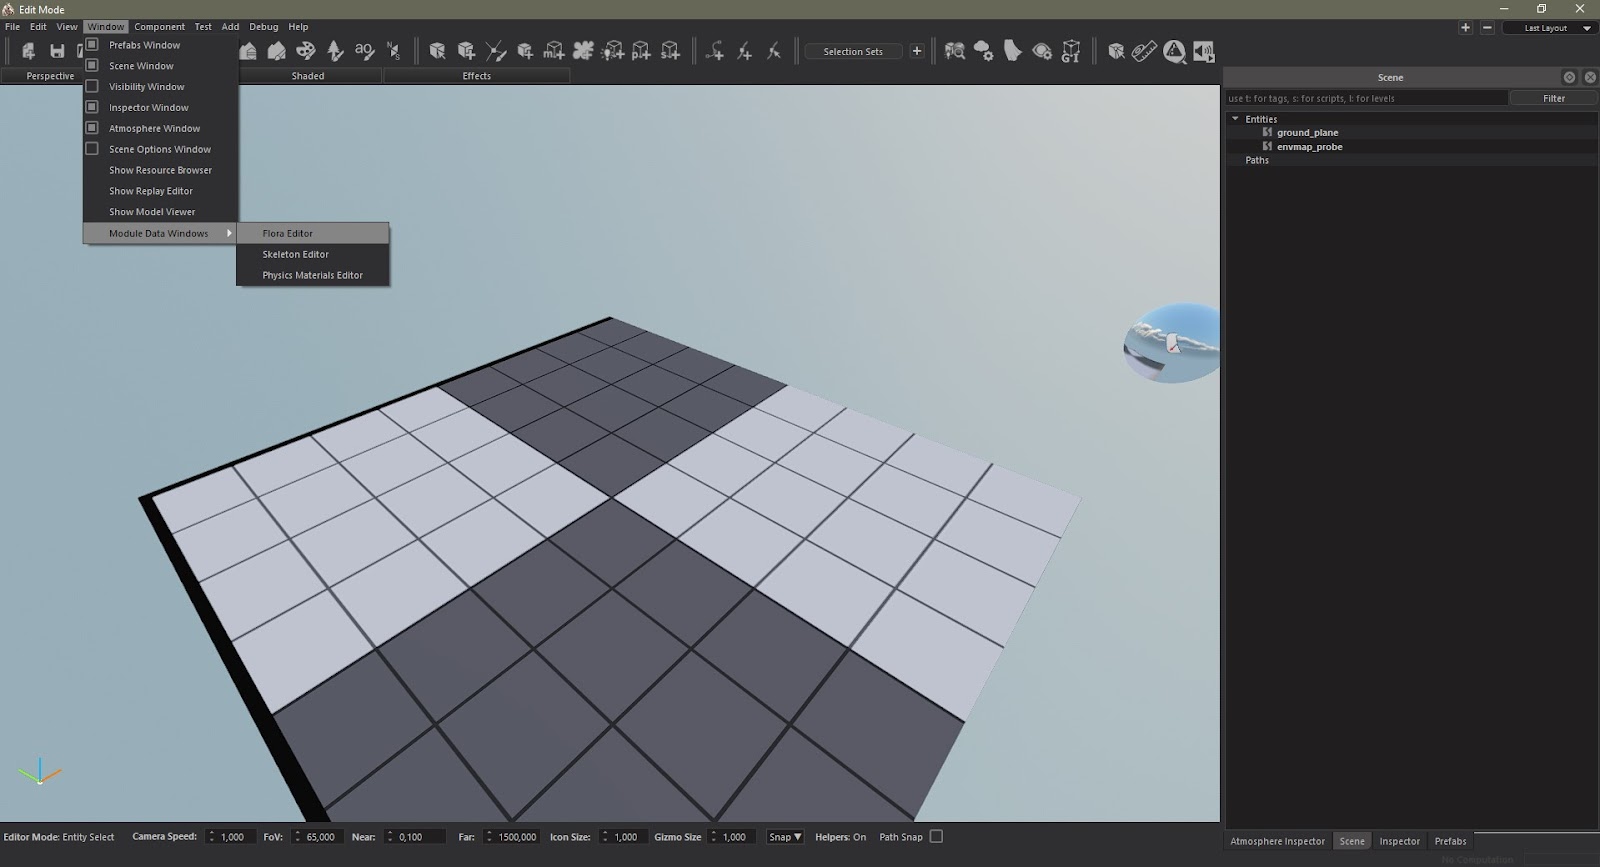
To be able to add the flora we created into scenes, we need to define it within the Flora Kind Editor. We can access it from Window>Module Data>Flora Editor.
Through the Flora Kind Editor we can:
- Access a list of flora that exist/about to be added into the editor.
- Name/Rename flora items.
- Define parameters of flora.
- View Flora variations according to seasons.
- Add flora and variations.
- View mesh information along with viewing or changing body objects and materials.
To add new flora we can click “Add New Flora” on the top left side and then change its name in the Flora Kind Name text field on the right side of the screen.
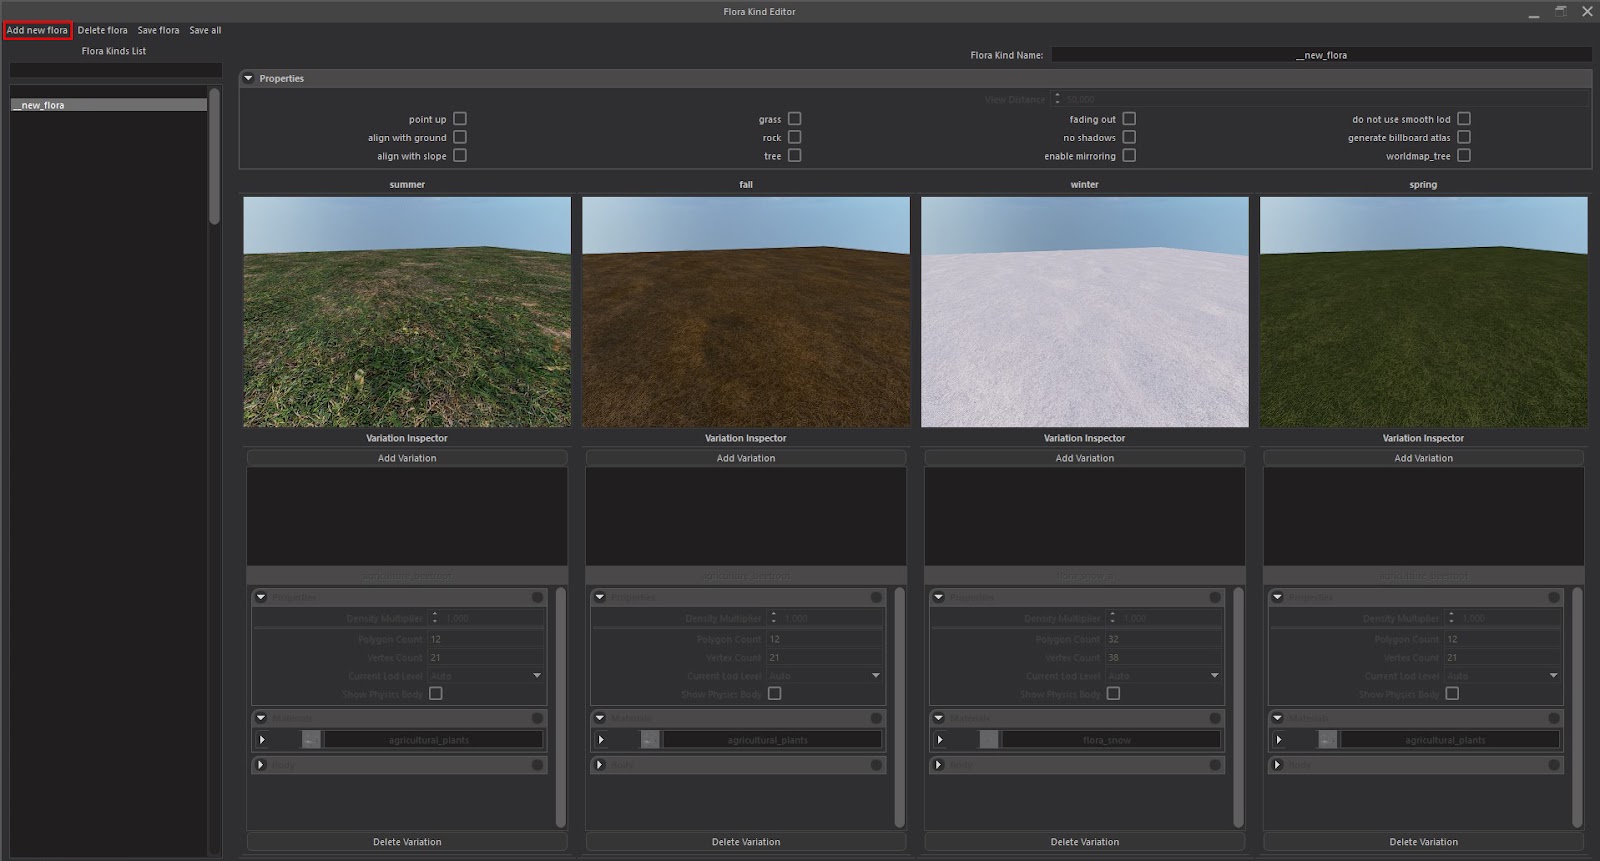
We define properties of our flora in the properties section. We check the “grass” box if our flora acts as grass. For the flora to snap to flatland or slopes we check the “align with ground” and “align with slope” respectively. If we want our flora to disappear at a certain distance, we check the “fading out” box and fill the “view distance” field right above with the correct amount. In case of using grass, we check the “no shadow” box to maximise the performance. Otherwise we leave that box unchecked for evidently larger and more scarcely placed flora objects like trees and shrubbery.
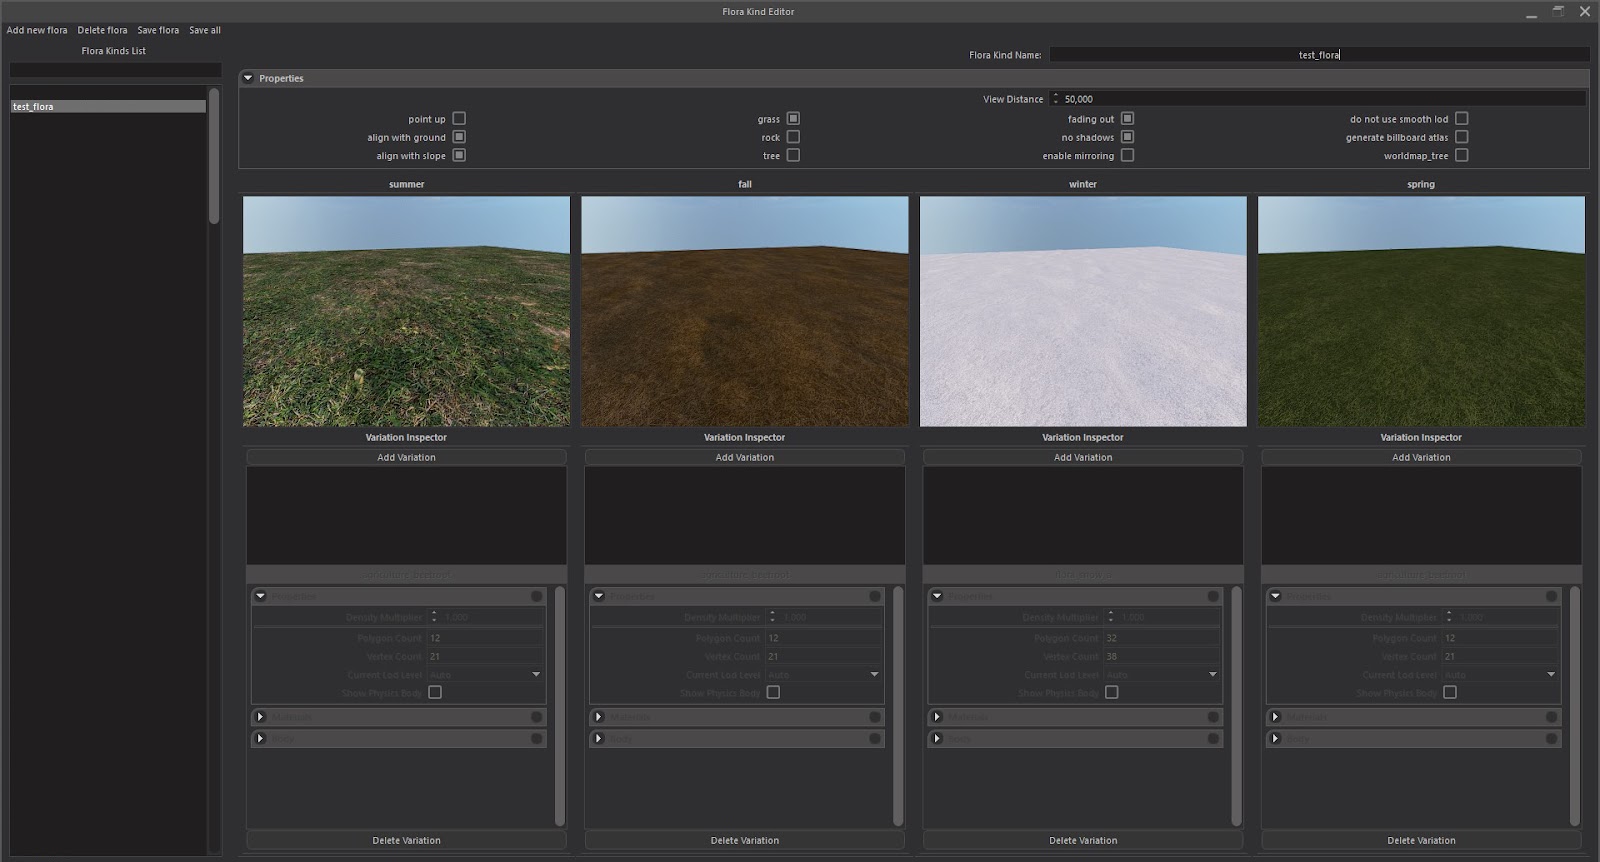
Click on “Add Variation” that is placed under the Seasons thumbnails in order to add the flora mesh you prepared. Here you can add different flora versions for different seasons so that season-specific flora will be displayed automatically. You can also add multiple flora meshes and create more variety.
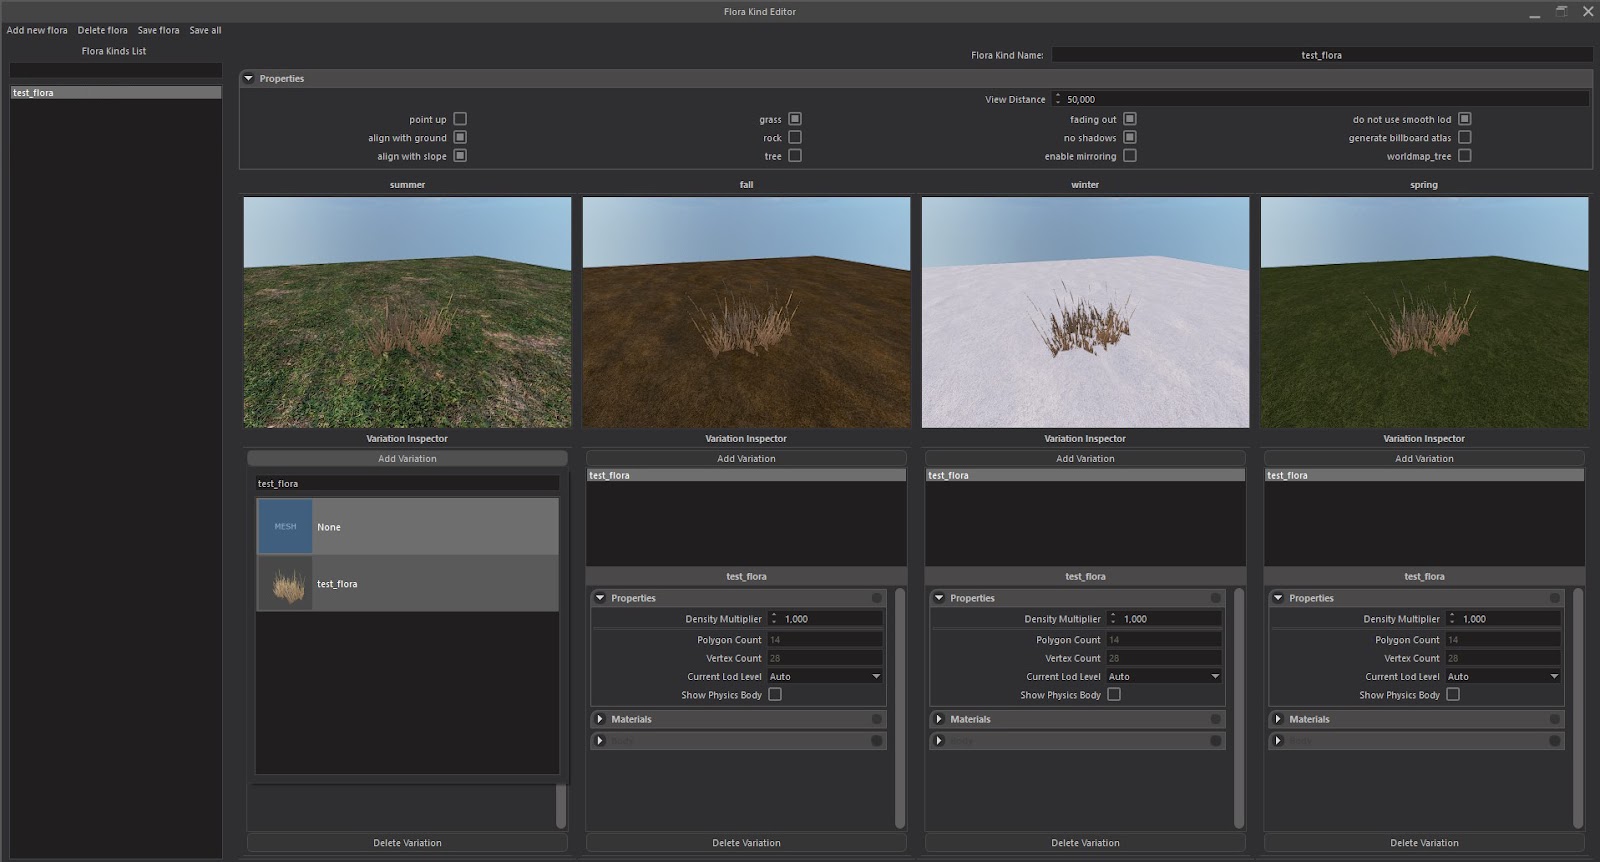
Now that we are done adding our flora to the “Flora Kind Editor” with the desired parameters, the creation can be saved by clicking “Save Flora” or, in case of addition of multiple flora kinds, “Save All”.
Adding Flora to Scenes
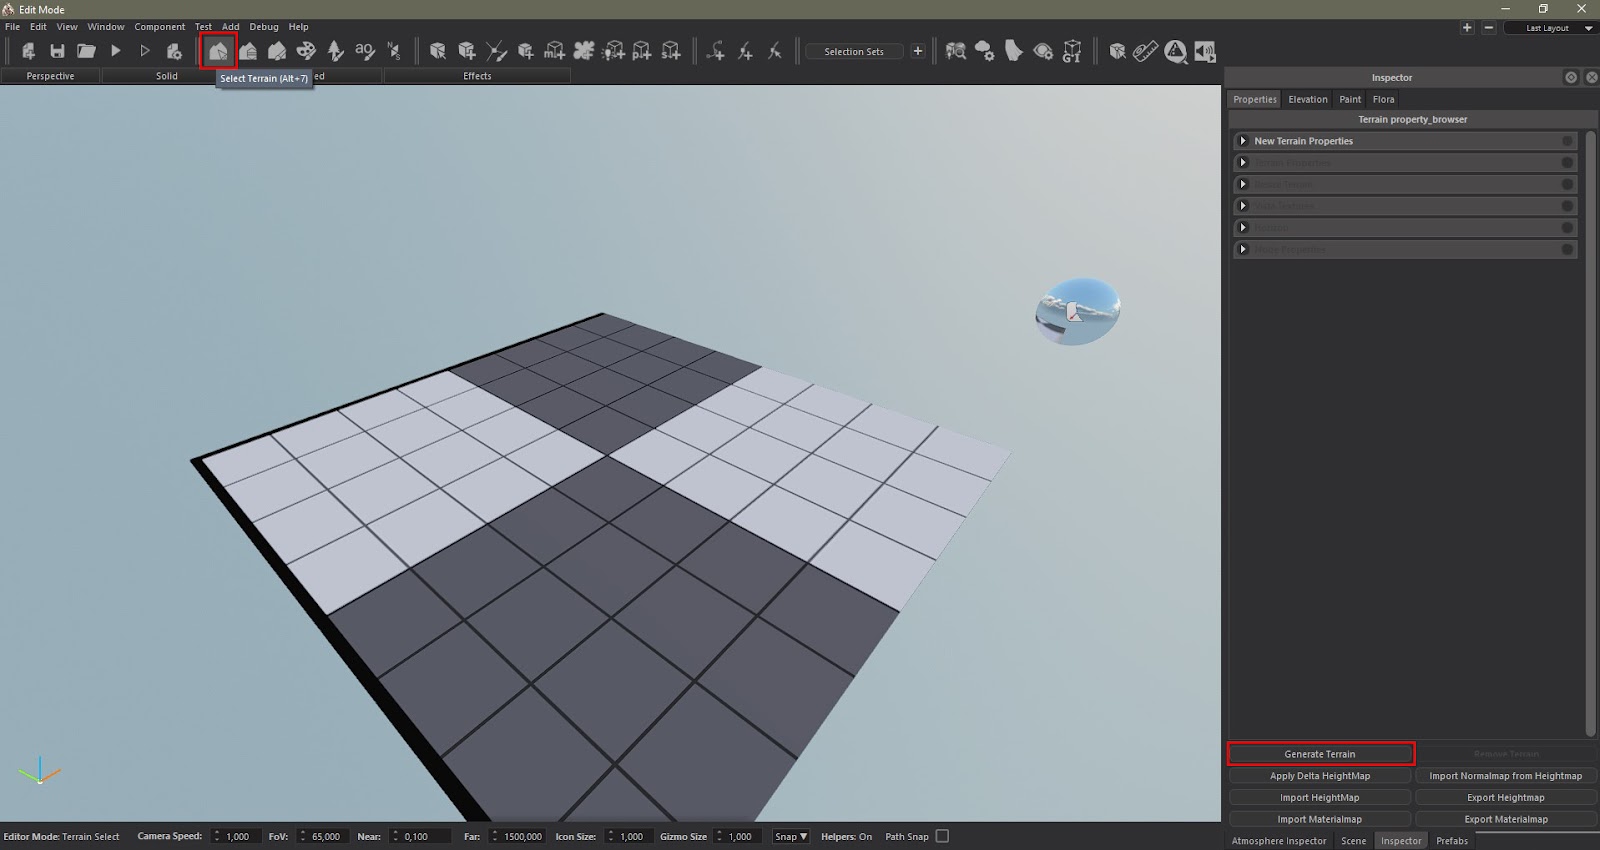
After importing your mesh into the game and entering it into the Flora Kind Editor, we can use the “Flora Paint” to paint our flora into a scene. First we can generate a terrain in our scene. To do so, we can pick the “Select Terrain” tool from the top menu bar and then click “Generate Terrain” on the window that pops up on the right hand side and click ok on the next window to finally generate a terrain. We take these steps solely to create a terrain so that we can then use the Flora Paint tool.
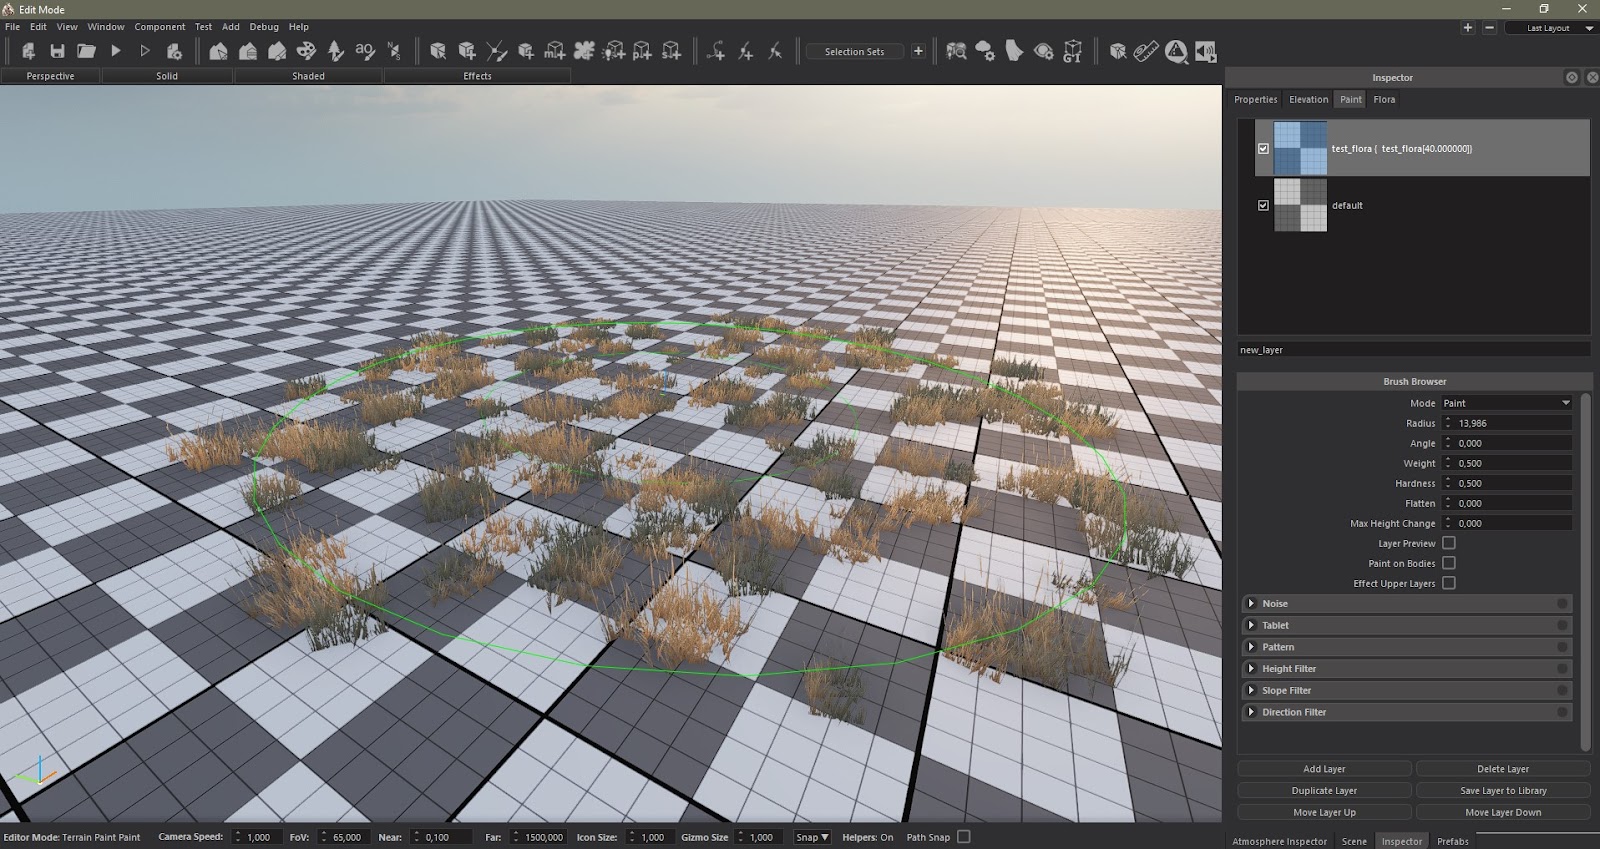
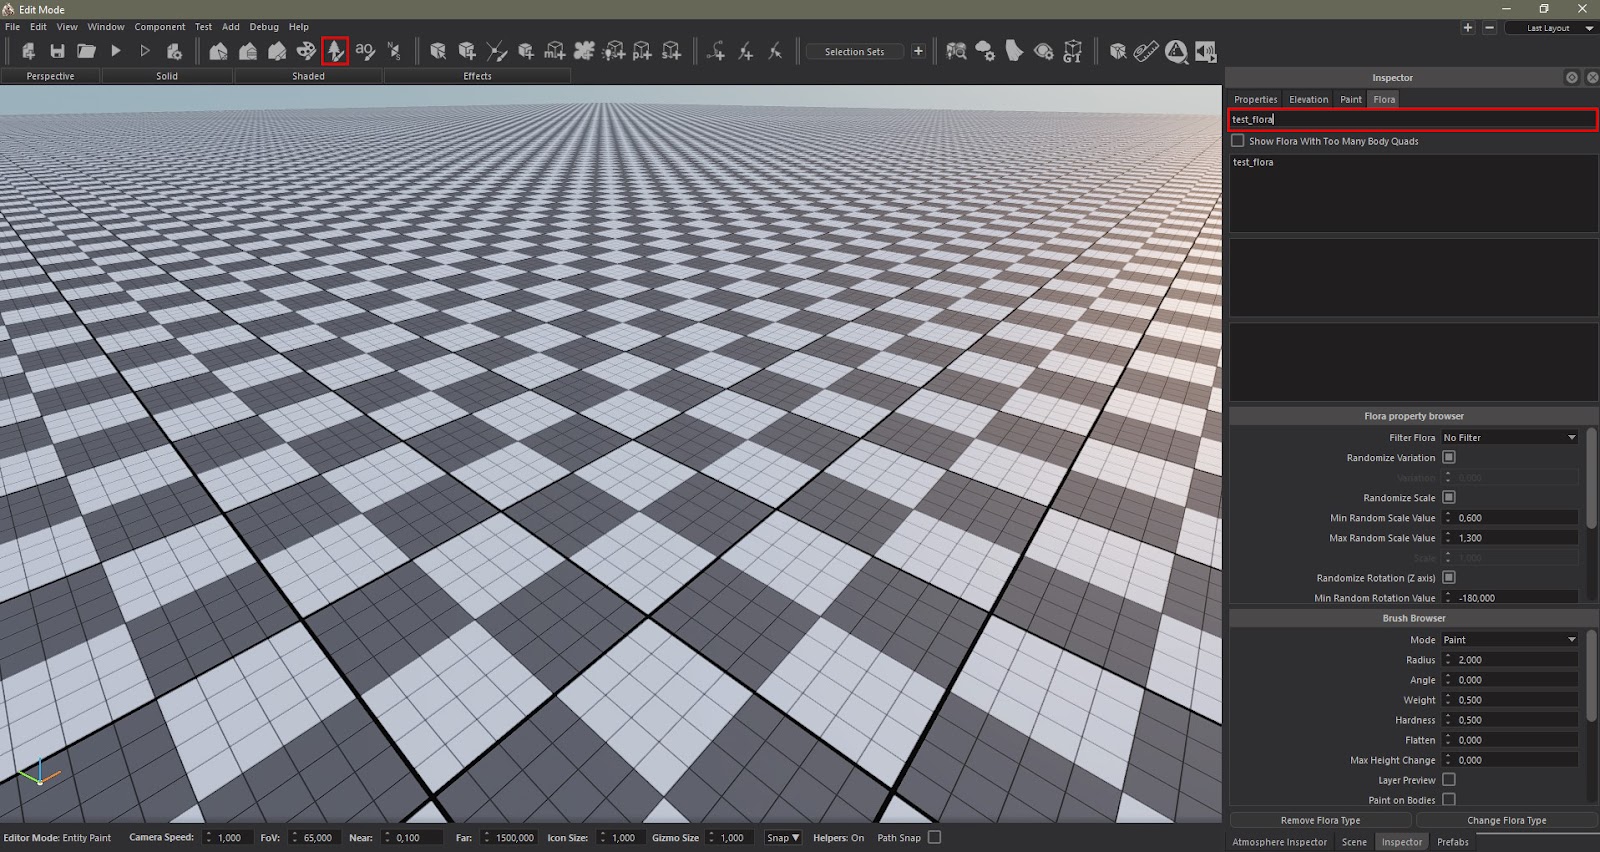
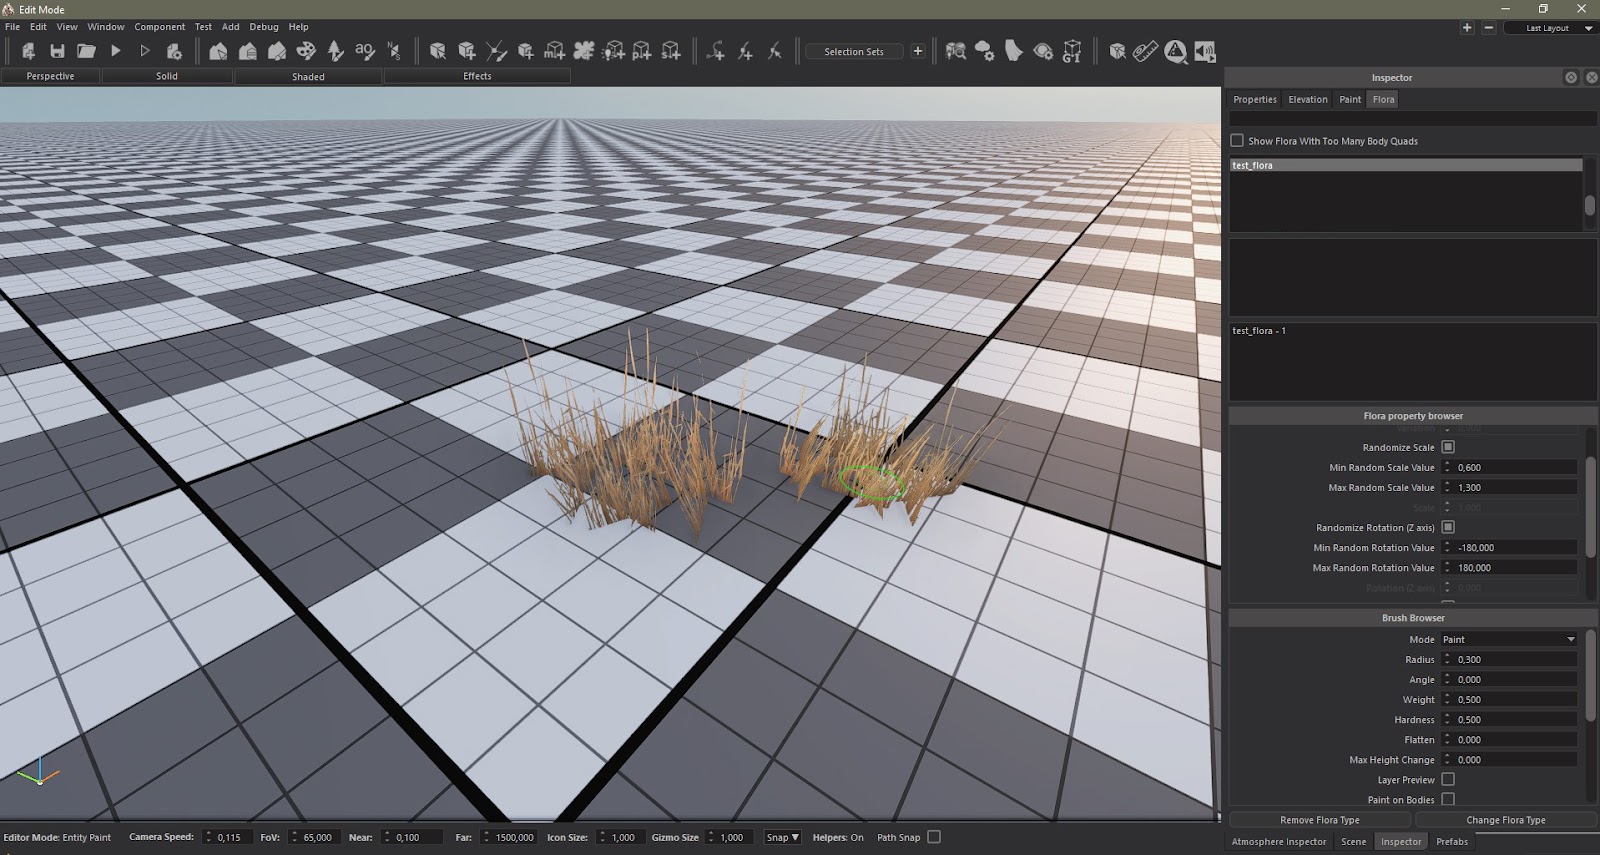
After a terrain is created, we pick the “Flora Paint” tool from the top bar. We then type in the name of the flora that we previously defined within the Flora Kind Editor and apply it on the scene.
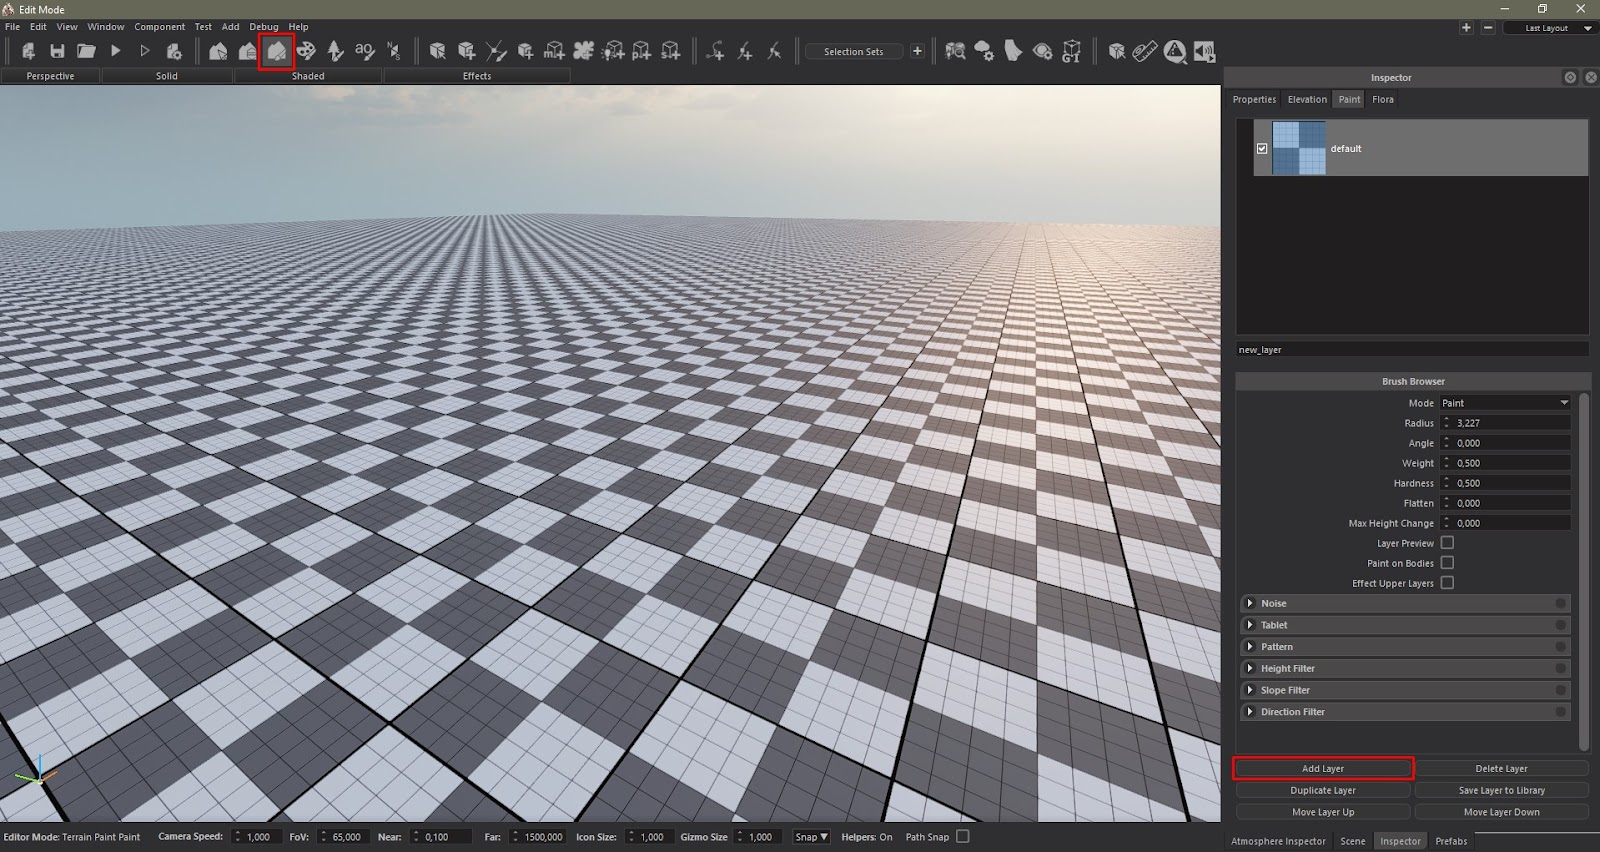
Another way of adding our flora onto the scene is by putting it into one of the layers we created for terrain painting. To do this we can pick the “Paint Terrain Layer” tool from the top menu bar. Then we add a new layer from the new window that opens up on the right hand side.
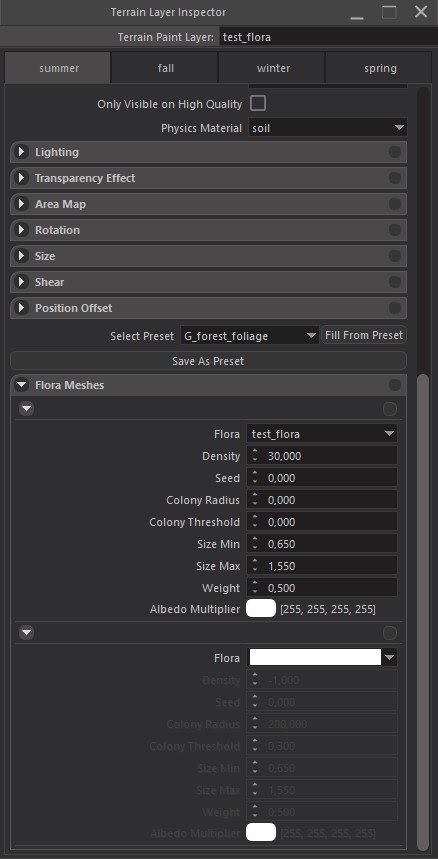
We double click on the new layer and open its properties menu. We then check the “Flora Layer” box and expand the “Flora Meshes” tab.
Checking the Flora Layer box will deactivate the textures that are used to paint the terrain, however, the flora that we added will still be visible. If we want to view both flora and the textures that we added to the layers at the same time, this box should be left unchecked.
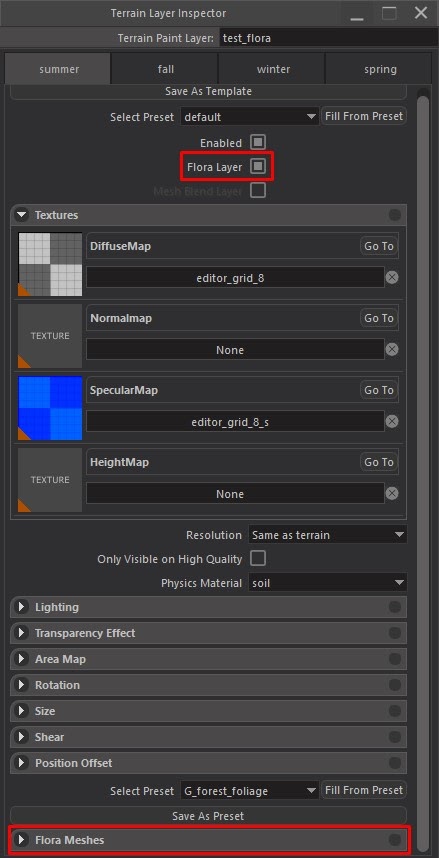
Under the “Flora Meshes” section, click on the dropdown menu next to “Flora” and select the Flora you have prepared, then paint an area of your terrain.